Recording Your Screen With Vue.js and MediaRecorder API
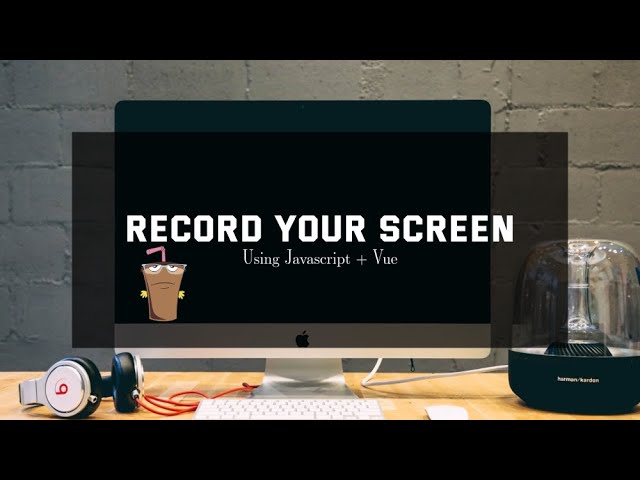
Last year I wrote a screen recording progressive web app with Vue.js and the MediaRecorder API. This was a simple app that allowed you to record your current screen and after screen sharing, a file would be created with the File API and downloaded to your system. Well I decided to update it this week and add email functionality. The reason? I needed to send a screen recording to a client and figured might as well add the functionality in the app and save time; as opposed to downloading the file then opening Gmail, then sending the email. Here is a video for the first part.
Adding The Email Service
Obviously, you all know I love Laravel! I decided to create a Laravel 8 API microservice with a single post route that takes the video file and email address and sends a notification to said email address. I then had to edit the Vue application to make a network call to the microservice when the user wants to email the file.
Getting To The Code!
Let’s start off with the Vue.js application. Create a new application in your terminal
vue create screen-recorderThe first thing we are going to do is add our dependencies, which in this case is vue-tailwind for ease of working with TailwindCSS, gtag for working with Google Analytics ( I like to know where my users are coming from), Google Adsense ( a brother gotta eat) and vue-script2.
cd screen-recorder; npm install --save vue-tailwind vue-script2 vue-gtag vue-google-adsenseAfter installing the dependencies, head over to main.js and let’s setup the application
import Vue from 'vue'
import App from './App.vue'
import VueTailwind from 'vue-tailwind'
import Ads from 'vue-google-adsense'
import VueGtag from "vue-gtag";
import "tailwindcss/tailwind.css"
Vue.use(VueGtag, {
  config: { id: "your google analytics id" }
});

Vue.use(require('vue-script2'))

Vue.use(Ads.Adsense)
const settings = {
  TInput: {
    classes: 'form-input border-2 text-gray-700',
    variants: {
      error: 'form-input border-2 border-red-300 bg-red-100',
      // ... Infinite variants
    }
  },
TButton: {
    classes: 'rounded-lg border block inline-flex items-center justify-center block px-4 py-2 transition duration-100 ease-in-out focus:border-blue-500 focus:ring-2 focus:ring-blue-500 focus:outline-none focus:ring-opacity-50 disabled:opacity-50 disabled:cursor-not-allowed',
    variants: {
      secondary: 'rounded-lg border block inline-flex items-center justify-center bg-purple-500 border-purple-500 hover:bg-purple-600 hover:border-purple-600',
    }
  },
  TAlert: {
    classes: {
      wrapper: 'rounded bg-blue-100 p-4 flex text-sm border-l-4 border-blue-500',
      body: 'flex-grow text-blue-700',
      close: 'text-blue-700 hover:text-blue-500 hover:bg-blue-200 ml-4 rounded',
      closeIcon: 'h-5 w-5 fill-current'
    },
    variants: {
      danger: {
        wrapper: 'rounded bg-red-100 p-4 flex text-sm border-l-4 border-red-500',
        body: 'flex-grow text-red-700',
        close: 'text-red-700 hover:text-red-500 hover:bg-red-200 ml-4 rounded'
      },
      // ... Infinite variants
    }
  },
  // ... The rest of the components
}

Vue.use(VueTailwind, settings)
Vue.config.productionTip = false

new Vue({
  render: h => h(App),
}).$mount('#app')
This file basically bootstraps the application with all the Google stuff and the Tailwind CSS packaging. Now let’s open up the App.vue and replace with the following:
<template>
  <div id="app">
    <img alt="J Computer Solutions Logo" src="./assets/logo.png" class="object-contain h-48 w-full">
    <p>
    Record your screen and save the file as a video.
    Perfect for screen recording for clients. Completely client side app and is installable as a PWA!
    </p>
    <p>
    Currently full system audio is only available in Windows and Chrome OS.
    In Linux and MacOS only chrome tabs are shared.
    </p>
    <t-modal
      header="Email Recording"
      ref="modal"
    >
  <t-input v-model="sendEmail" placeholder="Email Address" name="send-email" />
  <template v-slot:footer>
    <div class="flex justify-between">
      <t-button type="button" @click="$refs.modal.hide()">
        Cancel
      </t-button>
      <t-button type="button" @click="emailFile">
        Send File
      </t-button>
    </div>
  </template>
</t-modal>
<div class="mt-5">
    <t-button v-on:click="getStream" v-if="!isRecording"> Start Recording 🎥</t-button>
    <t-button v-on:click="stopStream" v-else> Stop Screen Recording ❌ </t-button>
    <t-button v-on:click="download" v-if="fileReady" class="ml-10"> Download Recording 🎬</t-button>
    <t-button  v-on:click="$refs.modal.show()" v-if="fileReady" class="ml-10"> Email Recording 📧</t-button>
</div>
    <br>
    <Adsense
      data-ad-client="ca-pub-xxxxxxxxxx"
      data-ad-slot="xxxxxxx">
    </Adsense>
  </div>
</template>

<script>

export default {
  name: 'App',
  data() {
    return {
      isRecording: false,
      options: {
        audioBitsPerSecond: 128000,
        videoBitsPerSecond: 2500000,
        mimeType: 'video/webm'
      },
      displayOptions: {
      video: {
        cursor: "always"
      },
      audio: {
          echoCancellation: true,
          noiseSuppression: true,
          sampleRate: 44100
        }
      },
      mediaRecorder: {},
      stream: {},
      recordedChunks: [],
      file: null,
      fileReady: false,
      sendEmail: '',
      url: 'https://screen-recorder-micro.jcompsolu.com'
    }
  },
  methods: {
    async emailFile () {
      try {
        const fd = new FormData();
        fd.append('video', this.file)
        fd.append('email', this.sendEmail)
        await fetch(`${this.url}/api/email-file`, {
          method: 'post',
          body: fd
        })
      this.$refs.modal.hide()
      this.showNotification()
      } catch (err) {
        alert(err.message)
      }
    },
    setFile (){
      this.file = new Blob(this.recordedChunks, {
        type: "video/webm"
      });
      this.fileReady = true
    },
    download: function(){
      this.$gtag.event('download-stream', {})


    var url = URL.createObjectURL(this.file);
    var a = document.createElement("a");
    document.body.appendChild(a);
    a.style = "display: none";
    a.href = url;
    var d = new Date();
    var n = d.toUTCString();
    a.download = n+".webm";
    a.click();
    window.URL.revokeObjectURL(url);
    this.recordedChunks = []
    this.showNotification()
    },
    showNotification: function() {
      var img = '/logo.png';
      var text = 'If you enjoyed this product consider donating!';
      navigator.serviceWorker.getRegistration().then(function(reg) {
        reg.showNotification('Screen Recorder', { body: text, icon: img, requireInteraction: true,
        actions: [
            {action: 'donate', title: 'Donate',icon: 'logo.png'},
            {action: 'close', title: 'Close',icon: 'logo.png'}
            ]
              });
      });
    },
    handleDataAvailable: function(event) {
      if (event.data.size > 0) {
        this.recordedChunks.push(event.data);
        this.isRecording = false
        this.setFile()
      } else {
        // ...
      }
    },
    stopStream: function() {
      this.$gtag.event('stream-stop', {})
      this.mediaRecorder.stop()
      this.mediaRecorder = null
      this.stream.getTracks()
      .forEach(track => track.stop())

    },
    getStream: async function() {
    try {
        this.stream =  await navigator.mediaDevices.getDisplayMedia(this.displayOptions);
        this.mediaRecorder = new MediaRecorder(this.stream, this.options);
        this.mediaRecorder.ondataavailable = this.handleDataAvailable;
        this.mediaRecorder.start();
        this.isRecording = true
        this.$gtag.event('stream-start', {})
      } catch(err) {
        this.isRecording = false
        this.$gtag.event('stream-stop', {})
        alert(err);
      }
    }
  },
  mounted() {

    let that = this
    Notification.requestPermission().then(function(result) {
      that.$gtag.event('accepted-notifications', { result: result })
    });
  }
}
</script>

<style>
#app {
  font-family: Avenir, Helvetica, Arial, sans-serif;
  -webkit-font-smoothing: antialiased;
  -moz-osx-font-smoothing: grayscale;
  text-align: center;
  color: #2c3e50;
  margin-top: 60px;
}
</style>
Laravel API
Start off by creating a new Laravel application. My setup uses Docker and MacOS
curl -s "https://laravel.build/screen-recorder-api" | bashThe first thing we want to do is create our File model and migration. The File model will hold the name, mime_type and size of the file along with the email where the file is to be sent. Note! We are NOT storing the file, simply passing it through to the email.
cd screen-recorder-api; ./vendor/bin/sail up -d; ./vendor/bin/sail artisan make:model -m FileOpen up the app/Models/File.php file and replace the contents with the following:
<?php

namespace App\Models;

use Illuminate\Database\Eloquent\Factories\HasFactory;
use Illuminate\Database\Eloquent\Model;
use Illuminate\Notifications\Notifiable;
class File extends Model
{
    use HasFactory, Notifiable;
    public $guarded = [];
}
Now open up the migration file and edit it to be the following:
<?php

use Illuminate\Database\Migrations\Migration;
use Illuminate\Database\Schema\Blueprint;
use Illuminate\Support\Facades\Schema;

class CreateFilesTable extends Migration
{
    /**
     * Run the migrations.
     *
     * @return void
     */
    public function up()
    {
        Schema::create('files', function (Blueprint $table) {
            $table->id();
            $table->string('name');
            $table->string('email');
            $table->string('size');
            $table->string('mime_type');
            $table->timestamps();
        });
    }

    /**
     * Reverse the migrations.
     *
     * @return void
     */
    public function down()
    {
        Schema::dropIfExists('files');
    }
}
Now let’s create a new notification called SendFile. This notification will send an email with the file attached to it to the user. Let’s create the notification and fill out the contents!
./vendor/bin/sail artisan make:migration SendFile<?php
namespace App\Notifications;
use Illuminate\Bus\Queueable;
use Illuminate\Contracts\Queue\ShouldQueue;
use Illuminate\Notifications\Messages\MailMessage;
use Illuminate\Notifications\Notification;
class SendFile extends Notification
{
use Queueable;
public $file;
/**
* Create a new notification instance.
*
* @return void
*/
public function __construct($file)
{
//
$this->file = $file;
}
/**
* Get the notification's delivery channels.
*
* @param mixed $notifiable
* @return array
*/
public function via($notifiable)
{
return ['mail'];
}
/**
* Get the mail representation of the notification.
*
* @param mixed $notifiable
* @return \Illuminate\Notifications\Messages\MailMessage
*/
public function toMail($notifiable)
{
return (new MailMessage)
->line('Your Screen Recording')
->line('Thank you for using our application!')
->attach($this->file, ['as' => 'jcompsolu-screen-record.webm', 'mime' => 'video/webm']);
}
/**
* Get the array representation of the notification.
*
* @param mixed $notifiable
* @return array
*/
public function toArray($notifiable)
{
return [
//
];
}
}
You will notice we set the file in the constructor then attach it using the attach() method on the MailMessage object. Now that is done let’s create the API route, and send our notifications! Open up routes/api.php and edit it to be so:
<?php

use Illuminate\Http\Request;
use Illuminate\Support\Facades\Route;
use App\Models\File;
use App\Notifications\SendFile;
/*
|--------------------------------------------------------------------------
| API Routes
|--------------------------------------------------------------------------
|
| Here is where you can register API routes for your application. These
| routes are loaded by the RouteServiceProvider within a group which
| is assigned the "api" middleware group. Enjoy building your API!
|
*/

Route::middleware('auth:sanctum')->get('/user', function (Request $request) {
    return $request->user();
});

Route::post('/email-file', function (Request $request) {
  $uploadedFile = $request->video;
  $file = File::Create([
    'name' => $uploadedFile->getClientOriginalName(),
    'mime_type' => $uploadedFile->getClientMimeType(),
    'size' => $uploadedFile->getSize(),
    'email' => $request->email
  ]);
  $file->notify(new SendFile($uploadedFile));
  return response()->json($file);
});
When you upload a file in Laravel it is an instance of UploadedFile class and has several file related methods associated with it! Using these methods we can get the name, size and mimetype of the uploaded file! After setting the model and saving in the database we send a notification with the uploaded file! Test it yourself here!
Conclusion
The vast majority of the apps I create and monetize, start off as an app that I use myself to make my life or work easier! This is the basis of #CodeLife and is the reason I was able to retire early for a few years. If this tutorial helped you please consider subscribing to my Youtube channel and subscribing to the blog and leave a comment if you want me to add new functionality!


