Posted on Leave a comment

Creating A Screen Recorder and Email Microservice With Vue.js + MediaRecorder API and Laravel PHP Framework

Recording Your Screen With Vue.js and MediaRecorder API

Last year I wrote a screen recording progressive web app with Vue.js and the MediaRecorder API. This was a simple app that allowed you to record your current screen and after screen sharing, a file would be created with the File API and downloaded to your system. Well I decided to update it this week and add email functionality. The reason? I needed to send a screen recording to a client and figured might as well add the functionality in the app and save time; as opposed to downloading the file then opening Gmail, then sending the email. Here is a video for the first part.

Screen recorder part 1

Adding The Email Service

Obviously, you all know I love Laravel! I decided to create a Laravel 8 API microservice with a single post route that takes the video file and email address and sends a notification to said email address. I then had to edit the Vue application to make a network call to the microservice when the user wants to email the file.

Screen recorder part 2

Getting To The Code!

Let’s start off with the Vue.js application. Create a new application in your terminal

vue create screen-recorder

The first thing we are going to do is add our dependencies, which in this case is vue-tailwind for ease of working with TailwindCSS, gtag for working with Google Analytics ( I like to know where my users are coming from), Google Adsense ( a brother gotta eat) and vue-script2.

cd screen-recorder; npm install --save vue-tailwind vue-script2 vue-gtag vue-google-adsense

After installing the dependencies, head over to main.js and let’s setup the application

import Vue from 'vue'
import App from './App.vue'
import VueTailwind from 'vue-tailwind'
import Ads from 'vue-google-adsense'
import VueGtag from "vue-gtag";
import "tailwindcss/tailwind.css"
Vue.use(VueGtag, {
  config: { id: "your google analytics id" }
});

Vue.use(require('vue-script2'))

Vue.use(Ads.Adsense)
const settings = {
  TInput: {
    classes: 'form-input border-2 text-gray-700',
    variants: {
      error: 'form-input border-2 border-red-300 bg-red-100',
      // ... Infinite variants
    }
  },
TButton: {
    classes: 'rounded-lg border block inline-flex items-center justify-center block px-4 py-2 transition duration-100 ease-in-out focus:border-blue-500 focus:ring-2 focus:ring-blue-500 focus:outline-none focus:ring-opacity-50 disabled:opacity-50 disabled:cursor-not-allowed',
    variants: {
      secondary: 'rounded-lg border block inline-flex items-center justify-center bg-purple-500 border-purple-500 hover:bg-purple-600 hover:border-purple-600',
    }
  },
  TAlert: {
    classes: {
      wrapper: 'rounded bg-blue-100 p-4 flex text-sm border-l-4 border-blue-500',
      body: 'flex-grow text-blue-700',
      close: 'text-blue-700 hover:text-blue-500 hover:bg-blue-200 ml-4 rounded',
      closeIcon: 'h-5 w-5 fill-current'
    },
    variants: {
      danger: {
        wrapper: 'rounded bg-red-100 p-4 flex text-sm border-l-4 border-red-500',
        body: 'flex-grow text-red-700',
        close: 'text-red-700 hover:text-red-500 hover:bg-red-200 ml-4 rounded'
      },
      // ... Infinite variants
    }
  },
  // ... The rest of the components
}

Vue.use(VueTailwind, settings)
Vue.config.productionTip = false

new Vue({
  render: h => h(App),
}).$mount('#app')

This file basically bootstraps the application with all the Google stuff and the Tailwind CSS packaging. Now let’s open up the App.vue and replace with the following:

<template>
  <div id="app">
    <img alt="J Computer Solutions Logo" src="./assets/logo.png" class="object-contain h-48 w-full">
    <p>
    Record your screen and save the file as a video.
    Perfect for screen recording for clients. Completely client side app and is installable as a PWA!
    </p>
    <p>
    Currently full system audio is only available in Windows and Chrome OS.
    In Linux and MacOS only chrome tabs are shared.
    </p>
    <t-modal
      header="Email Recording"
      ref="modal"
    >
  <t-input v-model="sendEmail" placeholder="Email Address" name="send-email" />
  <template v-slot:footer>
    <div class="flex justify-between">
      <t-button type="button" @click="$refs.modal.hide()">
        Cancel
      </t-button>
      <t-button type="button" @click="emailFile">
        Send File
      </t-button>
    </div>
  </template>
</t-modal>
<div class="mt-5">
    <t-button v-on:click="getStream" v-if="!isRecording"> Start Recording πŸŽ₯</t-button>
    <t-button v-on:click="stopStream" v-else> Stop Screen Recording ❌ </t-button>
    <t-button v-on:click="download" v-if="fileReady" class="ml-10"> Download Recording 🎬</t-button>
    <t-button  v-on:click="$refs.modal.show()" v-if="fileReady" class="ml-10"> Email Recording πŸ“§</t-button>
</div>
    <br>
    <Adsense
      data-ad-client="ca-pub-xxxxxxxxxx"
      data-ad-slot="xxxxxxx">
    </Adsense>
  </div>
</template>

<script>

export default {
  name: 'App',
  data() {
    return {
      isRecording: false,
      options: {
        audioBitsPerSecond: 128000,
        videoBitsPerSecond: 2500000,
        mimeType: 'video/webm'
      },
      displayOptions: {
      video: {
        cursor: "always"
      },
      audio: {
          echoCancellation: true,
          noiseSuppression: true,
          sampleRate: 44100
        }
      },
      mediaRecorder: {},
      stream: {},
      recordedChunks: [],
      file: null,
      fileReady: false,
      sendEmail: '',
      url: 'https://screen-recorder-micro.jcompsolu.com'
    }
  },
  methods: {
    async emailFile () {
      try {
        const fd = new FormData();
        fd.append('video', this.file)
        fd.append('email', this.sendEmail)
        await fetch(`${this.url}/api/email-file`, {
          method: 'post',
          body: fd
        })
      this.$refs.modal.hide()
      this.showNotification()
      } catch (err) {
        alert(err.message)
      }
    },
    setFile (){
      this.file = new Blob(this.recordedChunks, {
        type: "video/webm"
      });
      this.fileReady = true
    },
    download: function(){
      this.$gtag.event('download-stream', {})


    var url = URL.createObjectURL(this.file);
    var a = document.createElement("a");
    document.body.appendChild(a);
    a.style = "display: none";
    a.href = url;
    var d = new Date();
    var n = d.toUTCString();
    a.download = n+".webm";
    a.click();
    window.URL.revokeObjectURL(url);
    this.recordedChunks = []
    this.showNotification()
    },
    showNotification: function() {
      var img = '/logo.png';
      var text = 'If you enjoyed this product consider donating!';
      navigator.serviceWorker.getRegistration().then(function(reg) {
        reg.showNotification('Screen Recorder', { body: text, icon: img, requireInteraction: true,
        actions: [
            {action: 'donate', title: 'Donate',icon: 'logo.png'},
            {action: 'close', title: 'Close',icon: 'logo.png'}
            ]
              });
      });
    },
    handleDataAvailable: function(event) {
      if (event.data.size > 0) {
        this.recordedChunks.push(event.data);
        this.isRecording = false
        this.setFile()
      } else {
        // ...
      }
    },
    stopStream: function() {
      this.$gtag.event('stream-stop', {})
      this.mediaRecorder.stop()
      this.mediaRecorder = null
      this.stream.getTracks()
      .forEach(track => track.stop())

    },
    getStream: async function() {
    try {
        this.stream =  await navigator.mediaDevices.getDisplayMedia(this.displayOptions);
        this.mediaRecorder = new MediaRecorder(this.stream, this.options);
        this.mediaRecorder.ondataavailable = this.handleDataAvailable;
        this.mediaRecorder.start();
        this.isRecording = true
        this.$gtag.event('stream-start', {})
      } catch(err) {
        this.isRecording = false
        this.$gtag.event('stream-stop', {})
        alert(err);
      }
    }
  },
  mounted() {

    let that = this
    Notification.requestPermission().then(function(result) {
      that.$gtag.event('accepted-notifications', { result: result })
    });
  }
}
</script>

<style>
#app {
  font-family: Avenir, Helvetica, Arial, sans-serif;
  -webkit-font-smoothing: antialiased;
  -moz-osx-font-smoothing: grayscale;
  text-align: center;
  color: #2c3e50;
  margin-top: 60px;
}
</style>

Laravel API

Start off by creating a new Laravel application. My setup uses Docker and MacOS

curl -s "https://laravel.build/screen-recorder-api" | bash

The first thing we want to do is create our File model and migration. The File model will hold the name, mime_type and size of the file along with the email where the file is to be sent. Note! We are NOT storing the file, simply passing it through to the email.

cd screen-recorder-api; ./vendor/bin/sail up -d; ./vendor/bin/sail artisan make:model -m File

Open up the app/Models/File.php file and replace the contents with the following:

<?php

namespace App\Models;

use Illuminate\Database\Eloquent\Factories\HasFactory;
use Illuminate\Database\Eloquent\Model;
use Illuminate\Notifications\Notifiable;
class File extends Model
{
    use HasFactory, Notifiable;
    public $guarded = [];
}

Now open up the migration file and edit it to be the following:

<?php

use Illuminate\Database\Migrations\Migration;
use Illuminate\Database\Schema\Blueprint;
use Illuminate\Support\Facades\Schema;

class CreateFilesTable extends Migration
{
    /**
     * Run the migrations.
     *
     * @return void
     */
    public function up()
    {
        Schema::create('files', function (Blueprint $table) {
            $table->id();
            $table->string('name');
            $table->string('email');
            $table->string('size');
            $table->string('mime_type');
            $table->timestamps();
        });
    }

    /**
     * Reverse the migrations.
     *
     * @return void
     */
    public function down()
    {
        Schema::dropIfExists('files');
    }
}

Now let’s create a new notification called SendFile. This notification will send an email with the file attached to it to the user. Let’s create the notification and fill out the contents!

./vendor/bin/sail artisan make:migration SendFile
<?php

namespace App\Notifications;

use Illuminate\Bus\Queueable;
use Illuminate\Contracts\Queue\ShouldQueue;
use Illuminate\Notifications\Messages\MailMessage;
use Illuminate\Notifications\Notification;

class SendFile extends Notification
{
    use Queueable;
    public $file;
    /**
     * Create a new notification instance.
     *
     * @return void
     */
    public function __construct($file)
    {
        //
        $this->file = $file;
    }

    /**
     * Get the notification's delivery channels.
     *
     * @param  mixed  $notifiable
     * @return array
     */
    public function via($notifiable)
    {
        return ['mail'];
    }

    /**
     * Get the mail representation of the notification.
     *
     * @param  mixed  $notifiable
     * @return \Illuminate\Notifications\Messages\MailMessage
     */
    public function toMail($notifiable)
    {
        return (new MailMessage)
                    ->line('Your Screen Recording')
                    ->line('Thank you for using our application!')
                    ->attach($this->file, ['as' => 'jcompsolu-screen-record.webm', 'mime' => 'video/webm']);
    }

    /**
     * Get the array representation of the notification.
     *
     * @param  mixed  $notifiable
     * @return array
     */
    public function toArray($notifiable)
    {
        return [
            //
        ];
    }
}

You will notice we set the file in the constructor then attach it using the attach() method on the MailMessage object. Now that is done let’s create the API route, and send our notifications! Open up routes/api.php and edit it to be so:

<?php

use Illuminate\Http\Request;
use Illuminate\Support\Facades\Route;
use App\Models\File;
use App\Notifications\SendFile;
/*
|--------------------------------------------------------------------------
| API Routes
|--------------------------------------------------------------------------
|
| Here is where you can register API routes for your application. These
| routes are loaded by the RouteServiceProvider within a group which
| is assigned the "api" middleware group. Enjoy building your API!
|
*/

Route::middleware('auth:sanctum')->get('/user', function (Request $request) {
    return $request->user();
});

Route::post('/email-file', function (Request $request) {
  $uploadedFile = $request->video;
  $file = File::Create([
    'name' => $uploadedFile->getClientOriginalName(),
    'mime_type' => $uploadedFile->getClientMimeType(),
    'size' => $uploadedFile->getSize(),
    'email' => $request->email
  ]);
  $file->notify(new SendFile($uploadedFile));
  return response()->json($file);
});

When you upload a file in Laravel it is an instance of UploadedFile class and has several file related methods associated with it! Using these methods we can get the name, size and mimetype of the uploaded file! After setting the model and saving in the database we send a notification with the uploaded file! Test it yourself here!

Conclusion

The vast majority of the apps I create and monetize, start off as an app that I use myself to make my life or work easier! This is the basis of #CodeLife and is the reason I was able to retire early for a few years. If this tutorial helped you please consider subscribing to my Youtube channel and subscribing to the blog and leave a comment if you want me to add new functionality!

Posted on 2 Comments

An Introduction To Big O Notation

Big O Notation Isn’t That Hard

Big O notation is a big topic (see what I did there πŸ™‚ ) in computer science, used to describe algorithmic complexity. MIT defines Big O as the following

Big O notation (with a capital letter O, not a zero), also called Landau’s symbol, is a symbolism used in complexity theory, computer science, and mathematics to describe the asymptotic behavior of functions. Basically, it tells you how fast a function grows or declines.

From MIT’s website

Basically Big O notation breaks down how many steps an algorithm takes to complete. We use the letter O because we are finding the order of the function also called the rate of growth. As the input of a function grows, how does the function scale?

There are many ways to write an algorithm, but you want to always make sure your algorithm can perform the same with large input sizes as they do with small input sizes. This is why when analyzing an algorithm you count the number of steps it will take to complete said algorithm. Let’s take an example

function myLoop(n){
  int x = 0;
  for(int i=0; i < n; ++i){
     x += n;
   }
  return x;
}

This algorithmic complexity is O(n), why? It is O(n) also called Big O of n because this algorithm grows proportionally to the size of the input n. Let’s break down the steps.

int x = 0;

This is O(1) also called constant time because the computer will always take the same amount of time and resources to create an assigned variable. No matter if n = 100 or n = 100000, int x = 0 will always take the same amount of time.

for(int i=0; i < n; ++i){
     x += n;
   }

We have to go through every element in n for this function. In this case we have to go through every element, then we are doing an addition which like variable assignment is constant time, so this analysis is O(n)+O(1).

So overall this algorithm runs O(1)+O(n)+O(1). We can drop the constants so this simplifies the algorithmic complexity to O(n).

Rule of thumb if you see a for loop you will more than likely have O(n) somewhere in your analysis. Every NESTED loop will add an exponent to your analysis so this would be O(n^2) because you have to go through the loop n^2 times

for(int i=0; i < n; ++i){
     for(int i=0; i < n; ++i){
     x += n;
   }
   }

Big O Notation & Data Structures

Some of you have had the unfortunate experience of doing a technical interview and were asked to give the run time of the algorithm that you created and were stumped. The best advice I can give you is memorize and understand basic data structures. Most algorithms will use basic or variations of the most common data structures such as lists, queues, hash maps, etc. Knowing these and how they work will drastically reduce the complexity of technical analysis. I have a Big O notation cheat sheet that breaks down the complexities of common data structures. It really helped me and I know it can help you too!

Summary

Big O notation is just a fancy word for “How does this function scale as input increases over time”. In this blog I gave a theoretical overview into what Big O is and in my next post I will do more deep dives into data structures and break down their algorithmic complexity. Big O isn’t something you are going to get on the first try or first attempt so I will be breaking it down into bite size chunks and we will go forward a blog at a time!

Posted on Leave a comment

CodeLife 2020

2020 Is Going To Be Monumental

I have spent the last few years of my life creating the building blocks for this year. All of the late nights building prototypes, time spent building my social media presence on Twitter and Youtube and time spent networking has all culminated to this year. All the pieces are here and it is time to put it into action.

With my apps in place I am not creating any NEW projects in 2020, all my time will be spent augmenting and improving the apps I already have on my servers and Android developer account. This includes spending more time blogging on this very website. This website will serve as a central hub for my progress this year on all my entrepreneurial endeavors in 2020 it’s all about ownership and controlling the narrative.

CloudMed Billing, Trusts Generator, QF Credit, TMAH, 401K Apps

These are the apps that I am focused on for 2020, all of them have brought me income or are in the position to bring income in 2020. CloudMed Billing was the first app that ever brought me residual income and is the center piece in my article from a couple years ago. It is a web app used by healthcare clinics to collect post-insurance payments on medical collections. It’s still going strong and I haven’t made any improvements to the app in about a year. My goal for 2020 is to make it a PWA and gather at least 3 additional clinics as clients. I actually do not plan on this being a long term asset that I scale up, right now it’s just a cool residual stream. If anything my exit strategy is to try and sell the app once I acquire 10 clinics.

Trusts Generator has done VERY well in its first few months of existence, I am really proud of the progress it has made and even prouder that I have created a product that directly helps the lives of people. Trust Generator is a PWA and Android application that allows for anyone to create a trust. The feedback I have gotten from those who have used my service is heart-warming. Especially in the black community we lose a lot of what little wealth we have to death and probate so to be able to provide a solution to that and make it affordable is a win-win. In 2020 my plan is to improve the UI/UX and do some targeted marketing campaigns.

QF Credit was the last app I put out in 2019. It too is a web app and Android application that assists with removing fraudulent and negative items from your credit report. Simply fill out the form and we will take care of reaching out to your creditors for you! All for the low cost of $9.99! The feedback for this has also been phenomenal and as a result I will be focused on rebuilding the UI/UX and doing heavy marketing campaigns.

Treat Me At Home took a back seat this year as I was figuring out legality issues with service providers in specific fields. Now that that has been sorted out I am spending this year growing my provider list in the Louisville area and FINALLY rolling out the product. The PWA and Android app are live and the iOS app will be finished soon.

Lastly there is 401K Apps! This is probably going to be my long term baby! It’s an investment app that allows you to own percentages of apps and websites and will be verified on the blockchain! It will be open to accredited and non-accredited investors! The app is being developed currently and more details will emerge over this next 2 quarters.

Stay Tuned!

I feel like I have finally mastered this codelife thing πŸ™‚ I will be keeping everyone posted on here and my Youtube page as well as Twitter. If I can live this life, you can too and I want to serve as motivation, here is to a clear 2020!

Posted on Leave a comment

When Should My Side Gig Become My Main Gig?

I Want To Quit My Job And Work Full Time On My App!

This is the number one comment I receive from app entrepreneurs. Many people have read my article describing my decision to pursue residual income full time and want to live that same lifestyle. I understand the allure and the desire for this however I always give them the same answer…it depends. In my most recent Tech Talk I discussed what those variables are but here is a synopsis.

How Much Do You Make A Year?

This is the first question I ask aspiring app entrepreneurs. Your lifestyle always adjusts depending on your income. With that being said if you make $100,000 USD a year and you have an app that makes $50,000 a year it might not make sense to quit your main gig just yet IF that $50,000 cannot provide the same standard of living that you are currently living.

What Is Your App’s Time/Income Ratio?

Back to the concept of app income, one of the next questions I ask app entrepreneurs is “What is your app’s time/income ratio?”. Meaning how much time are you having to put in to this app to generate the income you are receiving.Β  Going back to the example of making $50,000 a year from one of your apps, if you have to spend 200 hrs/week just to maintain that $50,000 then it might make more sense to keep your $100,000 main gig and outsource development for your app (let’s say $10,000) and collect the rest and supplement income.

What Is The Life Expectancy Of The App?

Not all applications are meant to be around long term. If your app isn’t going to be around for more than 5-10 years. Don’t quit your main gig, it just does not make sense. There is ONE exception and that is if your app is making crazy amounts of money like Flappy Bird money

For A More In Depth Discussion Check Out The Tech Talk

Don’t forget to join my Tech Talk live broadcasts on Tuesdays and Thursdays and join the conversations in real time! If you enjoyed this content like and share this video and subscribe to my Youtube channel!

Posted on 1 Comment

Creating A Voice Powered Note App Using Web Speech

Web Speech API Is A Powerful Feature!

Using this Web Speech JavaScript API you can enable your web apps to handle voice data. The API is broken down into two parts SpeechSynthesis and SpeechRecognition. SpeechSynthesis also known as text-to-speech allows your web app to read text aloud from your speakers. SpeechRecognition allows your web app to convert voice data from your microphone into text.
 

What Are We Building?


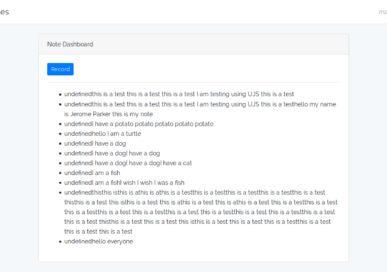
speech-notes-screenshot
To adequately demonstrate the power of the web speech API I decided to break the project up into steps. Step one is a simple voice dictated note taking app. The premise is very simple, you create an account and on the dashboard you have a list of your notes as well as a button to add a new note. Once that button is pressed you are prompted to allow access to your microphone. The SpeechRecognition API will transcribe your speech and when complete saves it to the database. In case you missed the livestream here is a link to the source code as well as a link to the live app.
 

What Are The Next Steps?

As you can see there isn’t much coding or difficulty setting up the API. Bear in mind I barely scratched the surface of what SpeechRecognition can do (for a more detail examination I suggest reading here). In my next livestream I will expand on this app and add SpeechSynthesis functionality into the program. You will be able to pick different voices, adjust the pitch and rate of speech and Β allow the browser to read your notes back to you! I hope to see you all on the next stream, if you haven’t already subscribe to my channel and to this blog. If you have any questions or concerns please drop them in the comment section below until next time happy hacking!