Posted on 4 Comments

Moving The ChatGPT Laravel API Into Composer – Creating My First Laravel 10 Package

I Created A Laravel 10 OpenAI ChatGPT Composer Package

In my last tutorial, I created a Laravel site that featured an OpenAI ChatGPT API. This was very fun to create and while I was thinking of ways to improve it, the idea dawned upon me to make it a Composer package and share it with the world. This took less time than I expected honestly and I already have integrated my package into a few applications (it feels good to composer require your own shit!).

What’s The Benefit?

1. Reusability

I know for a fact that I will be using OpenAI in a majority of my projects going forward, instead of rewriting functionality over and over and over, I’m going to package up the functionality that I know I will need every time.

2. Modularity

Breaking my code into modules allows me to think about my applications from a high-level view. I call it Lego Theory; all of my modules are legos and my app is the lego castle I’m building.

3. Discoverability

Publishing packages directly helps my brand via discoverability. If I produce high-quality, in-demand open-source software then more people will use it, and the more people that use it then the more people know who I am. This helps me when I am doing things like applying for contracts or conference talks.

Creating The Code

Scaffold From Spatie

The wonderful engineers at Spatie have created a package skeleton for Laravel and is what I used as a starting point for my Laravel package. If you are using GitHub you can use this repo as a template or if using the command line enter the following command:

git clone git@github.com:spatie/package-skeleton-laravel.git laravel-open-api

There is a configure.php script that will set all of the placeholder values with the values you provide for your package

php ./configure.php

Now we can get to the nitty gritty.

Listen To Some Hacker Music While You Code

Follow me on Spotify I make Tech Trap music

The Front-Facing Object

After running the configure script you will have a main object that will be renamed, in my case it was called LaravelOpenaiApi.php and it looks like this:

<?php

namespace Mastashake\LaravelOpenaiApi;

use OpenAI\Laravel\Facades\OpenAI;
use Mastashake\LaravelOpenaiApi\Models\Prompt;

class LaravelOpenaiApi
{
  function generateResult(string $type, array $data): Prompt {
    switch ($type) {
      case 'text':
      return $this->generateText($data);
      case 'image':
      return $this->generateImage($data);
    }
  }

  function generateText($data) {
    $result = OpenAI::completions()->create($data);
    return $this->savePrompt($result, $data);
  }

  function generateImage($data) {
    $result = OpenAI::images()->create($data);
    return $this->savePrompt($result, $data);
  }

  private function savePrompt($result, $data): Prompt {
    $prompt = new Prompt([
      'prompt_text' => $data['prompt'],
      'data' => $result
    ]);
    return $prompt;
  }
}

It can generate text and images and save the prompts, it looks at the type provided to determine what resource to generate. It’s all powered by the OpenAI Laravel Facade.

The Migration

The default migration will be edited to use the prompts migration from the Laravel API tutorial, open it up and replace the contents with the following:

<?php

use Illuminate\Database\Migrations\Migration;
use Illuminate\Database\Schema\Blueprint;
use Illuminate\Support\Facades\Schema;

return new class extends Migration
{
    /**
     * Run the migrations.
     */
    public function up(): void
    {
        Schema::create('prompts', function (Blueprint $table) {
            $table->id();
            $table->string('prompt_text');
            $table->json('data');
            $table->timestamps();
        });
    }

    /**
     * Reverse the migrations.
     */
    public function down(): void
    {
        Schema::dropIfExists('prompts');
    }
};

The Model

Create a file called src/Models/Prompt.php and copy the old Prompt code inside

<?php

namespace Mastashake\LaravelOpenaiApi\Models;

use Illuminate\Database\Eloquent\Factories\HasFactory;
use Illuminate\Database\Eloquent\Model;

class Prompt extends Model
{
    use HasFactory;

    protected $guarded = [];
    protected $casts = [
      'data' => 'array'
    ];
}

The Controller

For the controllers, we have to create a BaseController and a PromptController. Create a file called src/Http/Controllers/BaseController.php

<?php

namespace Mastashake\LaravelOpenaiApi\Http\Controllers;

use Illuminate\Foundation\Bus\DispatchesJobs;
use Illuminate\Routing\Controller as BaseController;
use Illuminate\Foundation\Validation\ValidatesRequests;
use Illuminate\Foundation\Auth\Access\AuthorizesRequests;

class Controller extends BaseController
{
    use AuthorizesRequests, DispatchesJobs, ValidatesRequests;
}

Now we will create our PromptController and inherit from the BaseController

<?php

namespace Mastashake\LaravelOpenaiApi\Http\Controllers;
use Illuminate\Http\Request;
use Mastashake\LaravelOpenaiApi\LaravelOpenaiApi;
class PromptController extends Controller
{
    //
    function generateResult(Request $request) {

      $ai = new LaravelOpenaiApi();
      $prompt = $ai->generateResult($request->type, $request->except(['type']));
      return response()->json([
        'data' => $prompt
      ]);
    }
}

OpenAI and ChatGPT can generate multiple types of responses, so we want the user to be able to choose which type of resource they want to generate then pass on that data to the underlying engine.

The Route

Create a routes/api.php file to store our api route:

<?php

use Illuminate\Http\Request;
use Illuminate\Support\Facades\Route;

/*
|--------------------------------------------------------------------------
| API Routes
|--------------------------------------------------------------------------
|
| Here is where you can register API routes for your application. These
| routes are loaded by the RouteServiceProvider and all of them will
| be assigned to the "api" middleware group. Make something great!
|
*/
Route::group(['prefix' => '/api'], function(){
  if(config('openai.use_sanctum') == true){
    Route::middleware(['api','auth:sanctum'])->post(config('openai.api_url'),'Mastashake\LaravelOpenaiApi\Http\Controllers\PromptController@generateResult');
  } else {
    Route::post(config('openai.api_url'),'Mastashake\LaravelOpenaiApi\Http\Controllers\PromptController@generateResult');
  }
});

Depending on the values in the config file (we will get to it in a second calm down) the user may want to use Laravel Sanctum for token-based authenticated requests. In fact, I highly suggest you do if you don’t want your token usage abused, but for development and testing, I suppose it’s fine. I made it this way to make it more robust and extensible.

The Config File

Create a file called config/openai.php that will hold the default config values for the package. This will be published into any application that you install this package in:

<?php

return [

    /*
    |--------------------------------------------------------------------------
    | OpenAI API Key and Organization
    |--------------------------------------------------------------------------
    |
    | Here you may specify your OpenAI API Key and organization. This will be
    | used to authenticate with the OpenAI API - you can find your API key
    | and organization on your OpenAI dashboard, at https://openai.com.
    */

    'api_key' => env('OPENAI_API_KEY'),
    'organization' => env('OPENAI_ORGANIZATION'),
    'api_url' => env('OPENAI_API_URL') !== null ? env('OPENAI_API_URL') : '/generate-result',
    'use_sanctum' => env('OPENAI_USE_SANCTUM') !== null ? env('OPENAI_USE_SANCTUM') == true : false

];
  • The api_key variable is the OpenAI API key
  • The organization variable is the OpenAI organization if one exists
  • The api_url variable is the user-defined URL for the API routes, if one is not defined then use /api/generate-result
    • The use_sanctum variable defines if the API will use auth:sanctum middleware.

The Command

The package includes an artisan command for generating results from the command line. Create a file called src/Commands/LaravelOpenaiApiCommand.php

<?php

namespace Mastashake\LaravelOpenaiApi\Commands;

use Illuminate\Console\Command;
use Mastashake\LaravelOpenaiApi\LaravelOpenaiApi;
class LaravelOpenaiApiCommand extends Command
{
    public $signature = 'laravel-openai-api:generate-result';

    public $description = 'Generate Result';

    public function handle(): int
    {
        $data = [];
        $suffix = null;
        $n = 1;
        $temperature = 1;
        $displayJson = false;
        $max_tokens = 16;
        $type = $this->choice(
            'What are you generating?',
            ['text', 'image'],
            0
        );
        $prompt = $this->ask('Enter the prompt');
        $data['prompt'] = $prompt;

        if($type == 'text') {
          $model = $this->choice(
              'What model do you want to use?',
              ['text-davinci-003', 'text-curie-001', 'text-babbage-001', 'text-ada-001'],
              0
          );
          $data['model'] = $model;
          if ($this->confirm('Do you wish to add a suffix to the generated result?')) {
              //
              $suffix = $this->ask('What is the suffix?');
          }
          $data['suffix'] = $suffix;

          if ($this->confirm('Do you wish to set the max tokens used(defaults to 16)?')) {
            $max_tokens = (int)$this->ask('Max number of tokens to use?');
          }
          $data['max_tokens'] = $max_tokens;

          if ($this->confirm('Change temperature')) {
            $temperature = (float)$this->ask('What is the temperature(0-2)?');
            $data['temperature'] = $temperature;
          }
        }

        if ($this->confirm('Multiple results?')) {
          $n = (int)$this->ask('Number of results?');
          $data['n'] = $n;
        }

        $displayJson = $this->confirm('Display JSON results?');

        $ai = new LaravelOpenaiApi();
        $result = $ai->generateResult($type,$data);

        if ($displayJson) {
          $this->comment($result);
        }
        if($type == 'text') {
          $choices = $result->data['choices'];
          foreach($choices as $choice) {
            $this->comment($choice['text']);
          }
        } else {
          $images = $result->data['data'];
          foreach($images as $image) {
            $this->comment($image['url']);
          }
        }


        return self::SUCCESS;
    }
}

I’m going to add more inputs later, but for now, this is a good starting point to get back data. I tried to make it as verbose as possible, I’m always welcoming PRs if you want to add functionality 🙂

The Service Provider

All Laravel packages must have a service provider, open up the default one in the root directory, in my case it was called LaravelOpenaiApiServiceProvider

<?php

namespace Mastashake\LaravelOpenaiApi;

use Spatie\LaravelPackageTools\Package;
use Spatie\LaravelPackageTools\PackageServiceProvider;
use Mastashake\LaravelOpenaiApi\Commands\LaravelOpenaiApiCommand;
use Spatie\LaravelPackageTools\Commands\InstallCommand;
class LaravelOpenaiApiServiceProvider extends PackageServiceProvider
{
    public function configurePackage(Package $package): void
    {
        /*
         * This class is a Package Service Provider
         *
         * More info: https://github.com/spatie/laravel-package-tools
         */
        $package
            ->name('laravel-openai-api')
            ->hasConfigFile(['openai'])
            ->hasRoute('api')
            ->hasMigration('create_openai_api_table')
            ->hasCommand(LaravelOpenaiApiCommand::class)
            ->hasInstallCommand(function(InstallCommand $command) {
                $command
                    ->publishConfigFile()
                    ->publishMigrations()
                    ->askToRunMigrations()
                    ->copyAndRegisterServiceProviderInApp()
                    ->askToStarRepoOnGitHub('mastashake08/laravel-openai-api');
                  }
                );
    }
}

The name is the name of our package, next we pass in the config file created above. Of course we have to add our API routes and migrations. Lastly, we add our commands.

Testing It In Laravel Project

composer require mastashake08/laravel-openai-api

You can run that command in any Laravel project, I used it in the Laravel API tutorial I did last week. If you runphp artisan route:list and you will see the API is in your project!

Hey look mom it’s my package!!!

Check The Repo!

This is actually my first-ever Composer package! I would love feedback, stars, and PRs that would go a long way. You can check out the repo here on GitHub. Please let me know in the comments if this tutorial was helpful and share on social media.

Follow Me On Social Media

Follow Me On Youtube!

Follow my YouTube account

Get Your Next Domain Cheap & Support The Channel

I use Namecheap for all of my domains! Whenever I need a cheap solution for a proof-of-concept project I grab a domain name for as little as $1! When you sign up and buy your first domain with Namecheap I get a commission, it’s a great way to get a quality service and support this platform!

Get Your Next Domain Cheap
CLICK HERE

Become A Sponsor

Open-source work is free to use but it is not free to develop. If you enjoy my content and would like to see more please consider becoming a sponsor on Github or Patreon! Not only do you support me but you are funding tech programs for at risk youth in Louisville, Kentucky.

Join The Newsletter

By joining the newsletter, you get first access to all of my blogs, events, and other brand-related content delivered directly to your inbox. It’s 100% free and you can opt out at any time!

Check The Shop

You can also consider visiting the official #CodeLife shop! I have my own clothing/accessory line for techies as well as courses designed by me covering a range of software engineering topics.

Posted on Leave a comment

Creating A Screen Recorder and Email Microservice With Vue.js + MediaRecorder API and Laravel PHP Framework

Recording Your Screen With Vue.js and MediaRecorder API

Last year I wrote a screen recording progressive web app with Vue.js and the MediaRecorder API. This was a simple app that allowed you to record your current screen and after screen sharing, a file would be created with the File API and downloaded to your system. Well I decided to update it this week and add email functionality. The reason? I needed to send a screen recording to a client and figured might as well add the functionality in the app and save time; as opposed to downloading the file then opening Gmail, then sending the email. Here is a video for the first part.

Screen recorder part 1

Adding The Email Service

Obviously, you all know I love Laravel! I decided to create a Laravel 8 API microservice with a single post route that takes the video file and email address and sends a notification to said email address. I then had to edit the Vue application to make a network call to the microservice when the user wants to email the file.

Screen recorder part 2

Getting To The Code!

Let’s start off with the Vue.js application. Create a new application in your terminal

vue create screen-recorder

The first thing we are going to do is add our dependencies, which in this case is vue-tailwind for ease of working with TailwindCSS, gtag for working with Google Analytics ( I like to know where my users are coming from), Google Adsense ( a brother gotta eat) and vue-script2.

cd screen-recorder; npm install --save vue-tailwind vue-script2 vue-gtag vue-google-adsense

After installing the dependencies, head over to main.js and let’s setup the application

import Vue from 'vue'
import App from './App.vue'
import VueTailwind from 'vue-tailwind'
import Ads from 'vue-google-adsense'
import VueGtag from "vue-gtag";
import "tailwindcss/tailwind.css"
Vue.use(VueGtag, {
  config: { id: "your google analytics id" }
});

Vue.use(require('vue-script2'))

Vue.use(Ads.Adsense)
const settings = {
  TInput: {
    classes: 'form-input border-2 text-gray-700',
    variants: {
      error: 'form-input border-2 border-red-300 bg-red-100',
      // ... Infinite variants
    }
  },
TButton: {
    classes: 'rounded-lg border block inline-flex items-center justify-center block px-4 py-2 transition duration-100 ease-in-out focus:border-blue-500 focus:ring-2 focus:ring-blue-500 focus:outline-none focus:ring-opacity-50 disabled:opacity-50 disabled:cursor-not-allowed',
    variants: {
      secondary: 'rounded-lg border block inline-flex items-center justify-center bg-purple-500 border-purple-500 hover:bg-purple-600 hover:border-purple-600',
    }
  },
  TAlert: {
    classes: {
      wrapper: 'rounded bg-blue-100 p-4 flex text-sm border-l-4 border-blue-500',
      body: 'flex-grow text-blue-700',
      close: 'text-blue-700 hover:text-blue-500 hover:bg-blue-200 ml-4 rounded',
      closeIcon: 'h-5 w-5 fill-current'
    },
    variants: {
      danger: {
        wrapper: 'rounded bg-red-100 p-4 flex text-sm border-l-4 border-red-500',
        body: 'flex-grow text-red-700',
        close: 'text-red-700 hover:text-red-500 hover:bg-red-200 ml-4 rounded'
      },
      // ... Infinite variants
    }
  },
  // ... The rest of the components
}

Vue.use(VueTailwind, settings)
Vue.config.productionTip = false

new Vue({
  render: h => h(App),
}).$mount('#app')

This file basically bootstraps the application with all the Google stuff and the Tailwind CSS packaging. Now let’s open up the App.vue and replace with the following:

<template>
  <div id="app">
    <img alt="J Computer Solutions Logo" src="./assets/logo.png" class="object-contain h-48 w-full">
    <p>
    Record your screen and save the file as a video.
    Perfect for screen recording for clients. Completely client side app and is installable as a PWA!
    </p>
    <p>
    Currently full system audio is only available in Windows and Chrome OS.
    In Linux and MacOS only chrome tabs are shared.
    </p>
    <t-modal
      header="Email Recording"
      ref="modal"
    >
  <t-input v-model="sendEmail" placeholder="Email Address" name="send-email" />
  <template v-slot:footer>
    <div class="flex justify-between">
      <t-button type="button" @click="$refs.modal.hide()">
        Cancel
      </t-button>
      <t-button type="button" @click="emailFile">
        Send File
      </t-button>
    </div>
  </template>
</t-modal>
<div class="mt-5">
    <t-button v-on:click="getStream" v-if="!isRecording"> Start Recording 🎥</t-button>
    <t-button v-on:click="stopStream" v-else> Stop Screen Recording ❌ </t-button>
    <t-button v-on:click="download" v-if="fileReady" class="ml-10"> Download Recording 🎬</t-button>
    <t-button  v-on:click="$refs.modal.show()" v-if="fileReady" class="ml-10"> Email Recording 📧</t-button>
</div>
    <br>
    <Adsense
      data-ad-client="ca-pub-xxxxxxxxxx"
      data-ad-slot="xxxxxxx">
    </Adsense>
  </div>
</template>

<script>

export default {
  name: 'App',
  data() {
    return {
      isRecording: false,
      options: {
        audioBitsPerSecond: 128000,
        videoBitsPerSecond: 2500000,
        mimeType: 'video/webm'
      },
      displayOptions: {
      video: {
        cursor: "always"
      },
      audio: {
          echoCancellation: true,
          noiseSuppression: true,
          sampleRate: 44100
        }
      },
      mediaRecorder: {},
      stream: {},
      recordedChunks: [],
      file: null,
      fileReady: false,
      sendEmail: '',
      url: 'https://screen-recorder-micro.jcompsolu.com'
    }
  },
  methods: {
    async emailFile () {
      try {
        const fd = new FormData();
        fd.append('video', this.file)
        fd.append('email', this.sendEmail)
        await fetch(`${this.url}/api/email-file`, {
          method: 'post',
          body: fd
        })
      this.$refs.modal.hide()
      this.showNotification()
      } catch (err) {
        alert(err.message)
      }
    },
    setFile (){
      this.file = new Blob(this.recordedChunks, {
        type: "video/webm"
      });
      this.fileReady = true
    },
    download: function(){
      this.$gtag.event('download-stream', {})


    var url = URL.createObjectURL(this.file);
    var a = document.createElement("a");
    document.body.appendChild(a);
    a.style = "display: none";
    a.href = url;
    var d = new Date();
    var n = d.toUTCString();
    a.download = n+".webm";
    a.click();
    window.URL.revokeObjectURL(url);
    this.recordedChunks = []
    this.showNotification()
    },
    showNotification: function() {
      var img = '/logo.png';
      var text = 'If you enjoyed this product consider donating!';
      navigator.serviceWorker.getRegistration().then(function(reg) {
        reg.showNotification('Screen Recorder', { body: text, icon: img, requireInteraction: true,
        actions: [
            {action: 'donate', title: 'Donate',icon: 'logo.png'},
            {action: 'close', title: 'Close',icon: 'logo.png'}
            ]
              });
      });
    },
    handleDataAvailable: function(event) {
      if (event.data.size > 0) {
        this.recordedChunks.push(event.data);
        this.isRecording = false
        this.setFile()
      } else {
        // ...
      }
    },
    stopStream: function() {
      this.$gtag.event('stream-stop', {})
      this.mediaRecorder.stop()
      this.mediaRecorder = null
      this.stream.getTracks()
      .forEach(track => track.stop())

    },
    getStream: async function() {
    try {
        this.stream =  await navigator.mediaDevices.getDisplayMedia(this.displayOptions);
        this.mediaRecorder = new MediaRecorder(this.stream, this.options);
        this.mediaRecorder.ondataavailable = this.handleDataAvailable;
        this.mediaRecorder.start();
        this.isRecording = true
        this.$gtag.event('stream-start', {})
      } catch(err) {
        this.isRecording = false
        this.$gtag.event('stream-stop', {})
        alert(err);
      }
    }
  },
  mounted() {

    let that = this
    Notification.requestPermission().then(function(result) {
      that.$gtag.event('accepted-notifications', { result: result })
    });
  }
}
</script>

<style>
#app {
  font-family: Avenir, Helvetica, Arial, sans-serif;
  -webkit-font-smoothing: antialiased;
  -moz-osx-font-smoothing: grayscale;
  text-align: center;
  color: #2c3e50;
  margin-top: 60px;
}
</style>

Laravel API

Start off by creating a new Laravel application. My setup uses Docker and MacOS

curl -s "https://laravel.build/screen-recorder-api" | bash

The first thing we want to do is create our File model and migration. The File model will hold the name, mime_type and size of the file along with the email where the file is to be sent. Note! We are NOT storing the file, simply passing it through to the email.

cd screen-recorder-api; ./vendor/bin/sail up -d; ./vendor/bin/sail artisan make:model -m File

Open up the app/Models/File.php file and replace the contents with the following:

<?php

namespace App\Models;

use Illuminate\Database\Eloquent\Factories\HasFactory;
use Illuminate\Database\Eloquent\Model;
use Illuminate\Notifications\Notifiable;
class File extends Model
{
    use HasFactory, Notifiable;
    public $guarded = [];
}

Now open up the migration file and edit it to be the following:

<?php

use Illuminate\Database\Migrations\Migration;
use Illuminate\Database\Schema\Blueprint;
use Illuminate\Support\Facades\Schema;

class CreateFilesTable extends Migration
{
    /**
     * Run the migrations.
     *
     * @return void
     */
    public function up()
    {
        Schema::create('files', function (Blueprint $table) {
            $table->id();
            $table->string('name');
            $table->string('email');
            $table->string('size');
            $table->string('mime_type');
            $table->timestamps();
        });
    }

    /**
     * Reverse the migrations.
     *
     * @return void
     */
    public function down()
    {
        Schema::dropIfExists('files');
    }
}

Now let’s create a new notification called SendFile. This notification will send an email with the file attached to it to the user. Let’s create the notification and fill out the contents!

./vendor/bin/sail artisan make:migration SendFile
<?php

namespace App\Notifications;

use Illuminate\Bus\Queueable;
use Illuminate\Contracts\Queue\ShouldQueue;
use Illuminate\Notifications\Messages\MailMessage;
use Illuminate\Notifications\Notification;

class SendFile extends Notification
{
    use Queueable;
    public $file;
    /**
     * Create a new notification instance.
     *
     * @return void
     */
    public function __construct($file)
    {
        //
        $this->file = $file;
    }

    /**
     * Get the notification's delivery channels.
     *
     * @param  mixed  $notifiable
     * @return array
     */
    public function via($notifiable)
    {
        return ['mail'];
    }

    /**
     * Get the mail representation of the notification.
     *
     * @param  mixed  $notifiable
     * @return \Illuminate\Notifications\Messages\MailMessage
     */
    public function toMail($notifiable)
    {
        return (new MailMessage)
                    ->line('Your Screen Recording')
                    ->line('Thank you for using our application!')
                    ->attach($this->file, ['as' => 'jcompsolu-screen-record.webm', 'mime' => 'video/webm']);
    }

    /**
     * Get the array representation of the notification.
     *
     * @param  mixed  $notifiable
     * @return array
     */
    public function toArray($notifiable)
    {
        return [
            //
        ];
    }
}

You will notice we set the file in the constructor then attach it using the attach() method on the MailMessage object. Now that is done let’s create the API route, and send our notifications! Open up routes/api.php and edit it to be so:

<?php

use Illuminate\Http\Request;
use Illuminate\Support\Facades\Route;
use App\Models\File;
use App\Notifications\SendFile;
/*
|--------------------------------------------------------------------------
| API Routes
|--------------------------------------------------------------------------
|
| Here is where you can register API routes for your application. These
| routes are loaded by the RouteServiceProvider within a group which
| is assigned the "api" middleware group. Enjoy building your API!
|
*/

Route::middleware('auth:sanctum')->get('/user', function (Request $request) {
    return $request->user();
});

Route::post('/email-file', function (Request $request) {
  $uploadedFile = $request->video;
  $file = File::Create([
    'name' => $uploadedFile->getClientOriginalName(),
    'mime_type' => $uploadedFile->getClientMimeType(),
    'size' => $uploadedFile->getSize(),
    'email' => $request->email
  ]);
  $file->notify(new SendFile($uploadedFile));
  return response()->json($file);
});

When you upload a file in Laravel it is an instance of UploadedFile class and has several file related methods associated with it! Using these methods we can get the name, size and mimetype of the uploaded file! After setting the model and saving in the database we send a notification with the uploaded file! Test it yourself here!

Conclusion

The vast majority of the apps I create and monetize, start off as an app that I use myself to make my life or work easier! This is the basis of #CodeLife and is the reason I was able to retire early for a few years. If this tutorial helped you please consider subscribing to my Youtube channel and subscribing to the blog and leave a comment if you want me to add new functionality!

Posted on Leave a comment

Setting Up A CI Laravel Pipeline Using Bitbucket

Continuous Integration

Is a must in today’s software architecture. Setting up a solid CI/CD pipeline will save you countless hours and money immediately and down the line.

There are plenty of tools that can accomplish your CI/CD goals from Jenkins, to CircleCI however in today’s tutorial I will be showing you how to accomplish this using Bitbucket pipelines.

Editing The YAML File

Bitbucket’s pipeline system uses yml files to spin up docker instances and run your scripts. This is an example file that runs composer, generates keys, runs migrations, installs passport and runs the tests. It also only runs when deploying to master branch and sets up a mysql instance and sets the environment keys.

# This is a sample build configuration for PHP.
# Check our guides at https://confluence.atlassian.com/x/e8YWN for more examples.
# Only use spaces to indent your .yml configuration.
# -----
# You can specify a custom docker image from Docker Hub as your build environment.
image: lorisleiva/laravel-docker
pipelines:
  branches:
    master:
      - step:
          caches:
            - composer
          script:
            - composer install --prefer-dist --no-ansi --no-interaction --no-progress --no-scripts
            - cp .env.example .env
            - php artisan key:generate
            - php artisan migrate
            - php artisan passport:install
            - vendor/bin/phpunit
          services:
            - mysql
      - step:
          name: Deploy to prod
          deployment: production
          # trigger: manual  # Uncomment to make this a manual deployment.
          script:
            - echo "Deploying to prod environment"
            - curl -X GET https://forge.laravel.com/servers/148653/sites/653797/deploy/http?token=4Q8e1kFPmFsHbxOBek7jcqikAvGVTbiX50tsPUPK
definitions:
    services:
      mysql:
        image: mysql:5.7
        variables:
          MYSQL_DATABASE: 'ben'
          MYSQL_RANDOM_ROOT_PASSWORD: 'yes'
          MYSQL_USER: 'homestead'
          MYSQL_PASSWORD: 'secret'

Why Is Continuous Integration Important?

I did an article about why continuous integration is important to the solo developer and I suggest everyone take a few moments and read that article. It outlines why having a solid CI/CD plan in your architecture, however the TL;DR is that is saves you time, money, effort and stress by spending the little bit of time up front to ensure you have tested and tried code before you ship to production.

Posted on Leave a comment

How To Create A Point Of Sales System With Laravel and Vue Pt. 2

Expanding Upon Our Point Of Sales App

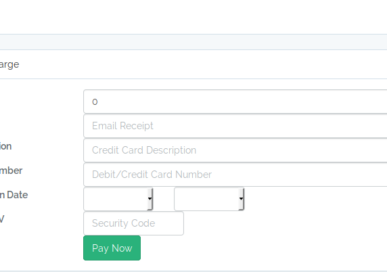
In part one we created a point of sales system using Laravel and Vue (if you haven’t done part 1 here is the source code). It had very basic functionality but it got the job done, you could charge debit/credit cards. The basic design looked like this
Point of sales part 1 screenshot
In part two we will add email invoice functionality so that we can email our customers and they can pay without us having to know their account information. For this we will be using Laravel’s notification framework on the backend and utilizing the web payment request API with Vue.js on the front end.
 

The Invoice Model

In the command line we will create a new model to represent our invoices type in the following command to generate your model and migration

php artisan make:model -m Invoice

 
Once the model and migration are made, open up migration and edit accordingly:

<?php
use Illuminate\Support\Facades\Schema;
use Illuminate\Database\Schema\Blueprint;
use Illuminate\Database\Migrations\Migration;
class CreateInvoicesTable extends Migration
{
    /**
     * Run the migrations.
     *
     * @return void
     */
    public function up()
    {
        Schema::create('invoices', function (Blueprint $table) {
            $table->increments('id');
            $table->string('name');
            $table->longText('description');
            $table->integer('amount');
            $table->string('email');
            $table->string('charge_id');
            $table->boolean('is_paid')->default(false);
            $table->timestamps();
        });
    }
    /**
     * Reverse the migrations.
     *
     * @return void
     */
    public function down()
    {
        Schema::dropIfExists('invoices');
    }
}

As you can see there are only a few fields

  • name of person being invoiced
  • description of the invoice
  • amount to be invoiced
  • email address for invoice to be mailed to
  • stripe charge id
  • boolean indicating whether or not the invoice has been paid

Open up the Invoice.php model and add the following to the $fillable array

<?php
namespace App;
use Illuminate\Database\Eloquent\Model;
use Illuminate\Notifications\Notifiable;
class Invoice extends Model
{
    use Notifiable;
    //
    protected $fillable = ['name','amount','email','description','charge_id'];
}

Next we need to create some api routes and a RESTful controller. Let’s start with the routes, open up routes/api.php and add the following routes

Route::middleware('auth:api')->resource('/invoice','InvoiceController');
Route::post('/invoice/pay/{id}','InvoiceController@payInvoice');

Open up routes/web.php and add the following

Route::get('/invoice/pay/{id}','InvoiceController@getPayInvoice');

Now create a new controller

php artisan make:controller --resource InvoiceController

Open up the controller and replace with the following

<?php
namespace App\Http\Controllers;
use Illuminate\Http\Request;
use App\Invoice;
class InvoiceController extends Controller
{
  public function __construct(){
    \Stripe\Stripe::setApiKey(env('STRIPE_SECRET'));
  }
    /**
     * Display a listing of the resource.
     *
     * @return \Illuminate\Http\Response
     */
    public function index()
    {
        //
        $invoices = Invoice::where('is_paid',true)->get();
        return response()->json([
          'invoices' => $invoices
        ]);
    }
    /**
     * Show the form for creating a new resource.
     *
     * @return \Illuminate\Http\Response
     */
    public function create()
    {
        //
    }
    /**
     * Store a newly created resource in storage.
     *
     * @param  \Illuminate\Http\Request  $request
     * @return \Illuminate\Http\Response
     */
    public function store(Request $request)
    {
        //
        $invoice = Invoice::Create($request->all());
        $invoice->notify(new \App\Notifications\InvoiceCreated());
        return response()->json([
          'invoice' => $invoice
        ]);
    }
    /**
     * Display the specified resource.
     *
     * @param  int  $id
     * @return \Illuminate\Http\Response
     */
    public function show($id)
    {
        //
    }
    /**
     * Show the form for editing the specified resource.
     *
     * @param  int  $id
     * @return \Illuminate\Http\Response
     */
    public function edit($id)
    {
        //
    }
    /**
     * Update the specified resource in storage.
     *
     * @param  \Illuminate\Http\Request  $request
     * @param  int  $id
     * @return \Illuminate\Http\Response
     */
    public function update(Request $request, $id)
    {
        //
        $invoice = Invoice::findOrFail($id);
        $invoice->fill($request->all())->save();
        return response()->json([
          'invoice' => $invoice
        ]);
    }
    /**
     * Remove the specified resource from storage.
     *
     * @param  int  $id
     * @return \Illuminate\Http\Response
     */
    public function destroy($id)
    {
        //
        return response()->json([
          'success' => Invoice::findOrFail($id)->delete()
        ]);
    }
    function getPayInvoice($id){
      return view('invoice')->with([
        'invoice' => Invoice::findOrFail($id)
      ]);
    }
    function payInvoice(Request $request,$id){
      $invoice = Invoice::findOrFail($id);
      try {
        // Use Stripe's library to make requests...
        $token = \Stripe\Token::create(array(
          "card" => array(
            "number" => $request->details['cardNumber'],
            "exp_month" => $request->details['expiryMonth'],
            "exp_year" => $request->details['expiryYear'],
            "cvc" => $request->details['cardSecurityCode']
          )
        ));
        \Stripe\Charge::create(array(
          "amount" => $invoice->amount,
          "currency" => "usd",
          "source" => $token, // obtained with Stripe.js
          "description" => $invoice->description,
          "receipt_email" => $invoice->email
        ));
        return response()->json([
          'success' => true
        ]);
      } catch(\Stripe\Error\Card $e) {
        // Since it's a decline, \Stripe\Error\Card will be caught
        return response()->json($e->getJsonBody());
      } catch (\Stripe\Error\RateLimit $e) {
        // Too many requests made to the API too quickly
        return response()->json($e->getJsonBody());
      } catch (\Stripe\Error\InvalidRequest $e) {
        // Invalid parameters were supplied to Stripe's API
        return response()->json($e->getJsonBody());
      } catch (\Stripe\Error\Authentication $e) {
        // Authentication with Stripe's API failed
        // (maybe you changed API keys recently)
        return response()->json($e->getJsonBody());
      } catch (\Stripe\Error\ApiConnection $e) {
        // Network communication with Stripe failed
        return response()->json($e->getJsonBody());
      } catch (\Stripe\Error\Base $e) {
        // Display a very generic error to the user, and maybe send
        // yourself an email
        return response()->json($e->getJsonBody());
      } catch (Exception $e) {
        // Something else happened, completely unrelated to Stripe
        return response()->json($e->getJsonBody());
      }
    }
}

Most of the CRUD operations are simple, in the create method we are calling a notification on the invoice (we will create the notification next don’t worry), and we have the charge method which is really just copy and paste from the other charge method except the amount comes from the invoice.
The last thing needed on the back end is the notification. Let’s go ahead and create that.

php artisan make:notification InvoiceCreated

In the notification file we just send an email with a link to pay

<?php
namespace App\Notifications;
use Illuminate\Bus\Queueable;
use Illuminate\Notifications\Notification;
use Illuminate\Contracts\Queue\ShouldQueue;
use Illuminate\Notifications\Messages\MailMessage;
class InvoiceCreated extends Notification
{
    use Queueable;
    /**
     * Create a new notification instance.
     *
     * @return void
     */
    public function __construct()
    {
        //
    }
    /**
     * Get the notification's delivery channels.
     *
     * @param  mixed  $notifiable
     * @return array
     */
    public function via($notifiable)
    {
        return ['mail'];
    }
    /**
     * Get the mail representation of the notification.
     *
     * @param  mixed  $notifiable
     * @return \Illuminate\Notifications\Messages\MailMessage
     */
    public function toMail($notifiable)
    {
        return (new MailMessage)
                    ->subject('You Have A New Invoice Due')
                    ->line('Pay NOW or suffer the consequences!')
                    ->action('Pay UP!', url('/invoice/pay/'.$notifiable->id))
                    ->line('Thank you for using our application!');
    }
    /**
     * Get the array representation of the notification.
     *
     * @param  mixed  $notifiable
     * @return array
     */
    public function toArray($notifiable)
    {
        return [
            //
        ];
    }
}

The Front End

We are going to create 2 components and a new page so people can pay their invoice. Create a new component in your vue application name it InvoiceComponent and replace with the following

<template>
    <div class="container">
        <div class="row">
            <div class="col-md-8 col-md-offset-2">
                <div class="panel panel-default">
                    <div class="panel-heading">Make A Invoice</div>
                    <div class="panel-body">
                        <fieldset>
                        <div class="form-group">
                        <label class="col-sm-3 control-label" for="amount">Amount</label>
                        <div class="col-sm-9">
                          <input type="number" class="form-control"  min="1.00" max="10000.00" id="amount" placeholder="Amount To Charge" v-model="amount">
                        </div>
                      </div>
                      <div class="form-group">
                      <label class="col-sm-3 control-label" for="name">Name</label>
                      <div class="col-sm-9">
                        <input type="text" class="form-control"  id="name" placeholder="Name To Charge" v-model="name">
                      </div>
                    </div>
                        <div class="form-group">
                        <label class="col-sm-3 control-label" for="email">Email</label>
                        <div class="col-sm-9">
                          <input type="email" class="form-control"  id="email" placeholder="Email Receipt" v-model="email">
                        </div>
                      </div>
                      <div class="form-group">
                      <label class="col-sm-3 control-label" for="description">Description</label>
                      <div class="col-sm-9">
                        <input type="text" class="form-control"  id="description" placeholder="Credit Card Description"  v-model="description">
                      </div>
                    </div>
                      <div class="form-group">
                        <div class="col-sm-offset-3 col-sm-9">
                          <button type="button" class="btn btn-success" v-on:click="createInvoice">Create Invoice</button>
                        </div>
                      </div>
                        </fieldset>
                    </div>
                </div>
            </div>
        </div>
    </div>
</template>
<script>
    export default {
        mounted() {
            console.log('Component mounted.')
        },
        data(){
        return{
        name: null,
        amount: null,
        email: null,
        description: null,
        invoices: []
        }
        },
        created(){
          var that = this;
          axios.get('/api/invoice').then(function(data){
            that.invoices = data.data.invoices;
          });
        },
        methods: {
        createInvoice: function(){
        var that = this;
        axios.post('/api/invoice',{name: this.name, amount: this.amount * 100, description: this.description, email: this.email})
        .then(function(data){
          that.invoices.push(data.data.invoice);
        alert('Success!')
        }).catch(function(error){
        alert(error.message);
        });
        }
        }
    }
</script>

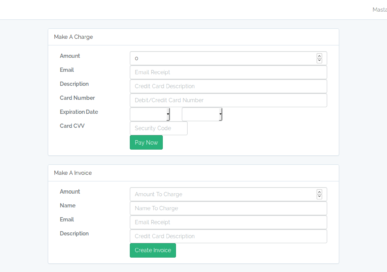
Drop that new component in your home.blade file and your page should look like this

Create another component call it InvoicePayController and place the following

<template>
    <div class="container">
        <div class="row">
            <div class="col-md-8 col-md-offset-2">
                <div class="panel panel-default">
                    <div class="panel-heading">Make A Invoice</div>
                    <div class="panel-body">
                        Your total amount due is {{invoice.amount / 100}}
                        <br>
                        {{invoice.description}}
                        <br>
                        <button v-on:click="payInvoice()" class="btn btn-primary">Pay</button>
                    </div>
                </div>
            </div>
        </div>
    </div>
</template>
<script>
    export default {
        mounted() {
            console.log('Component mounted.')
        },
        data(){
        return{
          invoice: null,
          paymentRequest: null
        }
        },
        created(){
          this.invoice = JSON.parse(this.invoiceObject);
        },
        methods: {
        payInvoice: function(){
          const supportedPaymentMethods = [
            {
              supportedMethods: 'basic-card',
            }
          ];
          const paymentDetails = {
            total: {
              label: this.invoice.description,
              amount:{
                currency: 'USD',
                value: this.invoice.amount/100
              }
            }
          };
          // Options isn't required.
          const options = {};
          this.paymentRequest = new PaymentRequest(
            supportedPaymentMethods,
            paymentDetails,
            options
          );
          var that = this;
          this.paymentRequest.show().then(function(data){
            axios.post('/api/invoice/pay/'+that.invoice.id,data).then(function(data){
              alert('Success');
              return paymentResponse.complete();
            })
          }).catch(function(err){
            console.log(err);
            return paymentResponse.complete();
          });
        },
      },
      props: ['invoiceObject']
        }
</script>

We are making use of the Payment Request API to gather all user card data to simplify the checkout process, you can read up more about it here. Create a new blade view file and call it Invoice.blade.php and put this new component there


@extends('layouts.app')
@section('content')
@endsection


Now your customers can pay invoices sent to them via email! Please don’t forget to subscribe to my Youtube Channel and like the video and post! Also don’t forget if you want to support this blog pre-orders for my new e-book are open now until the end of month!

Posted on 51 Comments

Web Push Using Laravel 8 Notifications *Updated*

Web Push Is Awesome

No seriously! It’s a pivotal moment in web development. You see web push is a W3C protocol that allows websites to communicate with a user’s browser in the background, using this web developers can now do things such as: background push notifications, offline sync, and background analytics just to name few. The web push api follows the protocol and consist of 4 main stages:

  1. User Agent installs service worker
  2. App asks permission to show notifications
  3. Once permission is granted, subscribe to push
  4. Save subscription details on backend
  5. Send notification via Laravel notification

All the code can be seen on my Github and the live demo can be seen here!

Components Of Web Push

Implementing web push requires a true full-stack approach, on the back-end we have to:

  • Implement the WebPush notification channel
  • Set up VAPID keys (more details later)
  • Configure the user model to manage subscriptions
  • Fire the notifications

On the front end we must:

  • Create and install a service worker, the majority of our logic will be contained here and is responsible to handling push notifications
  • Give user prompt to accept permissions
  • Give user ability to send notification to self

I will break it down into back-end and front-end implementations as to not confuse you; let’s start with the back-end.
 

Creating The Backend

Create a blank Laravel application and run the following composer command to download the web push notification channel.

composer require laravel-notification-channels/webpush

The User Model

Next open up your user model and add the following.

<?php

namespace App\Models;

use Illuminate\Contracts\Auth\MustVerifyEmail;
use Illuminate\Database\Eloquent\Factories\HasFactory;
use Illuminate\Foundation\Auth\User as Authenticatable;
use Illuminate\Notifications\Notifiable;
use NotificationChannels\WebPush\HasPushSubscriptions;
use Laravel\Sanctum\HasApiTokens;

class User extends Authenticatable
{
use HasApiTokens, HasFactory, Notifiable, HasPushSubscriptions;

/**
* The attributes that are mass assignable.
*
* @var string[]
*/
protected $fillable = [
'name',
'email',
'password',
];

/**
* The attributes that should be hidden for serialization.
*
* @var array
*/
protected $hidden = [
'password',
'remember_token',
];

/**
* The attributes that should be cast.
*
* @var array
*/
protected $casts = [
'email_verified_at' => 'datetime',
];
}

This added HasPushSubscriptions trait allows the user model to receive push notifications. Without this trait the application won’t know what model to store the tokens on.


Next publish the migration with:

php artisan vendor:publish --provider="NotificationChannels\WebPush\WebPushServiceProvider" --tag="migrations"

Run the migrate command to create the necessary tables:

php artisan migrate

You can also publish the config file with the following command. We won’t be doing any customizations in part 1 but maybe down the line:

php artisan vendor:publish --provider="NotificationChannels\WebPush\WebPushServiceProvider" --tag="config"

Generate the VAPID keys with (required for browser authentication) with the following artisan command. This command will set VAPID_PUBLIC_KEY and VAPID_PRIVATE_KEYin your .env file. VAPID is a web push protocol that is needed if we want to send push notifications. Basically it voluntarily identifies itself to a push notification server. If you want to read the specification you can here:

php artisan webpush:vapid

The Notification Class

Next let’s create the notification being used. For now we will make a generic catch all notification. In later tutorials we may add some more custom notifications:

php artisan make:notification GenericNotification

Open up the file and replace with the following contents

<?php
namespace App\Notifications;
use Illuminate\Bus\Queueable;
use Illuminate\Notifications\Notification;
use Illuminate\Contracts\Queue\ShouldQueue;
use Illuminate\Notifications\Messages\MailMessage;
use NotificationChannels\WebPush\WebPushMessage;
use NotificationChannels\WebPush\WebPushChannel;
class GenericNotification extends Notification
{
    use Queueable;
    public $title, $body;
    /**
     * Create a new notification instance.
     *
     * @return void
     */
    public function __construct($title, $body)
    {
        //
        $this->title = $title;
        $this->body = $body;
    }
    /**
     * Get the notification's delivery channels.
     *
     * @param  mixed  $notifiable
     * @return array
     */
    public function via($notifiable)
    {
        return [WebPushChannel::class];
    }
    public function toWebPush($notifiable, $notification)
    {
      $time = \Carbon\Carbon::now();
        return WebPushMessage::create()
            // ->id($notification->id)
            ->title($this->title)
            ->icon(url('/push.png'))
            ->body($this->body);
            //->action('View account', 'view_account');
    }
}

Let’s break down this class. First off in the constructor() method we set the title and the body of the notification. This will be used to show the title and body of the push notification on the browser. The via() method we want to set the channel to the WebPushChannel. This should be self explanatory as we want to deliver via push notifications.

The API Routes

Next open up routes/api.php and fill out the API routes

<?php
use Illuminate\Http\Request;
use App\Models\User; /* |-------------------------------------------------------------------------- | API Routes |-------------------------------------------------------------------------- | | Here is where you can register API routes for your application. These | routes are loaded by the RouteServiceProvider within a group which | is assigned the "api" middleware group. Enjoy building your API! | */ Route::middleware('auth:api')->get('/user', function (Request $request) { return $request->user(); }); Route::post('/save-subscription/{id}',function($id, Request $request){ $user = \App\Model\User::findOrFail($id); $user->updatePushSubscription($request->input('endpoint'), $request->input('keys.p256dh'), $request->input('keys.auth')); $user->notify(new \App\Notifications\GenericNotification("Welcome To WebPush", "You will now get all of our push notifications")); return response()->json([ 'success' => true ]); }); Route::post('/send-notification/{id}', function($id, Request $request){ $user = \App\Model\User::findOrFail($id); $user->notify(new \App\Notifications\GenericNotification($request->title, $request->body)); return response()->json([ 'success' => true ]); });

As you can see, we only added two additional routes to the application, both of which are POST. The first route

/save-subscription/{id}

Is responsible for saving the web push subscription from the client. Once the client requests web push access a set of keys are generated, which must be sent to our server. Using the updatePushSubscription() method that comes with the trait added to the user model, we can set the webpush subscription for whatever url the user is requesting from. The updatePushSubscription method takes 3 parameters:

  • endpoint (required): This is the created on the front end when registering for push notifications
  • key (optional) : Needed to encrypt data, only encrypted messages can have a payload
  • token (optional): Needed to encrypt data, only encrypted messages can have a payload

That’s it for the back end! In the next tutorial we will make a Vue.js application and register for push notifications and test it out! If you enjoyed my content please like/subscribe/share! If you want another cool project learn how to stream your desktop to a recording or to YouTube!

Posted on 4 Comments

Writing A Real Time Location Service – Routes and Controller Logic

Routes and Controllers

If you are following along from the previous tutorial then you should have the following page implemented on the front end:

Home screen
Your screen should look like this

In this part of the tutorial I will show you how to implement the routes and the back-end controller logic. The application has two main controllers that I will be implementing:

  • ActivationController for registering and activating new devices
  • LocationController for storing and broadcasting GPS locations

but before we get into that let’s first create our routes, open up the routes/web.php file and replace the contents with this:


<?php
/*
|--------------------------------------------------------------------------
| Web Routes
|--------------------------------------------------------------------------
|
| Here is where you can register web routes for your application. These
| routes are loaded by the RouteServiceProvider within a group which
| contains the "web" middleware group. Now create something great!
|
*/
Route::get('/', function () {
return view('welcome');
});
Auth::routes();
Route::get('/home', 'HomeController@index');
/* Commands */
Route::group(['prefix' => 'command','middleware' => 'auth'], function(){
Route::get('start-gps', 'LocationController@startGps');
Route::get('stop-gps','LocationController@stopGps');
});
/* Activation */
Route::group(['prefix' => 'activation','middleware' => 'auth'], function(){
Route::get('/','ActivationController@getView');
Route::post('/','ActivationController@activateDevice');
Route::post('/register','ActivationController@registerDevice');
});ro

 
and open up routes/api.php and replace the contents with this:


<?php
use Illuminate\Http\Request;
/*
|--------------------------------------------------------------------------
| API Routes
|--------------------------------------------------------------------------
|
| Here is where you can register API routes for your application. These
| routes are loaded by the RouteServiceProvider within a group which
| is assigned the "api" middleware group. Enjoy building your API!
|
*/
Route::resource('location','LocationController')

 
You may be wondering why I am editing two separate route files and the reason being is becasue the routes/api.php file is what the Android application will be interacting with and it’s just good practice to keep API code separate from main code. As you can see there are two route groups one for activation and one for commands. In the commands group I have a start-gps and a stop-gps route. These are going to do what their name implies and instruct the Android device to either start sending GPS data to the server, or to stop it. Next in the activation group there is a get route / to return the activation view, and a post route  / to activate the device, lastly there is a post route to register a new device. Basically the Android device will call register when the app opens for the first time, this will generate a code that the user has to enter at the activation screen to give the web app permission to start collecting data anonymously. The routes/api.php file has a resourceful route called location that will call the CRUD functions on the LocationController, although right now I am only implementing the store() function (gotta give you guys SOME homework). If you run php artisan route:list in your terminal you should see the following routes:

 +--------+-----------+------------------------------+------------------+------------------------------------------------------------------------+------------+ | Domain | Method | URI | Name | Action | Middleware | +--------+-----------+------------------------------+------------------+------------------------------------------------------------------------+------------+ | | GET|HEAD | / | | Closure | web | | | POST | activation | | App\Http\Controllers\ActivationController@activateDevice | web,auth | | | GET|HEAD | activation | | App\Http\Controllers\ActivationController@getView | web,auth | | | POST | activation/register | | App\Http\Controllers\ActivationController@registerDevice | web,auth | | | GET|HEAD | api/location | location.index | App\Http\Controllers\LocationController@index | api | | | POST | api/location | location.store | App\Http\Controllers\LocationController@store | api | | | GET|HEAD | api/location/create | location.create | App\Http\Controllers\LocationController@create | api | | | PUT|PATCH | api/location/{location} | location.update | App\Http\Controllers\LocationController@update | api | | | GET|HEAD | api/location/{location} | location.show | App\Http\Controllers\LocationController@show | api | | | DELETE | api/location/{location} | location.destroy | App\Http\Controllers\LocationController@destroy | api | | | GET|HEAD | api/location/{location}/edit | location.edit | App\Http\Controllers\LocationController@edit | api | | | GET|HEAD | command/start-gps/{id} | | App\Http\Controllers\LocationController@startGps | web,auth | | | GET|HEAD | command/stop-gps/{id}| | App\Http\Controllers\LocationController@stopGps | web,auth | | | GET|HEAD | home | | App\Http\Controllers\HomeController@index | web,auth | | | GET|HEAD | login | login | App\Http\Controllers\Auth\LoginController@showLoginForm | web,guest | | | POST | login | | App\Http\Controllers\Auth\LoginController@login | web,guest | | | POST | logout | logout | App\Http\Controllers\Auth\LoginController@logout | web | | | POST | password/email | | App\Http\Controllers\Auth\ForgotPasswordController@sendResetLinkEmail | web,guest | | | POST | password/reset | | App\Http\Controllers\Auth\ResetPasswordController@reset | web,guest | | | GET|HEAD | password/reset | | App\Http\Controllers\Auth\ForgotPasswordController@showLinkRequestForm | web,guest | | | GET|HEAD | password/reset/{token} | | App\Http\Controllers\Auth\ResetPasswordController@showResetForm | web,guest | | | POST | register | | App\Http\Controllers\Auth\RegisterController@register | web,guest | | | GET|HEAD | register | register | App\Http\Controllers\Auth\RegisterController@showRegistrationForm | web,guest | +--------+-----------+------------------------------+------------------+------------------------------------------------------------------------+------------+

Implementing The Controller

If you haven’t already created the controllers, please do so with the following commands:
php artisan make:controller LocationController
php artisan make:controller ActivationController
Let’s start with the ActivationController, open up app/Http/Controllers/ActivationController.php. This controller only has three functions getView(), activateDevice(), and registerDevice(), I described their functions above so instead of repeating myself I will post the code:

<?php namespace App\Http\Controllers; use Illuminate\Http\Request; use App\ActivationCode; use App\Device; class ActivationController extends Controller {  //  public function getView(){  return view('activation');  } public function activateDevice(Request $request){  $code = ActivationCode::where('code', $request->code)->first();  if ($code != null){  $device = Device::create([  'user_id' => $request->user()->id,  'uuid' => $code->uuid  ]);  }  return redirect('/home');y  } public function registerDevice(Request $request){  $code = ActivationCode::Create([  'uuid' => $request->uuid,  'code' => $request->code  ]);  } }

You may be wondering where the uuid and code is coming from. This uuid and the code are generated on the Android device when the app is opened for the first time. This uuid is what maps the app to each device, while the code is shown to the user on the android device they then have to enter that code on the activation page to activate the device and start collecting data. The devices also listens on a Socket.IO channel that corresponds to their uuid so this is how we will talk to the Android devices. Next open up the LocationController and enter the following contents:

<?php namespace App\Http\Controllers; use Illuminate\Http\Request; use App\Location; use App\Device; class LocationController extends Controller {  // public function startGps($id){  $device = Device::findOrFail($id);  event(new \App\Events\SendCommand($device,'start-gps'));  } public function stopGps($id){  $device = Device::findOrFail($id);  event(new \App\Events\SendCommand($device,'stop-gps'));  }ns  public function store(Request $request){  $device = Device::where('uuid', $request->uuid)->first();  $location = Location::Create([  'long' => $request->long,  'lat' => $request->lat,  'device_id' => $device->id  ]);  event(new \App\Events\LocationCreated($location));  } }be i

All three of these functions are relying on Laravel events because they will be interacting with sockets, however we will actually be implementing the event logic in the next tutorial. Right now just understand that the sendCommand event will be responsible for telling the Android device to start or stop the GPS transponder and the LocationCreated event will tell the web browser the GPS coordinates in real time.
 

Conclusion

At this stage of the application you should have your front end logic complete and the controllers that power the back end. The last thing that has to be completed on the web end is the event and socket logic. If you haven’t already please subscribe not only to this blog but also my Youtube page (links to both on the right sidebar). Please leave any questions in the comment section below, and be sure to check the source code here.

Posted on Leave a comment

Writing A Real Time Location Service – Models and Migrations

[callaction url=”https://www.youtube.com/user/JPlaya01″ background_color=”#333333″ text_color=”#ffffff” button_text=”Go Now” button_background_color=”#e64429″]Subscribe To My Youtube Page[/callaction]

Overview

In this programming series I am going to show you how to create a real time Laravel app that shows the location of an android device on a Google map in real time. This design can easily be applied to iOS and I will cover it at a later date. This project will be constructed of three parts:

  • Laravel app that handles registration/login, saves coordinates and timestamps
  • Node Application that talks to Laravel application and android devices
  • Android application that talks to node application

In this post I will create the Laravel + Node apps and I will write the Android app at a later post. The Laravel app is a run down version of my new application SocketDroid, an application that allows you to control android devices from a web panel. click a button and alert the Android device to send geolocation information back to the server and push it to the browser. The application will store the geolocation information in a database for later analysis if you so choose (in a later post I will expand upon the admin panel). The Laravel app will communicate with the Node app via Redis using the built-in Event system. From there the Node app will communicate with our devices via Socket.io. The Android device will listen on a websocket connection in a background service and listen for an event to start grabbing and posting GPS data, and another event to stop listening. Make sense so far? Good, let’s get started!
 

Scaffolding The Laravel Application

If you have followed any of my Laravel tutorials in the past, you know the drill, create a new application, and scaffold the authentication routes and views:


laravel new real-time-gps
cd real-time-gps
php artisan make:auth

Now we have a basic Laravel application with registration and login logic established. Let’s talk about database design for a moment shall we? This application is going to have 3 really important tables they are:

  • Users (Already made for us be default)
  • Devices
  • Locations
  • ActivationCodes

A user can have many devices, a device can have many locations and belongs to one user, and a location belong to one device, that is the basic relationship structure. Activation codes are for you guessed it activating devices to use the app. Go ahead and create the relations and models for devices and locations using the following commands:


php artisan make:model -m Device
php artisan make:model -m Location
php artisan make:model -m ActivationCode

Device Model

Open up the devices migration file and add the following content to the up() function:


Schema::create('devices', function (Blueprint $table) {
$table->increments('id');
$table->string('uuid');
$table->integer('user_id')->unsigned();
$table->foreign('user_id')->references('id')->on('users')->onDelete('cascade');
$table->timestamps();
});

The only things we need to know about devices are who they belong to and what channel they are listening on. We also want to make sure that when a user account is deleted from the database, that all of their devices are also removed from the database.  Now open up the Device model (app/Device.php), there are three things we need to do with this model, the first is tell it which parameters to accept when inserting into the database. The second thing is to tell the model about its relation to the User model, while the third is to tell the model about it’s relation to the Location model. The finished version should look like this:


<?php
namespace App;
use Illuminate\Database\Eloquent\Model;
class Device extends Model
{
//
protected $guarded = [];
public function user(){
return $this->belongsTo('App\User');
}
public function locations(){
return $this->hasMany('App\Location');
}
}

The Device model and migration is now complete, now on to the Location model and migration.

Location Model

Open up the location migration file and in its up() function we are going to add the following:


Schema::create('locations', function (Blueprint $table) {
$table->increments('id');
$table->string('lat');
$table->string('long');
$table->integer('device_id')->unsigned();
$table->foreign('device_id')->references('id')->on('devices')->onDelete('cascade');
$table->timestamps();
});

Hopefully by now you understand what is going on, we are saving the lat/long acquired from the device, as well as its id. Using this information we can associate geolocations with independent devices. Next we will open up the Location(app/Location.php) model, tell it which properties to fill, and it’s relation to the Device model.


<?php
namespace App;
use Illuminate\Database\Eloquent\Model;
class Location extends Model
{
//
public $guarded = [];
public function device(){
return $this->belongsTo('App\Device');
}
}

User Model

The only thing we need to do the user model is make it aware of it’s new device relation open up the User(app/User.php) model and add the following function:


public function devices(){
return $this->hasMany('App\Device');
}

ActivationCode Model

The activation code model is responsible for storing the activation code given from the Android device on app installation to register the device with your account. It will take in the UUID of the device and the activation code, open up the migration file and add the following:


public function up()
{
Schema::create('activation_codes', function (Blueprint $table) {
$table->increments('id');
$table->string('uuid');
$table->string('code');
$table->timestamps();
});
}

Now open up the ActivationCode(app/ActivationCode.php) model and add the following:


<?php
namespace App;
use Illuminate\Database\Eloquent\Model;
class AuthCode extends Model
{
//
public $guarded = [];
}

That’s all that’s needed you can now run your migrations!


php artisan migrate

In the next lesson we will be creating the views and front end logic needed to visualize the devices on a Google map!

Posted on Leave a comment

Get Your Daily Stripe Balance Using Laravel Task Scheduler

[callaction url=”https://www.youtube.com/user/JPlaya01″ background_color=”#333333″ text_color=”#ffffff” button_text=”Go Now” button_background_color=”#e64429″]Subscribe To My Youtube Page[/callaction]

Laravel Task Scheduler

I create many apps that use the Uber business model for paying out contractors using Stripe, and I make money by using application fees. I like to get my daily account available and pending balances from Stripe. Using Laravel’s built in task scheduler this is trivial. Laravel provides a way to define all of your application’s scheduled jobs within Laravel itself, so that you only have to manage one cron tab * * * * * php /path/to/artisan schedule:run >> /dev/null 2>&1 it’s pretty awesome!

Install Dependencies

I will assume you have created a new Laravel install. I  need the Stripe PHP composer module for this to work. Go to the root of your application and type the following command composer require stripe/stripe-php now you have all the necessary components installed.

Define Schedule

All schedules are defined in schedule() method of the App\Console\Kernel located at app/console/kernel.php. I want to make a stripe call to retrieve my balance, both available and pending.

<?php
namespace App\Console;
use Mail;
use Carbon\Carbon;
use DB;
use Illuminate\Console\Scheduling\Schedule;
use Illuminate\Foundation\Console\Kernel as ConsoleKernel;
class Kernel extends ConsoleKernel
{
    /**
     * The Artisan commands provided by your application.
     *
     * @var array
     */
    protected $commands = [
        \App\Console\Commands\Inspire::class,
    ];
    /**
     * Define the application's command schedule.
     *
     * @param  \Illuminate\Console\Scheduling\Schedule  $schedule
     * @return void
     */
    protected function schedule(Schedule $schedule)
    {
        $schedule->call(function () {
        \Stripe\Stripe::setApiKey(env('STRIPE_SECRET'));
       $balance = \Stripe\Balance::retrieve();
       $emailText = "As of {Carbon::today()->toDayDateTimeString()}  your available balance is {$balance->available->amount} and your pending balance is {$balance->pending->amount}";
Mail::raw('Text to e-mail', function ($message) {
    //
    
 $message->from('financial@app.com', 'Your Application');
            $message->to(env('EMAIL_ADDRESS'),env('EMAIL_NAME'))->subject('Your Daily Stripe Balance!');
}); })->daily();  } }

With this piece of code I am now getting daily emails with the date, my available balance, and my pending balance. If you liked this please share and subscribe to my blog posts via email to the right!

Posted on Leave a comment

API Authentication In Laravel 5.2

[callaction url=”https://www.youtube.com/user/JPlaya01″ background_color=”#333333″ text_color=”#ffffff” button_text=”Go Now” button_background_color=”#e64429″]Subscribe To My Youtube Page[/callaction]

Hours Saved!

Token based API authentication is something you are inevitably going to encounter if you plan on working with web/mobile apps (unless you are coding under a rock). The benefits are great, in fact here are six of them; However it can be a nightmare if you need to create your own token authentication server. As of Laravel 5.2, there is a new auth guard called conveniently api this guard allows us to check an api_token parameter against an api_token field on our users table in our database.

API Configuration

Almost everything is configured right out of the box, open up config/auth.php and you will see this block of code

  /*
 |--------------------------------------------------------------------------
 | Authentication Guards
 |--------------------------------------------------------------------------
 |
 | Next, you may define every authentication guard for your application.
 | Of course, a great default configuration has been defined for you
 | here which uses session storage and the Eloquent user provider.
 |
 | All authentication drivers have a user provider. This defines how the
 | users are actually retrieved out of your database or other storage
 | mechanisms used by this application to persist your user's data.
 |
 | Supported: "session", "token"
 |
 */
 'guards' => [
 'web' => [
 'driver' => 'session',
 'provider' => 'users',
 ],
 'api' => [
 'driver' => 'token',
 'provider' => 'users',
 ],
 ],

By default Laravel 5.2 uses the web guard, which is the traditional session based model. This model is great for a traditional web application but not suitable for API architecture. The next guard is the api this guard is suitable for routes that need to be consumed by mobile apps and the like. The reason why you would want to do this is because when you are making request from your client-side app, each request is mutually exclusive of the requests before and after it, thus each one requires authentication. In the traditional session based flow, user data is saved on the server and that session data is used in every request, not only is this approach not scalable, it isn’t efficient or as secure as one might think. API token authentication is faster, scalable, and more secure. The biggest benefit of all is that you can now use this token in other applications to access your own API if you so choose. If you would like to see an example leave a comment of what kind of app you would like to see this implemented in and I will write it, record it, and blog it!

Posted on Leave a comment

Learning Laravel – Installation

[callaction url=”https://www.youtube.com/user/JPlaya01″ background_color=”#333333″ text_color=”#ffffff” button_text=”Go Now” button_background_color=”#e64429″]Subscribe To My Youtube Page[/callaction]

Getting Started Learning Laravel

So you have decided that learning Laravel is worth your time, GOOD FOR YOU! Now you have to go through the task of actually installing and configuring the software on your machine. If you use Laravel Homestead, then all of your system requirements are handled out of the box (I highly recommend this approach), if you choose not to use the VM, make sure your machine satisfies the following requirements:

  • PHP >= 5.5.9
  • OpenSSL PHP Extension
  • PDO PHP Extension
  • Mbstring PHP Extension
  • Tokenizer PHP Extension

Utilizing Composer

Laravel leverages Composer for all of it’s PHP dependency management. You may ask what is dependency management? Laravel utilizes a plethora of different components in order to make it function. It would be a nightmare if you as the developer is left in charge on managing all of these dependencies, with updates and patches and whatnot. This is where Composer comes in and makes your life pleasant. Composer keeps everything up-to-date, if a package requires other packages then Composer will handle all of the downloads. It’s like gem for Ruby or NPM for Node. If you don’t already have it installed it is quite easy, go to your command line and enter the following command.

curl -sS https://getcomposer.org/installer | php
mv composer.phar /usr/local/bin/composer

This will install composer globally so you can just type

composer <command>

if you run into any errors, then try running with the sudo command.
The first thing that we will do is install the Laravel installer with composer:

composer global require "laravel/installer"

Before you do anything else, make sure you put ~/.composer/vendor/bin in your PATH . Now you can start a new Laravel application by issuing the command

laravel new <app> 

doing so will create a new Laravel app creating a folder in the process where is your application’s name.