
Routes and Controllers
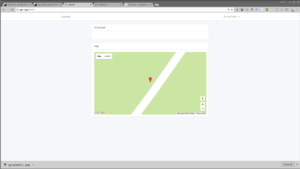
If you are following along from the previous tutorial then you should have the following page implemented on the front end:
In this part of the tutorial I will show you how to implement the routes and the back-end controller logic. The application has two main controllers that I will be implementing:
- ActivationController for registering and activating new devices
- LocationController for storing and broadcasting GPS locations
but before we get into that let’s first create our routes, open up the routes/web.php file and replace the contents with this:
<?php
/*
|--------------------------------------------------------------------------
| Web Routes
|--------------------------------------------------------------------------
|
| Here is where you can register web routes for your application. These
| routes are loaded by the RouteServiceProvider within a group which
| contains the "web" middleware group. Now create something great!
|
*/
Route::get('/', function () {
return view('welcome');
});
Auth::routes();
Route::get('/home', 'HomeController@index');
/* Commands */
Route::group(['prefix' => 'command','middleware' => 'auth'], function(){
Route::get('start-gps', 'LocationController@startGps');
Route::get('stop-gps','LocationController@stopGps');
});
/* Activation */
Route::group(['prefix' => 'activation','middleware' => 'auth'], function(){
Route::get('/','ActivationController@getView');
Route::post('/','ActivationController@activateDevice');
Route::post('/register','ActivationController@registerDevice');
});ro
and open up routes/api.php and replace the contents with this:
<?php
use Illuminate\Http\Request;
/*
|--------------------------------------------------------------------------
| API Routes
|--------------------------------------------------------------------------
|
| Here is where you can register API routes for your application. These
| routes are loaded by the RouteServiceProvider within a group which
| is assigned the "api" middleware group. Enjoy building your API!
|
*/
Route::resource('location','LocationController')
You may be wondering why I am editing two separate route files and the reason being is becasue the routes/api.php file is what the Android application will be interacting with and it’s just good practice to keep API code separate from main code. As you can see there are two route groups one for activation and one for commands. In the commands group I have a start-gps and a stop-gps route. These are going to do what their name implies and instruct the Android device to either start sending GPS data to the server, or to stop it. Next in the activation group there is a get route / to return the activation view, and a post route / to activate the device, lastly there is a post route to register a new device. Basically the Android device will call register when the app opens for the first time, this will generate a code that the user has to enter at the activation screen to give the web app permission to start collecting data anonymously. The routes/api.php file has a resourceful route called location that will call the CRUD functions on the LocationController, although right now I am only implementing the store() function (gotta give you guys SOME homework). If you run php artisan route:list in your terminal you should see the following routes:
+--------+-----------+------------------------------+------------------+------------------------------------------------------------------------+------------+| Domain | Method | URI | Name | Action | Middleware |+--------+-----------+------------------------------+------------------+------------------------------------------------------------------------+------------+| | GET|HEAD | / | | Closure | web || | POST | activation | | App\Http\Controllers\ActivationController@activateDevice | web,auth || | GET|HEAD | activation | | App\Http\Controllers\ActivationController@getView | web,auth || | POST | activation/register | | App\Http\Controllers\ActivationController@registerDevice | web,auth || | GET|HEAD | api/location | location.index | App\Http\Controllers\LocationController@index | api || | POST | api/location | location.store | App\Http\Controllers\LocationController@store | api || | GET|HEAD | api/location/create | location.create | App\Http\Controllers\LocationController@create | api || | PUT|PATCH | api/location/{location} | location.update | App\Http\Controllers\LocationController@update | api || | GET|HEAD | api/location/{location} | location.show | App\Http\Controllers\LocationController@show | api || | DELETE | api/location/{location} | location.destroy | App\Http\Controllers\LocationController@destroy | api || | GET|HEAD | api/location/{location}/edit | location.edit | App\Http\Controllers\LocationController@edit | api || | GET|HEAD | command/start-gps/{id} | | App\Http\Controllers\LocationController@startGps | web,auth || | GET|HEAD | command/stop-gps/{id}| | App\Http\Controllers\LocationController@stopGps | web,auth || | GET|HEAD | home | | App\Http\Controllers\HomeController@index | web,auth || | GET|HEAD | login | login | App\Http\Controllers\Auth\LoginController@showLoginForm | web,guest || | POST | login | | App\Http\Controllers\Auth\LoginController@login | web,guest || | POST | logout | logout | App\Http\Controllers\Auth\LoginController@logout | web || | POST | password/email | | App\Http\Controllers\Auth\ForgotPasswordController@sendResetLinkEmail | web,guest || | POST | password/reset | | App\Http\Controllers\Auth\ResetPasswordController@reset | web,guest || | GET|HEAD | password/reset | | App\Http\Controllers\Auth\ForgotPasswordController@showLinkRequestForm | web,guest || | GET|HEAD | password/reset/{token} | | App\Http\Controllers\Auth\ResetPasswordController@showResetForm | web,guest || | POST | register | | App\Http\Controllers\Auth\RegisterController@register | web,guest || | GET|HEAD | register | register | App\Http\Controllers\Auth\RegisterController@showRegistrationForm | web,guest |+--------+-----------+------------------------------+------------------+------------------------------------------------------------------------+------------+
Implementing The Controller
If you haven’t already created the controllers, please do so with the following commands:
php artisan make:controller LocationController
php artisan make:controller ActivationController
Let’s start with the ActivationController, open up app/Http/Controllers/ActivationController.php. This controller only has three functions getView(), activateDevice(), and registerDevice(), I described their functions above so instead of repeating myself I will post the code:
<?phpnamespace App\Http\Controllers;use Illuminate\Http\Request;use App\ActivationCode;use App\Device;class ActivationController extends Controller{//public function getView(){return view('activation');}public function activateDevice(Request $request){$code = ActivationCode::where('code', $request->code)->first();if ($code != null){$device = Device::create(['user_id' => $request->user()->id,'uuid' => $code->uuid]);}return redirect('/home');y}public function registerDevice(Request $request){$code = ActivationCode::Create(['uuid' => $request->uuid,'code' => $request->code]);}}
You may be wondering where the uuid and code is coming from. This uuid and the code are generated on the Android device when the app is opened for the first time. This uuid is what maps the app to each device, while the code is shown to the user on the android device they then have to enter that code on the activation page to activate the device and start collecting data. The devices also listens on a Socket.IO channel that corresponds to their uuid so this is how we will talk to the Android devices. Next open up the LocationController and enter the following contents:
<?phpnamespace App\Http\Controllers;use Illuminate\Http\Request;use App\Location;use App\Device;class LocationController extends Controller{//public function startGps($id){$device = Device::findOrFail($id);event(new \App\Events\SendCommand($device,'start-gps'));}public function stopGps($id){$device = Device::findOrFail($id);event(new \App\Events\SendCommand($device,'stop-gps'));}nspublic function store(Request $request){$device = Device::where('uuid', $request->uuid)->first();$location = Location::Create(['long' => $request->long,'lat' => $request->lat,'device_id' => $device->id]);event(new \App\Events\LocationCreated($location));}}be i
All three of these functions are relying on Laravel events because they will be interacting with sockets, however we will actually be implementing the event logic in the next tutorial. Right now just understand that the sendCommand event will be responsible for telling the Android device to start or stop the GPS transponder and the LocationCreated event will tell the web browser the GPS coordinates in real time.
Conclusion
At this stage of the application you should have your front end logic complete and the controllers that power the back end. The last thing that has to be completed on the web end is the event and socket logic. If you haven’t already please subscribe not only to this blog but also my Youtube page (links to both on the right sidebar). Please leave any questions in the comment section below, and be sure to check the source code here.