Posted on 2 Comments

SpeechKit: A Javascript Package For The Web Speech API (Speech Synthesis & Speech Recognition)

Speech Recognition & Speech Synthesis In The Browser With Web Speech API

Voice apps are now first-class citizens on the web thanks to the Speech Recognition and the Speech Synthesis interfaces which are a part of the bigger Web Speech API. Taken from the MDN docs

The Web Speech API makes web apps able to handle voice data. There are two components to this API:

  • Speech recognition is accessed via the SpeechRecognition interface, which provides the ability to recognize voice context from an audio input (normally via the device’s default speech recognition service) and respond appropriately. Generally you’ll use the interface’s constructor to create a new SpeechRecognition object, which has a number of event handlers available for detecting when speech is input through the device’s microphone. The SpeechGrammar interface represents a container for a particular set of grammar that your app should recognize. Grammar is defined using JSpeech Grammar Format (JSGF.)
  • Speech synthesis is accessed via the SpeechSynthesis interface, a text-to-speech component that allows programs to read out their text content (normally via the device’s default speech synthesizer.) Different voice types are represented by SpeechSynthesisVoice objects, and different parts of text that you want to be spoken are represented by SpeechSynthesisUtterance objects. You can get these spoken by passing them to the SpeechSynthesis.speak() method.
Brief on Web Speech API from MDN

So basically with the Web Speech API you can work with voice data. You can make your apps speak to its users and you can run commands based on what your user speaks. This opens up a host of opportunities for voice-activated CLIENT-SIDE apps. I love building open-source software, so I decided to create an NPM package to work with the Web Speech API called SpeechKit and I couldn’t wait to share it with you! I suppose this is a continuation of Creating A Voice Powered Note App Using Web Speech

Simplifying The Process With SpeechKit

I decided starting this year I would contribute more to the open-source community and provide packages (primarily Javascript, PHP, and Rust) to the world to use. I use the Web Speech API a lot in my personal projects and so why not make it an NPM package? You can find the source code here.

Listen To Some Hacker Music While You Code

Follow me on Spotify I make Tech Trap music

Features

  • Speak Commands
  • Listen for voice commands
  • Add your own grammar
  • Transcribe words and output as file.
  • Generate SSML from text
npm install @mastashake08/speech-kit

Import

import SpeechKit from '@mastashake08/speech-kit'

Instantiate A New Instance

new SpeechKit(options)

listen()

Start listening for speech recognition.

stopListen()

Stop listening for speech recognition.

speak(text)

Use Speech Synthesis to speak text.

Param Type Description
text string Text to be spoken

getResultList() ⇒ SpeechRecognitionResultList

Get current SpeechRecognition resultsList.

Returns: SpeechRecognitionResultList – – List of Speech Recognition results

getText() ⇒ string

Return text

Returns: string – resultList as text string

getTextAsFile() ⇒ Blob

Return text file with results.

Returns: Blob – transcript

getTextAsJson() ⇒ object

Return text as JSON.

Returns: object – transcript

addGrammarFromUri()

Add grammar to the SpeechGrammarList from a URI.

Params: string uri – URI that contains grammar

addGrammarFromString()

Add grammar to the SpeechGrammarList from a Grammar String.

Params: string grammar – String containing grammar

getGrammarList() ⇒ SpeechGrammarList

Return current SpeechGrammarList.

Returns: SpeechGrammarList – current SpeechGrammarList object

getRecognition() ⇒ SpeechRecognition

Return the urrent SpeechRecognition object.

Returns: SpeechRecognition – current SpeechRecognition object

getSynth() ⇒ SpeechSynthesis

Return the current Speech Synthesis object.

Returns: SpeechSynthesis – current instance of Speech Synthesis object

getVoices() ⇒ Array<SpeechSynthesisVoice>

Return the current voices available to the user.

Returns: Array<SpeechSynthesisVoice> – Array of available Speech Synthesis Voices

setSpeechText()

Set the SpeechSynthesisUtterance object with the text that is meant to be spoken.

Params: string text – Text to be spoken

setSpeechVoice()

Set the SpeechSynthesisVoice object with the desired voice.

Params: SpeechSynthesisVoice voice – Voice to be spoken

getCurrentVoice() ⇒ SpeechSynthesisVoice

Return the current voice being used in the utterance.

Returns: SpeechSynthesisVoice – current voice
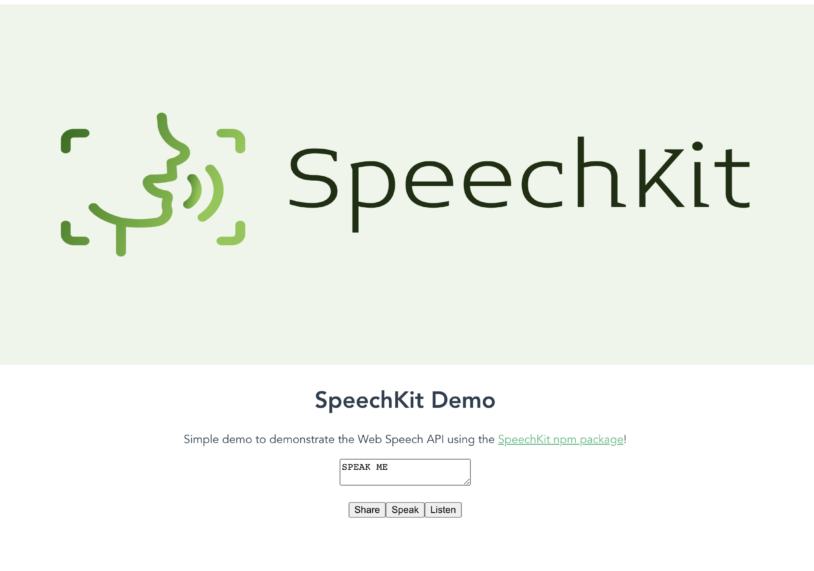
Example Application

In this example vue.js application there will be a text box with three buttons underneath, when the user clicks the listen button, SpeechKit will start listening to the user. As speech is detected, the text will appear in the text box. The first button under the textbox will tell the browser to share the page, the second button will speak the text in the textbox while the third button will control recording.

Home page from the github.io page

I created this in Vue.js and (for sake of time and laziness) I reused all of the defaul components and rewrote the HelloWorld component. So let’s get started by creating a new Vue application.

Creating The Application

Open up your terminal and input the following command to create a new vue application:

vue create speech-kit-demo

It doesn’t really matter what settings you choose, after you get that squared away, now it is time to add our dependecy.

Installing SpeechKit

Still inside your terminal we will add the SpeechKit dependency to our package.json file with the following command:

npm install @mastashake08/speech-kit

Now with that out of the way we can begin creating our component functionality.

Editing HelloWorld.vue

Open up your HelloWorld.vue file in your components/ folder and change it to look like this:

<template>
  <div class="hello">
    <h1>{{ msg }}</h1>
    <p>
      Simple demo to demonstrate the Web Speech API using the
      <a href="https://github.com/@mastashake08/speech-kit" target="_blank" rel="noopener">SpeechKit npm package</a>!
    </p>
    <textarea v-model="voiceText"/>
    <ul>
      <button @click="share" >Share</button>
      <button @click="speak">Speak</button>
      <button @click="listen" v-if="!isListen">Listen</button>
      <button @click="stopListen" v-else>Stop Listen</button>
    </ul>
  </div>
</template>

<script>
import SpeechKit from '@mastashake08/speech-kit'
export default {
  name: 'HelloWorld',
  props: {
    msg: String
  },
  mounted () {
    this.sk = new SpeechKit({rate: 0.85})
    document.addEventListener('onspeechkitresult', (e) => this.getText(e))
  },
  data () {
    return {
      voiceText: 'SPEAK ME',
      sk: {},
      isListen: false
    }
  },
  methods: {
    share () {
      const text = `Check out the SpeechKit Demo and speak this text! ${this.voiceText} ${document.URL}`
      try {
        if (!navigator.canShare) {
          this.clipBoard(text)
        } else {
          navigator.share({
            text: text,
            url: document.URL
          })
        }
      } catch (e) {
        this.clipBoard(text)
      }
    },
    async clipBoard (text) {
      const type = "text/plain";
      const blob = new Blob([text], { type });

      const data = [new window.ClipboardItem({ [type]: blob })];
      await navigator.clipboard.write(data)
      alert ('Text copied to clipboard')
    },
    speak () {
      this.sk.speak(this.voiceText)
    },
    listen () {
      this.sk.listen()
      this.isListen = !this.isListen
    },
    stopListen () {
      this.sk.stopListen()
      this.isListen = !this.isListen
    },
    getText (evt) {
      this.voiceText = evt.detail.transcript
    }
  }
}
</script>

<!-- Add "scoped" attribute to limit CSS to this component only -->
<style scoped>
h3 {
  margin: 40px 0 0;
}
ul {
  list-style-type: none;
  padding: 0;
}
li {
  display: inline-block;
  margin: 0 10px;
}
a {
  color: #42b983;
}
</style>

As you can see the almost all of the functionality is being offloaded to the SpeechKit library. You can see a live version of this at https://mastashake08.github.io/speech-kit-demo/ . In the mount() method we initialize our SpeechKit instance and add an event listener on the document to listen for the onspeechkitresult event emitted from the SpeechKit class which dispatches everytime there is an availble transcript from speech recognition. The listen() and stopListen() functions simply call the SpeechKit functions and toggle a boolean indicating recording is in process. Finally the share() function uses the Web Share API to share the URL if available, otherwise it defaults to using the Clipboard API and copying the text to the user’s clipboard for manual sharing.

Want To See More Tutorials?

Join my newsletter and get weekly updates from my blog delivered straight to your inbox.

Check The Shop!

Consider purchasing an item from the #CodeLife shop, all proceeds go towards our coding initiatives.

Follow Me On Social Media

Follow Me On Youtube!

Follow my YouTube account

Get Your Next Domain Cheap & Support The Channel

I use Namecheap for all of my domains! Whenever I need a cheap solution for a proof-of-concept project I grab a domain name for as little as $1! When you sign up and buy your first domain with Namecheap I get a commission, it’s a great way to get a quality service and support this platform!

Get Your Next Domain Cheap
CLICK HERE

Become A Sponsor

Open-source work is free to use but it is not free to develop. If you enjoy my content and would like to see more please consider becoming a sponsor on Github or Patreon! Not only do you support me but you are funding tech programs for at risk youth in Louisville, Kentucky.

Join The Newsletter

By joining the newsletter, you get first access to all of my blogs, events, and other brand-related content delivered directly to your inbox. It’s 100% free and you can opt out at any time!

Check The Shop

You can also consider visiting the official #CodeLife shop! I have my own clothing/accessory line for techies as well as courses designed by me covering a range of software engineering topics.

Posted on 1 Comment

Adding Livestreaming To The Screen Recorder Using The YouTube Data V3 API

Adding YouTube API To The Screen Recorder

So I wanted to add some more functionality to the app that would separate it from the competition (check it out here). At first, I was going to add YouTube functionality where the user could upload the video straight to Youtube. My brother who is a streamer brought up that unless I added editing capabilities to it, there wasn’t much need for that functionality. Instead, I should stream to YouTube. This made much more sense, even in my case I usually stream myself coding from the desktop but instead of downloading cumbersome software, I can do it straight in the browser! For this, I decided to use Laravel Socialite with a YouTube provider, while on the client-side creating a YouTube class with the various functions needed to interact with the API.

Connect To Youtube!

Extending The Laravel Microservice

The Laravel part is pretty simple first we add the Socialite and Youtube Provider packages.

composer require laravel/socialite socialiteproviders/youtube

Now we have to edit the app/Providers/EventServiceProvider.php file

<?php

namespace App\Providers;

use Illuminate\Auth\Events\Registered;
use Illuminate\Auth\Listeners\SendEmailVerificationNotification;
use Illuminate\Foundation\Support\Providers\EventServiceProvider as ServiceProvider;
use Illuminate\Support\Facades\Event;

class EventServiceProvider extends ServiceProvider
{
    /**
     * The event listener mappings for the application.
     *
     * @var array
     */
    protected $listen = [
        Registered::class => [
            SendEmailVerificationNotification::class,
        ],
        \SocialiteProviders\Manager\SocialiteWasCalled::class => [
        // ... other providers
        \SocialiteProviders\YouTube\YouTubeExtendSocialite::class.'@handle',
      ],
    ];

    /**
     * Register any events for your application.
     *
     * @return void
     */
    public function boot()
    {
        //
    }
}

Next we need to set the .env file and add the client secret, recorder URL and redirect URL

YOUTUBE_CLIENT_ID=
YOUTUBE_CLIENT_SECRET=
YOUTUBE_REDIRECT_URI="${APP_URL}/api/callback/youtube"
RECORDER_URL=

If you have worked with Laravel Socialite in the past then all of this is familiar. Finally we need to edit our routes/api.php file and add our two API routes for interacting with Youtube.

Route::get('/login/youtube', function (Request $request) {
  return Socialite::driver('youtube')->scopes(['https://www.googleapis.com/auth/youtube', 'https://www.googleapis.com/auth/youtube.upload', 'https://www.googleapis.com/auth/youtube.readonly'])->stateless()->redirect();
});

Route::get('/callback/youtube', function (Request $request) {
  $user = Socialite::driver('youtube')->stateless()->user();
  return redirect(env('RECORDER_URL').'/#/success?token='.$user->token);
});

The callback function redirects us to the web app and the reason for this will become clear next.

The Client Side

On the web app we need to create a Youtube class that will call all of the functions needed for interacting with the API. Not everything is implemented now and will be as the tutorial goes on. Create a new file src/classes/Youtube.js

export default class Youtube {
  constructor (token) {
    this.token = token
    this.broadcasts = []
  }
  async uploadVideo () {}
  async createNewLiveStream () {
    try {
    const broadcast = await this.createBroadcast()
    const livestream = await this.makeRequest('https://www.googleapis.com/youtube/v3/liveStreams?part=cdn&part=snippet', 'POST', {
      "snippet": {
        "title": "Getting Started With Screen Recorder"
      },
      "cdn": {
        "frameRate": "variable",
        "ingestionType": "dash",
        "resolution": "variable"
      }
    })
      console.log([broadcast, livestream])
      const bind = await this.bindBroadCast(broadcast.id, livestream.id)
      console.log(bind)
    } catch (e) {
      console.log(e)
    }
  }
  async getBroadcasts () {
    try {
      const res = await fetch('https://www.googleapis.com/youtube/v3/liveBroadcasts?broadcastStatus=all', {
        headers: {
          'Authorization': `Bearer ${this.token}`
        }
      })
      const results = await res.json()
      this.broadcasts = results.items
      console.log(this.broadcasts)
      return results
    } catch (e) {
      console.log(e)
    }
  }
  async createBroadcast () {
    try {
      const res = await this.makeRequest('https://youtube.googleapis.com/youtube/v3/liveBroadcasts?part=contentDetails&part=snippet&part=status','POST',{
      "snippet": {
        "scheduledStartTime": new Date(Date.now()).toISOString(),
        "title": "Getting Started With Screen Recorder"
      },
      "contentDetails": {
        "enableDvr": true,
        "enableAutoStart": true,
        "enableAutoStop": true
      },
      "status": {
        "privacyStatus": "unlisted",
      }
    })
    return res
    } catch (e) {
      console.log(e)
    }
  }
  async bindBroadCast (broadcastId, streamId) {
    const url = `https://www.googleapis.com/youtube/v3/liveBroadcasts/bind?id=${broadcastId}&part=snippet&streamId=${streamId}`
    try {
      const res = await this.makeRequest(url, 'POST', {})
      return res
    } catch (e) {
      console.log(e)
    }
  }
  async endBroadcast() {}
  async makeRequest(url, method, data) {
    try {
      const res = await fetch(url, {
        method: method, // *GET, POST, PUT, DELETE, etc.
        mode: 'cors', // no-cors, *cors, same-origin
        cache: 'no-cache',
        headers: {
          Authorization: `Bearer ${this.token}`
        },
        body: JSON.stringify(data)
      })
      const ret = await res.json()
      return ret
    } catch (e) {
      alert('There was an error with the request! Please try agin later.')
    }

  }
}

All of these methods are from the Live and Broadcasts APIs now we will grab the token and init our class! To do this we will create a button that when pressed will open up a new window call the Socialite endpoint, grab the token, close the window, and set the class. First we will create a vuex file and add it to the application open src/store/index.js

import Vue from 'vue'
import Vuex from 'vuex'
import Youtube from '../classes/Youtube'
Vue.use(Vuex)

export default new Vuex.Store({
  state: {
    yt: {}
  },
  mutations: {
    setYouTube (state, token) {
      state.yt = new Youtube(token)
    },
    streamToYouTube (state) {
      return state.yt.createNewLiveStream()
    },
    getBroadcasts (state) {
      return state.yt.getBroadcasts()
    },
    createBroadcast (state) {
      return state.yt.createNewLiveStream()
    }
  },
  actions: {
    setYouTube (context, token) {
      console.log(token)
      context.commit('setYouTube', token)
    },
    streamToYouTube (context) {
      context.commit('streamToYouTube')
    },
    getBroadcasts (context) {
      return context.commit('getBroadcasts')
    },
    createBroadcast (context) {
      context.commit('createBroadcast')
    }
  },
  getters: {
    getYoutube (state) {
      return state.yt
    }
  },
  modules: {
  }
})

We create a universal yt object in the state that represents our Youtube class and we will call the methods. Don’t forget to add the plugin

vue add vuex

Routing

The Youtube API use case requires us to provide a privacy policy so we need to add vue-router and make some new components for the pages.

vue add router

Now create a new file src/router/index.js

import Vue from 'vue'
import VueRouter from 'vue-router'
import Home from '../views/Home.vue'

Vue.use(VueRouter)

const routes = [
  {
    path: '/',
    name: 'Home',
    component: Home
  },
  {
    path: '/about',
    name: 'About',
    // route level code-splitting
    // this generates a separate chunk (about.[hash].js) for this route
    // which is lazy-loaded when the route is visited.
    component: () => import(/* webpackChunkName: "about" */ '../views/About.vue')
  },
  {
    path: '/privacy',
    name: 'Privacy',
    // route level code-splitting
    // this generates a separate chunk (about.[hash].js) for this route
    // which is lazy-loaded when the route is visited.
    component: () => import(/* webpackChunkName: "about" */ '../views/Privacy.vue')
  },
  {
    path: '/terms',
    name: 'TOS',
    // route level code-splitting
    // this generates a separate chunk (about.[hash].js) for this route
    // which is lazy-loaded when the route is visited.
    component: () => import(/* webpackChunkName: "about" */ '../views/Terms.vue')
  },
  {
    path: '/success',
    name: 'Success',
    // route level code-splitting
    // this generates a separate chunk (about.[hash].js) for this route
    // which is lazy-loaded when the route is visited.
    component: () => import(/* webpackChunkName: "about" */ '../views/Success.vue')
  }
]

const router = new VueRouter({
  routes
})

export default router

The About, Terms and Privacy pages are simply templates with text in them showing the various content needed and for sake of brevity I won’t show those contents as there is no javascript. The Success page however is very important and is responsible for grabbing the Youtube token from the Laravel callback. Let’s explore it src/views/Success.vue

<template>
  <div class="Success">
    <img alt="Screen Record Pro" src="../assets/logo.svg" class="animate-fade-slow object-contain h-80 w-full">
    <h2 class="text-sm tracking-wide font-medium text-gray-500 uppercase">Youtube Connected!</h2>
    <p class="text-base font-light leading-relaxed mt-0 mb-4 text-gray-800">
    Thank you for authenticating with Screen Record Pro! This window will close automatically
    </p>
  </div>
</template>
<script>
import { mapActions, mapGetters } from 'vuex'
export default {
  name: 'Success',
  mounted () {
    window.localStorage.setItem('youtube_key', this.$route.query.token)
    window.opener.postMessage({youtube_token: this.$route.query.token}, '*')
    window.close()
  },
  computed: {
    ...mapGetters(['getYoutube'])
  },
  methods : {
    ...mapActions(['setYouTube'])
  }
}
</script>

Once the page mountes we use localstorage API to set the youtube_key to the token query parameter. This parameter is set when the redirect is called in the /callback/youtube API endpoint. This window will be a popup window, and we need to send a message to the window that opened this window (make sense?). For this we use the window.opener.postMessage() function. We will listen for this message on the home screen and set the youtube object. Now that we have made our router and vuex object we need to redo the main.js and set our Vue object with them. open up main.js

import Vue from 'vue'
import App from './App.vue'
import VueTailwind from 'vue-tailwind'
import Ads from 'vue-google-adsense'
import VueGtag from "vue-gtag";
import "tailwindcss/tailwind.css"
import router from './router'
import store from './store'
Vue.use(VueGtag, {
  config: { id: "UA-xxxxxxx" }
});

Vue.use(require('vue-script2'))

Vue.use(Ads.Adsense)
const settings = {
  TInput: {
    classes: 'form-input border-2 text-gray-700',
    variants: {
      error: 'form-input border-2 border-red-300 bg-red-100',
      // ... Infinite variants
    }
  },
TButton: {
    classes: 'rounded-lg border block inline-flex items-center justify-center block px-4 py-2 transition duration-100 ease-in-out focus:border-blue-500 focus:ring-2 focus:ring-blue-500 focus:outline-none focus:ring-opacity-50 disabled:opacity-50 disabled:cursor-not-allowed',
    variants: {
      secondary: 'rounded-lg border block inline-flex items-center justify-center bg-purple-500 border-purple-500 hover:bg-purple-600 hover:border-purple-600',
    }
  },
  TAlert: {
    classes: {
      wrapper: 'rounded bg-blue-100 p-4 flex text-sm border-l-4 border-blue-500',
      body: 'flex-grow text-blue-700',
      close: 'text-blue-700 hover:text-blue-500 hover:bg-blue-200 ml-4 rounded',
      closeIcon: 'h-5 w-5 fill-current'
    },
    variants: {
      danger: {
        wrapper: 'rounded bg-red-100 p-4 flex text-sm border-l-4 border-red-500',
        body: 'flex-grow text-red-700',
        close: 'text-red-700 hover:text-red-500 hover:bg-red-200 ml-4 rounded'
      },
      // ... Infinite variants
    }
  },
  // ... The rest of the components
}

Vue.use(VueTailwind, settings)
Vue.config.productionTip = false

new Vue({
  router,
  store,
  render: h => h(App)
}).$mount('#app')

Lastly we need to open the src/views/Home.vue file and edit our application. When it mounts we need to set a listener for message and call the setYoutube method. If the localstorage is already set then we don’t show the button for connecting. If the user is connected then they click a button and it creates a live stream.

<template>
  <div id="app">
    <img alt="Screen Record Pro" src="../assets/logo.svg" class="animate-fade-slow object-contain h-80 w-full">
    <h2 class="text-sm tracking-wide font-medium text-gray-500 uppercase">Free Online Screen Recorder</h2>
    <p class="text-base font-light leading-relaxed mt-0 mb-4 text-gray-800">
    Free online screen recorder by J Computer Solutions LLC that allows you to
    record your screen including microphone audio and save the file to your desktop.
    No download required, use this progressive web app in the browser!
    J Computer Solutions LLC provides the #1 free online screen capture software! Due to current
    browser limitations, this software can only be used on desktop. Please ensure you are on a Windows, MacOS or Linux
    computer using Chrome, Firefox or Safari!
    </p>
    <h1 class="text-3xl font-large text-gray-500 uppercase">To Date We Have Processed: <strong class="animate-pulse text-3xl font-large text-red-500">{{bytes_processed}}</strong> bytes worth of video data!</h1>
    <t-modal
      header="Email Recording"
      ref="modal"
    >
  <t-input v-model="sendEmail" placeholder="Email Address" name="send-email" />
  <template v-slot:footer>
    <div class="flex justify-between">
      <t-button type="button" @click="$refs.modal.hide()">
        Cancel
      </t-button>
      <t-button type="button" @click="emailFile">
        Send File
      </t-button>
    </div>
  </template>
</t-modal>
<div class="mt-5 mb-5">
  <t-button v-on:click="connectToYoutube" v-if="!youtube_ready"> Connect To YouTube 📺</t-button>
</div>
<div class="mt-5 mb-5">
  <t-button v-on:click="getStream" v-if="!isRecording" v-show="canRecord" class="ml-10"> Start Recording 🎥</t-button>
    <div v-else>
      <t-button v-on:click="streamToYouTube" @click="createBroadcast" v-if="youtube_ready">Stream To Youtube 📺</t-button>

      <t-button v-on:click="stopStream"> Stop Screen Recording ❌ </t-button>
      </div>
    <t-button v-on:click="download" v-if="fileReady" class="ml-10"> Download Recording 🎬</t-button>
    <t-button  v-on:click="$refs.modal.show()" autoPictureInPicture="true" v-if="fileReady" class="ml-10"> Email Recording 📧</t-button>
</div>
<div class="mt-5" v-show="fileReady">
  <video class="center" height="500px"  controls  id="video" ></video>
</div>
<Adsense
  data-ad-client="ca-pub-7023023584987784"
  data-ad-slot="8876566362">
</Adsense>
<footer>
  <cookie-law theme="base"></cookie-law>
</footer>
  </div>
</template>

<script>
 import CookieLaw from 'vue-cookie-law'
 import { mapGetters, mapActions } from 'vuex'
export default {
  name: 'Home',
  components: { CookieLaw },
  data() {
    return {
      youtube_ready: false,
      canRecord: true,
      isRecording: false,
      options: {
        audioBitsPerSecond: 128000,
        videoBitsPerSecond: 2500000,
        mimeType: 'video/webm; codecs=vp9'
      },
      displayOptions: {
      video: {
        cursor: "always"
      },
      audio: {
          echoCancellation: true,
          noiseSuppression: true,
          sampleRate: 44100
        }
      },
      mediaRecorder: {},
      stream: {},
      recordedChunks: [],
      file: null,
      fileReady: false,
      sendEmail: '',
      url: 'https://screen-recorder-micro.jcompsolu.com',
      bytes_processed: 0,
    }
  },
  methods: {
    ...mapActions(['setYouTube', 'streamToYouTube', 'getBroadcasts', 'createBroadcast']),
    async connectToYoutube () {
      window.open(`${this.url}/api/login/youtube`, "YouTube Login", 'width=800, height=600');
    },
    async emailFile () {
      try {
        const fd = new FormData();
        fd.append('video', this.file)
        fd.append('email', this.sendEmail)
        await fetch(`${this.url}/api/email-file`, {
          method: 'post',
          body: fd
        })
        this.$gtag.event('email-file-data', {
          'name': this.file.name,
          'size': this.file.size,
          'email': this.sendEmail
        })
      this.$refs.modal.hide()
      this.showNotification()
      } catch (err) {
        alert(err.message)
      }
    },
    async uploadFileData () {
      try {
        const fd = new FormData();
        fd.append('video', this.file)
        await fetch(`${this.url}/api/upload-file-data`, {
          method: 'post',
          body: fd
        })
        this.$gtag.event('upload-file-data', {
          'name': this.file.name,
          'size': this.file.size
        })
      } catch (e) {
        this.$gtag.exception('application-error', e)
      }
    },
    setFile (){
      this.file = new Blob(this.recordedChunks, {
        type: "video/webm; codecs=vp9"
      });
      this.$gtag.event('file-set', {
        'event_category' : 'Files',
        'event_label' : 'File Set'
      })
      const newObjectUrl = URL.createObjectURL( this.file );
      const videoEl = document.getElementById('video')
      // URLs created by `URL.createObjectURL` always use the `blob:` URI scheme: https://w3c.github.io/FileAPI/#dfn-createObjectURL
      const oldObjectUrl = videoEl.src;
      if( oldObjectUrl && oldObjectUrl.startsWith('blob:') ) {
          // It is very important to revoke the previous ObjectURL to prevent memory leaks. Un-set the `src` first.
          // See https://developer.mozilla.org/en-US/docs/Web/API/URL/createObjectURL

          videoEl.src = ''; // <-- Un-set the src property *before* revoking the object URL.
          URL.revokeObjectURL( oldObjectUrl );
      }

      // Then set the new URL:
      videoEl.src = newObjectUrl;

      // And load it:
      videoEl.load();
      this.$gtag.event('file-loaded', {
        'event_category' : 'Files',
        'event_label' : 'File Loaded'
      })
      videoEl.onloadedmetadata = () => {
        this.uploadFileData()
        this.getBytes()
      }
      videoEl.onPlay = () => {
        this.$gtag.event('file-played', {
          'event_category' : 'Files',
          'event_label' : 'File Played'
        })
      }

      this.fileReady = true
    },
    download: function(){
    var url = URL.createObjectURL(this.file);
    var a = document.createElement("a");
    document.body.appendChild(a);
    a.style = "display: none";
    a.href = url;
    var d = new Date();
    var n = d.toUTCString();
    a.download = n+".webm";
    a.click();
    window.URL.revokeObjectURL(url);
    this.recordedChunks = []
    this.showNotification()
    this.$gtag.event('file-downloaded', {
      'event_category' : 'Files',
      'event_label' : 'File Downloaded'
    })
    },
    showNotification: function() {
      this.$gtag.event('notification-shown', {})
      var img = '/logo.png';
      var text = 'If you enjoyed this product consider donating!';
      navigator.serviceWorker.getRegistration().then(function(reg) {
        reg.showNotification('Screen Record Pro', { body: text, icon: img, requireInteraction: true,
        actions: [
            {action: 'donate', title: 'Donate',icon: 'logo.png'},
            {action: 'close', title: 'Close',icon: 'logo.png'}
            ]
              });
      });
    },
    handleDataAvailable: function(event) {
      if (event.data.size > 0) {
        this.recordedChunks.push(event.data);
        this.isRecording = false
        this.setFile()
      } else {
        // ...
      }
    },
    async registerPeriodicNewsCheck () {
      const registration = await navigator.serviceWorker.ready;
      try {
        await registration.periodicSync.register('get-latest-stats', {
          minInterval: 24 * 60 * 60 * 1000,
        });
      } catch (e) {
        this.$gtag.exception('application-error', e)
      }
    },
    stopStream: function() {
      this.mediaRecorder.stop()
      this.mediaRecorder = null
      this.stream.getTracks()
      .forEach(track => track.stop())
      this.stream = null
      this.$gtag.event('stream-stop', {
        'event_category' : 'Streams',
        'event_label' : 'Stream Stopped'
      })
    },
    getStream: async function() {
    try {
        this.stream =  await navigator.mediaDevices.getDisplayMedia(this.displayOptions);
        this.stream.getVideoTracks()[0].onended = () => { // Click on browser UI stop sharing button
          this.stream.getTracks()
          .forEach(track => track.stop())
        };
        const audioStream = await navigator.mediaDevices.getUserMedia({audio: true}).catch(e => {throw e});
        const audioTrack = audioStream.getAudioTracks();
        // add audio track
        this.stream.addTrack(audioTrack[0])
        this.mediaRecorder = new MediaRecorder(this.stream)
        this.mediaRecorder.ondataavailable = this.handleDataAvailable;
        this.mediaRecorder.start();
        this.isRecording = true
        this.$gtag.event('stream-start', {
          'event_category' : 'Streams',
          'event_label' : 'Stream Started'
        })
      } catch(e) {
        this.isRecording = false
        this.$gtag.exception('application-error', e)
      }
    },
    async getBytes () {
      const result = await fetch(`${this.url}/api/get-stats`)
      this.bytes_processed = await result.json()
    },
    skipDownloadUseCache () {
      this.bytes_processed = localStorage.bytes_processed
    }

  },
  mounted() {
    const ctx = this
    window.addEventListener("message", function (e) {
      if (typeof e.data.youtube_token !== 'undefined') {
        console.log(e.data.youtube_token)
        ctx.setYouTube(e.data.youtube_token)
        ctx.youtube_ready = true
      }
    })
    this.$gtag.pageview("/");
    const ua = navigator.userAgent;
    if (/(tablet|ipad|playbook|silk)|(android(?!.*mobi))/i.test(ua) || /Mobile|Android|iP(hone|od)|IEMobile|BlackBerry|Kindle|Silk-Accelerated|(hpw|web)OS|Opera M(obi|ini)/.test(ua)) {
        alert('You must be on desktop to use this application!')
        this.canRecord = false
        this.$gtag.exception('mobile-device-attempt', {})
    }
    let that = this
    if (Notification.permission !== 'denied' || Notification.permission === "default") {
      try {
        Notification.requestPermission().then(function(result) {
          that.$gtag.event('accepted-notifications', {
            'event_category' : 'Notifications',
            'event_label' : 'Notification accepted'
          })
          console.log(result)
        });
      } catch (error) {
          // Safari doesn't return a promise for requestPermissions and it
          // throws a TypeError. It takes a callback as the first argument
          // instead.
          if (error instanceof TypeError) {
              Notification.requestPermission((result) => {
                that.$gtag.event('accepted-notifications', {
                  'event_category' : 'Notifications',
                  'event_label' : 'Notification accepted'
                })
                console.log(result)
              });
          } else {
            this.$gtag.exception('notification-error', error)
            throw error;
          }
      }

    }
  },
  computed: {
    ...mapGetters(['getYoutube'])
  },
  async created () {
    try {
      if(localStorage.youtube_key != null) {
        this.setYouTube(localStorage.youtube_key)
        console.log(this.getBroadcasts())
        this.youtube_ready = true
      }
      const registration = await navigator.serviceWorker.ready
      const tags = await registration.periodicSync.getTags()
      navigator.serviceWorker.addEventListener('message', event => {
        this.bytes_processed = event.data
      });
      if (tags.includes('get-latest-stats')) {
          // this.skipDownloadUseCache()
      } else {
        this.getBytes()
      }
    } catch (e) {
      this.$gtag.exception('application-error', e)
      this.getBytes()
    }
  }
}
</script>

<style>
#app {
  font-family: Avenir, Helvetica, Arial, sans-serif;
  -webkit-font-smoothing: antialiased;
  -moz-osx-font-smoothing: grayscale;
  text-align: center;
  color: #2c3e50;
  margin-top: 60px;
}
:picture-in-picture {
  box-shadow: 0 0 0 5px red;
  height: 500px;
  width: 500px;
}
</style>
OAuth Screen
We can now stream using the Youtube live api
Now we can create a live stream!

We created the stream but now we need to send our packets via MPEG-DASH! In the next series, we create the dash service and send our packets to Youtube for ingestion! Be sure to like and share this article and subscribe to my Youtube channel! Also, be sure to check out the source code for the API and the PWA! Lastly, join the discord and connect with software engineers and entrepreneurs alike!

Posted on 1 Comment

Jyrone Parker Live – Intro Into HTML5

[youtube width=”100%” height=”100%” autoplay=”false”]https://www.youtube.com/watch?v=OGzV3D10LjE[/youtube]

What Is HTML5?

HTML5 is the newest standard of HTML (Hypertext Markup Language) which is the language used to define webpages. All webpages, including the one you are using to read this article is made up of HTML. HTML documents are text files that end with an extension .htm or .html HTML documents are made up of opening and closing tags that usually follow the convention

<tag>
Stuff between tag
</tag>

I say usually because as you will see in the above video some tags don’t require a closing tag. HTML can also be used in conjunction with CSS and Javascript to create stunning mobile apps using hybrid development. In this video I explain what HTML is, how to create a simple webpage and good resources to follow through with. If you haven’t already subscribe to my Youtube channel to get real time updates on when I go live!

Posted on Leave a comment

Adding Javascript To About Me Page

[callaction url=”https://www.youtube.com/user/JPlaya01″ background_color=”#333333″ text_color=”#ffffff” button_text=”Go Now” button_background_color=”#e64429″]Subscribe To My Youtube Page[/callaction]

Making About Me Interactive

If you have been following this series thus far then you should have an About Me page that looks similar to the following:

About Me Page Pre Javascript
About Me page before javascript implementation

So far we have added the HTML, integrated Bootstrap and added some custom CSS. This blog will serve as an introduction to Javascript. Javascript is the programmig language of the web. HTML defines the content, CSS defines the layout, Javascript defines the behavior. In this tutorial I will introduce you to the high level concepts of Javascript with fine tuned examples later to come.

Random Color Generator

To get you started on the basics of Javascript I will take you through creating a random color generator that will change the background color. This process will require adding a new button to the HTML as well as a new tag <script>. It will also involve an external script that contains the logic for changing the color. Below your phone number add the following HTML

<button id="color-change" class="btn btn-default">Change Background Color</button>

Nothing special the javascript will use this button later. Now create a new folder, call it js/ and inside create a new file called main.js. Inside this newly created file add the following contents.

window.onload = function(){
  document.getElementById('color-change').onclick = function(){
    /* In HTML colors are represented in a 6-digit hexadecimal string
    The values range from 0-9 and A-F*/
    var letters = '0123456789ABCDEF';
    //Colors in HTML are always prepended with a #
    var color = '#';
    //Loop 6 times and randomly select a character from the letters variable
    //Then concatanate to the color string
    for (var i = 0; i < 6; i++ ) {
        color += letters[Math.floor(Math.random() * 16)];
    }
    //set the background color of <body> to the random color
    document.body.style.backgroundColor = color;
  };
};

I’m going to break this down top to bottom:

  • window.onload – The window object represents an open window in a browser, onload is a javascript event that runs the specified function once everything on the page loads.
  • function() – A JavaScript function is a block of code designed to perform a particular task.
  • document.getElementById(‘color-change’)- get the button we just created based on it’s ID
  • .onclick = function(){ – onClick is a Javascript event that fires when an element is *WAIT FOR IT…..* CLICKED!
  • var letters = ‘0123456789ABCDEF’; – a variable called letters that holds all the possible values for a HTML color string
  • var color = ‘#’; – In HTML color strings always start with # followed by 6 characters. Here we initialize a color string.
  • for (var i = 0; i < 6; i++ ) { – A Javascript loop that runs 6 times and evaluates everything between {}
  • color += letters[Math.floor(Math.random() * 16)]; – Remember that color string and letters string? Here we add (concatenate) onto
    the color string and select a random character from the letters string
  • document.body.style.backgroundColor = color; – Set the background color of <body> to the newly generated color.

Your page should look similar to this:

About Me Page Newly Added Button

If you click the button your background should change to a random color like so:
About Me Page Random Color

Conclusion

I know it isn’t terribly fancy but you just wrote your first web app! It’s not that difficult is it?! Continuing forth I will add more advanced features to teach more in-depth skills. If you haven’t already please subscribe to my blog via email and feel free to leave any comments below!

Posted on 1 Comment

A Simple About Me Page

[callaction url=”https://www.youtube.com/user/JPlaya01″ background_color=”#333333″ text_color=”#ffffff” button_text=”Go Now” button_background_color=”#e64429″]Subscribe To My Youtube Page[/callaction]

About Me Refresher

In this next iteration of my HTML5 series, we are going to start out with a simple about me page. So let’s start off where we left shall we? Last time we spoke I left you all with this snippet:


<!DOCTYPE html>
<html>
<head>
<title>About Jyrone Parker</title>
</head>
<body>
<h1>Hi I Am Jyrone Parker</h1>
<img src="https://en.gravatar.com/userimage/70717632/53adbdecac04d4ffbe3449993c901a73.jpg?size=200"/>
<p>
I am CEO and lead engineer at J Computer Solutions LLC, a consultancy that places software and DevOps engineers at companies in need.
</p>
</body>
</html>

In a nutshell this is the basis for a web page but it’s not terribly exciting and even more so it’s ugly as all hell. So let’s change that. I’m a functionality guy before a design guy so I’m going to write all the components I want for my about page.

Adding Audio

Who doesn’t want a little background music? With HTML you can add links to local or remote audio files. I grabbed some cool beat from freesounds.org http://freesound.org/data/previews/353/353234_3162775-lq.mp3

<audio loop autoplay> <source src="http://freesound.org/data/previews/353/353234_3162775-lq.mp3" type="audio/mpeg"> Your browser does not support the audio element. </audio>

Substitute the src link with whatever audio source you want and place the entire snippet above the <img> tag. If you load your page in the browser you will hear your song autoplay.

Add Phone Number

I want people to know how to get a hold of me and I want search engines to know me. We can achieve two in one. HTML5 introduced a new tel protocol, which enables devices such as Android and iOS to open their call applications and make the phone calls. Search engines also use the Schema.org to create rich results (if you don’t know what I mean Google a celebrity and see all the extra flashy stuff comes up) via microdata. Copy and modify the following snippet to fit your needs


<div itemscope itemtype="http://schema.org/LocalBusiness">
<h1 itemprop="name">Contact Me</h1>
Phone: <span itemprop="telephone"><a href="tel:+18594024863">
859-402-4863</a></span>
</div>

In the feature I plan on doing a comprehensive tutorial on microdata and schema.org tags, but for now if you want to read up on it click the link above. Here is a brief breakdown of the following tags and attributes:

  • <div> – tag defines a division or a section in an HTML document.
  • itemscope – By adding itemscope, you are specifying that the HTML contained in the <div>...</div> block is about a particular item (Schema.org).
  • itemtype – You can specify the type of item using the itemtype attribute immediately after the itemscope(Schema.org)
  • itemprop – To label properties of an item, use the itemprop attribute (Schema.org).
  • <h1> – tag defines a heading
  • <span> – tag is used to group inline-elements in a document
  • <a> – tag is used to define a link
  • href – attribute specifies the link’s destination:

*HINT: You can do the same thing with email just change the href link to mailto:<email>

Conclusion

That’s pretty much all of the content I want my about me page so this is where I am going to stop. HTML5 is easy to learn it’s 99.9999% learning the tags and attributes, which come with time and practice (and following my tutorials). The next tutorial will start the beginning of the meat of front end web development CSS (Cascading Style Sheets) which is the language that allows us to style our webpages (currently ours is boring). If you haven’t subscribe to my blog via email, and please share this with anyone who you believe would benefit! Be sure to see the updated code here!

Posted on Leave a comment

A Primer To HTML

[callaction url=”https://www.youtube.com/user/JPlaya01″ background_color=”#333333″ text_color=”#ffffff” button_text=”Go Now” button_background_color=”#e64429″]Subscribe To My Youtube Page[/callaction]

What Is HTML?

HTML is short for Hyper Text Markup Language. It is the language that describes web pages. Every web page is made up of HTML if you don’t believe me right-click on any webpage and select “view source”; You will see the HTML that makes up that particular page. HTML consists of tags usually in the form of <tag>CONTENT </tag>. Below is an example of a minimum HTML document or webpage


<!DOCTYPE html>


<html>


<head>
<title> My First Webpage! </title>
</head>
<body>
HELLO WORLD!
</body>
</html>


If you copy and paste that into an empty document and save it as index.html. Now launch your web browser of choice and open the file you just created. You should see the words “HELLO WORLD!” pop up on the screen with a title of “My First Webpage”. Now let’s break down what each tag means

  • The <!DOCTYPE html> declaration defines this document to be HTML5
  • The text between <html> and </html> describes an HTML document
  • The text between <head> and </head> provides information about the document
  • The text between <title> and </title> provides a title for the document
  • The text between <body> and </body> describes the visible page content

A simple way I like to think about it is the head section is used by the browser and search engines, where the content of the body is what the user of the browser will see and interact with.

Useful Tags

HTML has hundreds of tags, the vast majority of which you will probably never use, however here are a few you should get really familiar with.

  • <p> – Defines a paragraph
  • <h1> to <h6> – Define headings with h1 being the most important heading, to h6 being the least
  • <a href=”http://someurl”> – Defines a link tag where href= the remote link
  • <img src=”/link/to/image”> – Defines an image
  • <video src=”/link/to/video”> – Defines a video
  • <audio src=”/link/to/audio”> – Defines an audio source

Of course you have full range to look at all the tag definitions here. Next we will create a simple about me page, utilizing git in the process! So if you aren’t familiar with git you should start here. Also don’t forget if you haven’t already subscribe to my blog via email to get real-time updates on whenever I post! Be sure to leave comments below they are greatly appreciated!