Posted on 1 Comment

Jyrone Parker Live – Intro Into HTML5

[youtube width=”100%” height=”100%” autoplay=”false”]https://www.youtube.com/watch?v=OGzV3D10LjE[/youtube]

What Is HTML5?

HTML5 is the newest standard of HTML (Hypertext Markup Language) which is the language used to define webpages. All webpages, including the one you are using to read this article is made up of HTML. HTML documents are text files that end with an extension .htm or .html HTML documents are made up of opening and closing tags that usually follow the convention

<tag>
Stuff between tag
</tag>

I say usually because as you will see in the above video some tags don’t require a closing tag. HTML can also be used in conjunction with CSS and Javascript to create stunning mobile apps using hybrid development. In this video I explain what HTML is, how to create a simple webpage and good resources to follow through with. If you haven’t already subscribe to my Youtube channel to get real time updates on when I go live!

Posted on Leave a comment

Jyrone Parker Live – Buidling Our First PHP Application (Fibonacci)

[youtube width=”100%” height=”100%” autoplay=”false”]https://www.youtube.com/watch?v=-77pgzODEQI[/youtube]

What Better Assignment Than Fibonacci?

Since I am finished with the beginning into to PHP videos I found it imperative to do a stream putting everything together and showing you how easy it is to write an app. In today’s live stream I create a Fibonacci app, for those who are not familiar with the Fibonacci sequence there is a great wiki here. In this application I demonstrate variables, control flow logic, exception handling, and function design. All my code can be seen on my Github here or you can view it below in text or on video

<?php
$input = '';
$running = true;
while($running){
try{
getInput($input);
echo calculateFib($input) . "\n";
}
catch(Exception $e){
echo "Message: {$e->getMessage()}";
}
}
function getInput(&$input){
$input = readline("Please input your number or q to quit: ");
};
function calculateFib($input){
if(intval($input) < 0){
throw new Exception("Input must be greater than zero! \n");
}
elseif($input === 'q' || $input === 'Q'){
exit();
}
if(intval($input) === 0 || intval($input) === 1){
return 1;
}
else{
return calculateFib($input-1) + calculateFib($input - 2);
}
};
?>


Posted on Leave a comment

Come See Treat Me At Home @ TNW 2017


Treat Me At Home Has Been Selected

To attend The Next Web conference 2017 in Amsterdam May 18 -19 2017. This is both a humbling and an amazing opportunity to connect and network with over 15,000 entrepreneurs, developers, marketing managers, investors, CEOs and policymakers from around the world. Treat Me At Home has been awarded the Boost 2017 package by TNW in conjunction with Radix. This year’s conference will also be covered by over 150 major and independent media outlets bringing even more global coverage to my latest startup. To those who have followed it’s development thus far should feel as excited as I do because your participation has everything to do with this.

What Is Treat Me At Home


For those whose’s first time hearing about Treat Me At Home for the first time, allow me to explain what it is. Treat Me At Home is an on-demand SAAS app that connects service providers with those who want services performed at home. Imagine any task you would like performed at home: massage, tutoring, babysitting, car washing, haircut, etc; Now put all those services into one platform and you have Treat Me At Home. What’s even better is that anyone can sign up to become a service provider, given that they are over 18 and live in a country that supports Stripe connected accounts! What’s even better is that it is 100% free to sign up as a provider and as a customer. Providers get to set their own prices, the locations they serve, and the times that they serve. With a service fee applied on top of what the provider charges, this allows the provider to retain the full amount they ask! Providers can offer subscriptions and coupons to their customers as well making great marketing tools for the provider. Customers get reward points after every purchase that can be used to try new services or to pay the providers they already love.  Everyone who is reading this I implore them to sign up for Treat Me At Home here whether you have a skill you want to advertise and get paid for, or you want try some of these service providers for yourself just remember: Why go out when you can Treat Me At Home?
 

Can’t Make It But Want To Support?

I will be live streaming the event on my Youtube channel at every possible opportunity. If you haven’t already subscribed to my Youtube channel do so now to get real-time notifications whenever I upload or broadcast a new video.

Another way you can support if you don’t want to sign up as a provider, is to book me for 1-on-1 private programming tutoring sessions. These sessions go deeper than these blog posts and you will emerge strongly proficient in the software development area of your choice (web, mobile). In fact I am offering a 25% off coupon good for any subscription that I offer on my page tutor-25 https://treatmeathome.online/providers/mastashake08. Once again thank you all who have supported me thus far, and thank you all who are just joining!

Posted on Leave a comment

Jyrone Parker Live – Staying Ready For Entrepreneurial Opportunities

[success]Have You Checked Out The Shop Yet?[/success]
[youtube width=”100%” height=”100%” autoplay=”false”]https://www.youtube.com/watch?v=tK9NKFanOA4[/youtube]

Staying Ready For Entrepreneurial Opportunities

 
My latest live stream video, I speak on staying ready for software related entrepreneurial opportunities. Developing this non-technical skill is vital to the success of your self-employment venture.  The video above breaks it down better but it boils down to these simple principles:

  1. Identify A Problem

    Opportunities are all around your community in the form of problems. It is your job as the entrepreneur to find out what these problems are, and create some software to fix them.

  2. Create A Quick Solution

    After you identify the opportunities/problems work like a dog to create an MVP (minimum viable product) to address the concerns,  and give it those who need it.

  3. Improve That Solution Often

    Your work isn’t finished after you publish the MVP, in fact it hasn’t even begun! Iterate often, preferably every day and add features that will enhance your body of work.

Don’t forget to subscribe to this blog and to my Youtube page to get real time updates when I go live, and when I post new blog content!

Posted on 4 Comments

Writing A Real Time Location Service – Routes and Controller Logic

Routes and Controllers

If you are following along from the previous tutorial then you should have the following page implemented on the front end:

Home screen
Your screen should look like this

In this part of the tutorial I will show you how to implement the routes and the back-end controller logic. The application has two main controllers that I will be implementing:

  • ActivationController for registering and activating new devices
  • LocationController for storing and broadcasting GPS locations

but before we get into that let’s first create our routes, open up the routes/web.php file and replace the contents with this:


<?php
/*
|--------------------------------------------------------------------------
| Web Routes
|--------------------------------------------------------------------------
|
| Here is where you can register web routes for your application. These
| routes are loaded by the RouteServiceProvider within a group which
| contains the "web" middleware group. Now create something great!
|
*/
Route::get('/', function () {
return view('welcome');
});
Auth::routes();
Route::get('/home', 'HomeController@index');
/* Commands */
Route::group(['prefix' => 'command','middleware' => 'auth'], function(){
Route::get('start-gps', 'LocationController@startGps');
Route::get('stop-gps','LocationController@stopGps');
});
/* Activation */
Route::group(['prefix' => 'activation','middleware' => 'auth'], function(){
Route::get('/','ActivationController@getView');
Route::post('/','ActivationController@activateDevice');
Route::post('/register','ActivationController@registerDevice');
});ro

 
and open up routes/api.php and replace the contents with this:


<?php
use Illuminate\Http\Request;
/*
|--------------------------------------------------------------------------
| API Routes
|--------------------------------------------------------------------------
|
| Here is where you can register API routes for your application. These
| routes are loaded by the RouteServiceProvider within a group which
| is assigned the "api" middleware group. Enjoy building your API!
|
*/
Route::resource('location','LocationController')

 
You may be wondering why I am editing two separate route files and the reason being is becasue the routes/api.php file is what the Android application will be interacting with and it’s just good practice to keep API code separate from main code. As you can see there are two route groups one for activation and one for commands. In the commands group I have a start-gps and a stop-gps route. These are going to do what their name implies and instruct the Android device to either start sending GPS data to the server, or to stop it. Next in the activation group there is a get route / to return the activation view, and a post route  / to activate the device, lastly there is a post route to register a new device. Basically the Android device will call register when the app opens for the first time, this will generate a code that the user has to enter at the activation screen to give the web app permission to start collecting data anonymously. The routes/api.php file has a resourceful route called location that will call the CRUD functions on the LocationController, although right now I am only implementing the store() function (gotta give you guys SOME homework). If you run php artisan route:list in your terminal you should see the following routes:

 +--------+-----------+------------------------------+------------------+------------------------------------------------------------------------+------------+ | Domain | Method | URI | Name | Action | Middleware | +--------+-----------+------------------------------+------------------+------------------------------------------------------------------------+------------+ | | GET|HEAD | / | | Closure | web | | | POST | activation | | App\Http\Controllers\ActivationController@activateDevice | web,auth | | | GET|HEAD | activation | | App\Http\Controllers\ActivationController@getView | web,auth | | | POST | activation/register | | App\Http\Controllers\ActivationController@registerDevice | web,auth | | | GET|HEAD | api/location | location.index | App\Http\Controllers\LocationController@index | api | | | POST | api/location | location.store | App\Http\Controllers\LocationController@store | api | | | GET|HEAD | api/location/create | location.create | App\Http\Controllers\LocationController@create | api | | | PUT|PATCH | api/location/{location} | location.update | App\Http\Controllers\LocationController@update | api | | | GET|HEAD | api/location/{location} | location.show | App\Http\Controllers\LocationController@show | api | | | DELETE | api/location/{location} | location.destroy | App\Http\Controllers\LocationController@destroy | api | | | GET|HEAD | api/location/{location}/edit | location.edit | App\Http\Controllers\LocationController@edit | api | | | GET|HEAD | command/start-gps/{id} | | App\Http\Controllers\LocationController@startGps | web,auth | | | GET|HEAD | command/stop-gps/{id}| | App\Http\Controllers\LocationController@stopGps | web,auth | | | GET|HEAD | home | | App\Http\Controllers\HomeController@index | web,auth | | | GET|HEAD | login | login | App\Http\Controllers\Auth\LoginController@showLoginForm | web,guest | | | POST | login | | App\Http\Controllers\Auth\LoginController@login | web,guest | | | POST | logout | logout | App\Http\Controllers\Auth\LoginController@logout | web | | | POST | password/email | | App\Http\Controllers\Auth\ForgotPasswordController@sendResetLinkEmail | web,guest | | | POST | password/reset | | App\Http\Controllers\Auth\ResetPasswordController@reset | web,guest | | | GET|HEAD | password/reset | | App\Http\Controllers\Auth\ForgotPasswordController@showLinkRequestForm | web,guest | | | GET|HEAD | password/reset/{token} | | App\Http\Controllers\Auth\ResetPasswordController@showResetForm | web,guest | | | POST | register | | App\Http\Controllers\Auth\RegisterController@register | web,guest | | | GET|HEAD | register | register | App\Http\Controllers\Auth\RegisterController@showRegistrationForm | web,guest | +--------+-----------+------------------------------+------------------+------------------------------------------------------------------------+------------+

Implementing The Controller

If you haven’t already created the controllers, please do so with the following commands:
php artisan make:controller LocationController
php artisan make:controller ActivationController
Let’s start with the ActivationController, open up app/Http/Controllers/ActivationController.php. This controller only has three functions getView(), activateDevice(), and registerDevice(), I described their functions above so instead of repeating myself I will post the code:

<?php namespace App\Http\Controllers; use Illuminate\Http\Request; use App\ActivationCode; use App\Device; class ActivationController extends Controller {  //  public function getView(){  return view('activation');  } public function activateDevice(Request $request){  $code = ActivationCode::where('code', $request->code)->first();  if ($code != null){  $device = Device::create([  'user_id' => $request->user()->id,  'uuid' => $code->uuid  ]);  }  return redirect('/home');y  } public function registerDevice(Request $request){  $code = ActivationCode::Create([  'uuid' => $request->uuid,  'code' => $request->code  ]);  } }

You may be wondering where the uuid and code is coming from. This uuid and the code are generated on the Android device when the app is opened for the first time. This uuid is what maps the app to each device, while the code is shown to the user on the android device they then have to enter that code on the activation page to activate the device and start collecting data. The devices also listens on a Socket.IO channel that corresponds to their uuid so this is how we will talk to the Android devices. Next open up the LocationController and enter the following contents:

<?php namespace App\Http\Controllers; use Illuminate\Http\Request; use App\Location; use App\Device; class LocationController extends Controller {  // public function startGps($id){  $device = Device::findOrFail($id);  event(new \App\Events\SendCommand($device,'start-gps'));  } public function stopGps($id){  $device = Device::findOrFail($id);  event(new \App\Events\SendCommand($device,'stop-gps'));  }ns  public function store(Request $request){  $device = Device::where('uuid', $request->uuid)->first();  $location = Location::Create([  'long' => $request->long,  'lat' => $request->lat,  'device_id' => $device->id  ]);  event(new \App\Events\LocationCreated($location));  } }be i

All three of these functions are relying on Laravel events because they will be interacting with sockets, however we will actually be implementing the event logic in the next tutorial. Right now just understand that the sendCommand event will be responsible for telling the Android device to start or stop the GPS transponder and the LocationCreated event will tell the web browser the GPS coordinates in real time.
 

Conclusion

At this stage of the application you should have your front end logic complete and the controllers that power the back end. The last thing that has to be completed on the web end is the event and socket logic. If you haven’t already please subscribe not only to this blog but also my Youtube page (links to both on the right sidebar). Please leave any questions in the comment section below, and be sure to check the source code here.

Posted on Leave a comment

Jyrone Parker Live – Intro To Databases

[info]Check out the shop! [/info]

Intro To Databases

This live stream focuses on databases. A database is a container of imformation of sorts. It is what allows websites to be dynamic instead of static. Learn how to create a database, how to add tables to the database, how to update data in the database and how to delete data out of the database.
This stream is significant because it signifies the last beginner PHP live stream. Going forward we are creating PHP projects and building upon our knowledge set. Then I will go on and teach you guys some HTML/CSS/Javascript and move on to the Laravel framework.
As always if you haven’t yet subscribe to this blog using the widget on the right (bottom if on mobile) to get the latest updates from me.

Posted on Leave a comment

Jyrone Parker Live – Exceptions/Error Handling

[callaction url=”https://www.youtube.com/user/JPlaya01″ background_color=”#333333″ text_color=”#ffffff” button_text=”Go Now” button_background_color=”#e64429″]Subscribe To My Youtube Page[/callaction]
 

Exceptions and Error Handling

Continuing in the PHP tutorials I am showing you how to throw exceptions and handle errors in PHP. Often times when you are building software you have to account for when things go wrong. To ensure the best experience for your user, you want the application to gracefully handle those errors instead of crashing and leaving the user quizzically stumped. This is where exceptions come in. If you account for the cases where things might break and throw an exception then you can use the try/catch  control structure to catch said exceptions and handle them accordingly. A quick example is such:


<?php
function getRandomRange($min,$max){
if($min < 0){
throw new Exception("Min must be greater than 0");
}
if($max > 10000){
throw new Exception("Max must be less than 10000");
}
return rand($min,$max);
}
try{
/*
php exceptions.php $mix $max
*/
echo getRandomRange($argv[1],$argv[2]) . "\n";
}
catch(Exception $e){
echo $e->getMessage()."\n";
}
?>

Exceptions are part of the global PHP namespace and you can even create your own version on an exception that extends from the Exception class. If you didn’t get a chance to watch my live stream on the subject I talk about it more in depth, you can find it below
[youtube width=”100%” height=”100%” autoplay=”false”]https://www.youtube.com/embed/IkWK3qZ5Ix4[/youtube]

Posted on 3 Comments

Writing A Real Time Location Service – Views and Front End Logic

[callaction url=”https://www.youtube.com/user/JPlaya01″ background_color=”#333333″ text_color=”#ffffff” button_text=”Go Now” button_background_color=”#e64429″]Subscribe To My Youtube Page[/callaction]

Views

Thanks to the scaffolding done in the initial project setup, our login and registration views are already created, we just need to modify the home page and add a new page for device registration. Le’t create the activation view first, copy the home.blade.php file and name it activation.blade.php. This view will only have one form for taking in an activation code from an Android device replace the current contents with the following:


@extends('layouts.app')
@section('content')
<div class="container">
<div class="row">
<div class="col-md-8 col-md-offset-2">
<div class="panel panel-default">
<div class="panel-heading">Activate Device</div>
<div class="panel-body">
<form class="form-horizontal" role="form" method="POST" action="{{ url('/activate') }}">
{{ csrf_field() }}
<div class="form-group{{ $errors->has('name') ? ' has-error' : '' }}">
<label for="name" class="col-md-4 control-label">Code</label>
<div class="col-md-6">
<input id="name" type="text" class="form-control" name="code" value="{{ old('code') }}" required autofocus>
@if ($errors->has('name'))
<span class="help-block">
<strong>{{ $errors->first('activate') }}</strong>
</span>
@endif
</div>
</div>
<div class="form-group">
<div class="col-md-6 col-md-offset-4">
<button type="submit" class="btn btn-primary">
Activate
</button>
</div>
</div>
</form>.
</div>
</div>
</div>
</div>
</div>
@endsection

Don’t worry that the route hasn’t been created yet, we will get to that in a bit. In the mean time open up the home.blade.php file, this file is where the majority of the seen action is going to happen.  In this view the user will see a list of their devices with options to either start tracking GPS, stop tracking GPS, or delete the device. There is a Google map that will be used to show the position of the device and it will be updated in real time.


@extends('layouts.app')
@section('content')
<link rel="stylesheet" type="text/css" href="https://maxcdn.bootstrapcdn.com/font-awesome/4.7.0/css/font-awesome.min.css">
<style>
#map {
height: 400px;
width: 100%;
}
</style>
<script src="https://cdn.socket.io/socket.io-1.4.5.js"></script>
<script src="https://cdnjs.cloudflare.com/ajax/libs/jquery/3.1.1/jquery.js"></script>
<div class="container">
<div class="row">
<div class="col-md-8 col-md-offset-2">
<div class="panel panel-default">
<div class="panel-heading">Dashboard</div>
<div class="panel-body">
<table class="table">
<tbody>
@foreach(auth()->user()->devices as $device)
<tr>
<td>{{$device->uuid}}</td>
<td>
<button data-id="{{$device->id}}" class="btn btn-sm btn-default action-start-gps" id="start-gps"><i class="fa fa-map-marker" aria-hidden="true"></i></button>
<button data-id="{{$device->id}}" class="btn btn-sm btn-warning action-stop-gps" id="stop-gps"><i class="fa fa-map-marker" aria-hidden="true"></i></button>
<form method="post" action="/device/{{$device->id}}">
<input type="hidden" name="_method" value="DELETE">
<input type="hidden" name="_token" value="{{ csrf_token() }}">
<button data-id="{{$device->id}}" type="submit" class="btn btn-sm btn-danger" id="delete"><i class="fa fa-close" aria-hidden="true"></i></button>
</form>
</td>
</tr>
@endforeach
</tbody>
</table>
</div>
</div>
</div>
</div>
<div class="row">
<div class="col-md-8 col-md-offset-2">
<div class="panel panel-default">
<div class="panel-heading">Map</div>
<div class="panel-body">
<div id="map"></div>
</div>
</div>
</div>
</div>
</div>
<script>
var startGps = document.getElementsByClassName("action-start-gps");
var stopGps = document.getElementsByClassName("action-stop-gps");
for (var i = 0; i < startGps.length; i++) {
startGps[i].addEventListener('click', function(){
$.get("http://gps.app/command/start-gps/" + $(this).data('id'), function(data, status){
}, false);
});
}
for (var i = 0; i < stopGps.length; i++) {
stopGps[i].addEventListener('click', function(){
$.get("http://gps.app/command/stop-gps/" + $(this).data('id'), function(data, status){
}, false);
});
}
function initMap(lat,long) {
var uluru = {lat: -25.363, lng: 131.044};
var map = new google.maps.Map(document.getElementById('map'), {
zoom: 20,
center: uluru,
});
var marker = new google.maps.Marker({
position: uluru,
map: map
});
var socket = io.connect('http://gps.app:6001');
socket.on('gps', function (data) {
var center = {lat:Number(data.data.gps.lat),lng:Number(data.data.gps.long)};
@foreach(auth()->user()->devices as $device)
socket.on({{$device->id}}, function(data){
console.log(data);
});
@endforeach
marker.setPosition(center);
// using global variable:
map.panTo(center);
})
}
</script>
<script async defer
src="https://maps.googleapis.com/maps/api/js?key=AIzaSyBCDNt1biVyfA8h-eCZyZ69CKS6NNBCeEQ&callback=initMap">
</script>
@endsection

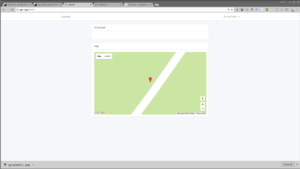
Home screen
Your screen should look like this

This is where the majority of the magic happens in the home view there are two divs. In the first div all of the associate devices will be shown in a tabular format with options to start GPS tracking, stop GPS tracking, and deleting the associated device. In the second div there is a Google map that will be used to visualize our devices (in order to use Google map services you must register for a key). The javascript code calls the routes needed to start and stop GPS tracking, as well as the Socket.IO code needed to update the Google map in real time ( for those who don’t know Socket.IO please refer here). Let’s take a closer look at the Socket.IO code and understand what is going on. When new data comes through the websocket channel, the marker’s latitude and longitude are updated and the map is recentered all without a page reload. With this bagged up the next step is to set up the routes and controller logic!

Posted on Leave a comment

Writing A Real Time Location Service – Models and Migrations

[callaction url=”https://www.youtube.com/user/JPlaya01″ background_color=”#333333″ text_color=”#ffffff” button_text=”Go Now” button_background_color=”#e64429″]Subscribe To My Youtube Page[/callaction]

Overview

In this programming series I am going to show you how to create a real time Laravel app that shows the location of an android device on a Google map in real time. This design can easily be applied to iOS and I will cover it at a later date. This project will be constructed of three parts:

  • Laravel app that handles registration/login, saves coordinates and timestamps
  • Node Application that talks to Laravel application and android devices
  • Android application that talks to node application

In this post I will create the Laravel + Node apps and I will write the Android app at a later post. The Laravel app is a run down version of my new application SocketDroid, an application that allows you to control android devices from a web panel. click a button and alert the Android device to send geolocation information back to the server and push it to the browser. The application will store the geolocation information in a database for later analysis if you so choose (in a later post I will expand upon the admin panel). The Laravel app will communicate with the Node app via Redis using the built-in Event system. From there the Node app will communicate with our devices via Socket.io. The Android device will listen on a websocket connection in a background service and listen for an event to start grabbing and posting GPS data, and another event to stop listening. Make sense so far? Good, let’s get started!
 

Scaffolding The Laravel Application

If you have followed any of my Laravel tutorials in the past, you know the drill, create a new application, and scaffold the authentication routes and views:


laravel new real-time-gps
cd real-time-gps
php artisan make:auth

Now we have a basic Laravel application with registration and login logic established. Let’s talk about database design for a moment shall we? This application is going to have 3 really important tables they are:

  • Users (Already made for us be default)
  • Devices
  • Locations
  • ActivationCodes

A user can have many devices, a device can have many locations and belongs to one user, and a location belong to one device, that is the basic relationship structure. Activation codes are for you guessed it activating devices to use the app. Go ahead and create the relations and models for devices and locations using the following commands:


php artisan make:model -m Device
php artisan make:model -m Location
php artisan make:model -m ActivationCode

Device Model

Open up the devices migration file and add the following content to the up() function:


Schema::create('devices', function (Blueprint $table) {
$table->increments('id');
$table->string('uuid');
$table->integer('user_id')->unsigned();
$table->foreign('user_id')->references('id')->on('users')->onDelete('cascade');
$table->timestamps();
});

The only things we need to know about devices are who they belong to and what channel they are listening on. We also want to make sure that when a user account is deleted from the database, that all of their devices are also removed from the database.  Now open up the Device model (app/Device.php), there are three things we need to do with this model, the first is tell it which parameters to accept when inserting into the database. The second thing is to tell the model about its relation to the User model, while the third is to tell the model about it’s relation to the Location model. The finished version should look like this:


<?php
namespace App;
use Illuminate\Database\Eloquent\Model;
class Device extends Model
{
//
protected $guarded = [];
public function user(){
return $this->belongsTo('App\User');
}
public function locations(){
return $this->hasMany('App\Location');
}
}

The Device model and migration is now complete, now on to the Location model and migration.

Location Model

Open up the location migration file and in its up() function we are going to add the following:


Schema::create('locations', function (Blueprint $table) {
$table->increments('id');
$table->string('lat');
$table->string('long');
$table->integer('device_id')->unsigned();
$table->foreign('device_id')->references('id')->on('devices')->onDelete('cascade');
$table->timestamps();
});

Hopefully by now you understand what is going on, we are saving the lat/long acquired from the device, as well as its id. Using this information we can associate geolocations with independent devices. Next we will open up the Location(app/Location.php) model, tell it which properties to fill, and it’s relation to the Device model.


<?php
namespace App;
use Illuminate\Database\Eloquent\Model;
class Location extends Model
{
//
public $guarded = [];
public function device(){
return $this->belongsTo('App\Device');
}
}

User Model

The only thing we need to do the user model is make it aware of it’s new device relation open up the User(app/User.php) model and add the following function:


public function devices(){
return $this->hasMany('App\Device');
}

ActivationCode Model

The activation code model is responsible for storing the activation code given from the Android device on app installation to register the device with your account. It will take in the UUID of the device and the activation code, open up the migration file and add the following:


public function up()
{
Schema::create('activation_codes', function (Blueprint $table) {
$table->increments('id');
$table->string('uuid');
$table->string('code');
$table->timestamps();
});
}

Now open up the ActivationCode(app/ActivationCode.php) model and add the following:


<?php
namespace App;
use Illuminate\Database\Eloquent\Model;
class AuthCode extends Model
{
//
public $guarded = [];
}

That’s all that’s needed you can now run your migrations!


php artisan migrate

In the next lesson we will be creating the views and front end logic needed to visualize the devices on a Google map!