Posted on 18 Comments

Why I Gave Up Six Figures Just To Pay My Rent

This Time Two Years Ago

I was living in Hayward, California and working in San Francisco. I was a senior fullstack engineer contracted through my own company working for Sephora. I also had another remote contract in Cincinnati doing the same thing plus I had a couple engineers contracted out on some side projects. In short I was balling hard. I was also not seeing my family I was working 100+ hours consistently and when I finally did have downtime I just wanted to rest. I felt perplexed because I was living my dream at the time I always wanted to go live out in California especially near Oakland. I always wanted to own my own company and I did so what was missing?
I had a couple apps at the time that were bringing in petty change, also around that time I started listening by chance to alot of YouTube videos and podcasts on building residual income. My wife was pregnant with our second child at the time and we had decided to move back to Kentucky to have our daughter and then move back out to Cali. During the back and forth transitions both of my contracts came to an end so we moved back permanently to Kentucky. At this point we had a nice savings we could live off of while I look for contracts in Kentucky SPOILER ALERT Kentucky’s IT sector is garbage there is very little here and what is here is outdated .NET
Even though it was kind of aggravating that I was having such hard time finding work back home I had comfort knowing I could always move back to California and resume what I was doing. Still I wanted to build my empire here. What I noticed is that where there is a lack of on site contracts there is an influx of companies who need custom web and mobile apps I capitalized on this low hanging fruit.

My First Breakthrough

While on my contract hunt I came across an anesthesia company based out of Indiana that needed a custom solution built to handle their collections accounts. Basically they were getting excel sheets every month with dozens to hundreds of accounts that needed to be collected on and were manually processing checks. I wrote them an in-house web app that is connected to Stripe that allows them to take credit/debit/bitcoin/HSA/FSA payments and put their clients on payment schedules to pay off their debt. It also can import their excel files and auto file their collections and sort them. Not only did I get paid for creating the app, I also receive 1% of all money processed via the app. This residual income alone pays for most of my bills including rent. There is something incredibly addicting to getting paid daily for work you did once, I wanted to concentrate my efforts on building my residual income so I stopped consulting full time. This was hands down the hardest and the scariest leap of faith I had to make but it was necessary. Doing this allowed me to focus my efforts recruiting more opportunities to do what I did for the anesthesia company.

Expanding To Other Areas

I know an exponential amount of people need websites rather than web apps for their individual and business pages. I already have servers that I run my app back-ends off of so I decided to rent out some virtual real estate. I started reaching out to companies and individuals asking offering to them a complete web package.

  • Web site
  • Unlimited Email
  • Free SSL
  • Hosting

All for $250 plus $2.99/mo for hosting fees. I spun up an email server and some web servers and I was ready to go. Since I have the software engineer/devops background that I do I am able to run all operations myself by automating 90% of the process with the other 10% to be finished soon. I schedule a date with the clients and create the website with them on the phone usually takes ~2 hours. After that essentially I’m receiving $3/mo for free. That might not sound like alot but check the math if I do 2 web sites a week:

  • 2 websites/week * 52 weeks = 104 sites/year
  • 104 ($ 250 + $ 2.99 / month) = $ 26,000 + $ 310.96 / mo
  • After 5 years I would have made $130,000 ($250 to make site) and my residual income would be $1554.80/month

The $130,000 is nice and all but I am more interested in $1554.80/month that I get just to host the website! The awesome part is I offer various plans besides the shared $2.99/mo.

What Are The Benefits?

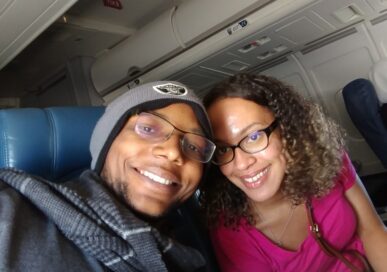
Some of you reading this might be asking was it worth leaving guaranteed six figures to only make a fraction? To that I say absolutely yes! I value my time infinitely more than my money. I get to take my son to the bus stop in the morning and pick him up in the afternoon all the while being at home with my wife and daughter. That in of itself makes it worth it I don’t miss ANY important event in regards to my children plus they get to see their father working which I think is important in ingraining work ethic in them.
 

On our way to Amsterdam

I get to travel more now than when I was consulting, I mean it’s not like I have to ask for a day off from my boss. If I want to go to California for the weekend it’s a straight flight from Cincinnati for the low just book a flight and go! This was extremely useful when my startup got selected to go to the TNW 2017 conference in Amsterdam like 10 days before the opening day! If I decide to take a small contract and need to go onsite for the first few days then I can do so with little adjustment to my schedule. This lifestyle actually enables me to make comparable income to what I was making working 40+ hours a week at the corporate plantation.
Lastly the awesome benefit that is focusing on building residual income allows me to spend more time on personal development. For example I have had more time to play violin and I am teaching my son how to code using Coji. I am perfecting my Japanese, mastering my meditation, and learning to love the things I didn’t know I had an affinity for.


What’s Next?

I plan on continuing doing what I am currently doing however I will start taking 1-2 major contracts a year (as I write this I am currently in the running for a contract at Facebook cross your fingers for the dude).  I am finishing my SAAS app that will fully automate my web creation/hosting process so I can focus on marketing my services en mass. I implore everyone to find ways to bring in residual or passive income, think outside the box. I have a friend whose brother is making ~$1000/mo from bubble gum machines, he has about 5 spread out around town and they each bring roughly $200 each per month; There are low hanging fruit opportunities everywhere you just have to look. Not everyone is interested in living 100% off residual  income and that’s fine and dandy but everyone should have multiple streams of income in their household, there is both enough supply and demand. Please like and share this article for all those who may find value.

Posted on 1 Comment

Setting Your Twitter Account To Auto Like Posts Of Interest

Auto Likes

Are a great way to interact with accounts who might be potential followers and is a great way for your to explore your potential audience. I will show you how to take the existing twitter microservice we have and extend it to stream a filter of tweets that track keywords, then like that tweet. If you have no idea what I am talking about then perhaps you should start here when we began this project.
 

Extending twitter.js

Open up the node script we created in the last tutorial, twitter.js and inside we are going to add the code needed to track tweets that meet a certain filter requirement. However it is important that we stream it so we get fresh content coming in.

var filter = T.stream('statuses/filter',{track: ['#30days30sites','#100DaysOfCode','#301DaysOfCode','#Webapp','#laravel','#vuejs']});
filter.on('tweet',function(tweet){
 T.post('favorites/create', { id: tweet.id_str },function(data){
 console.log(data);
 });
});

In the example above I am tracking all tweets in real-time that contain #30days30sites, #100DaysOfCode, #301DaysOfCode, #Webapp, #laravel and #vuejs. Then whenever the ‘tweet’ event fires I create a favorite (same thing as a like) and grabs the tweet id. Of course in your example you are going to want to change what you track. These 6 lines of code do wonders for me, there is something special about random people liking your tweets, also many people come and visit my profile after seeing I liked something on theirs. SInce launching this app I have definitely noticed an uptick in the amount of accounts that follow me.
In the future I plan on extending this to incorporate AI algorithms to parse what exactly was said and retweet or respond depending on the context or the tweet. Perhaps when I have the time I will do a livestream of the event. If there is anything you would like to see me do leave it in a comment below.

Posted on 2 Comments

Automating Your DMs With Nodejs

In The Last Tutorial

We created a Laravel/Vue app that allows us to automate and schedule our Twitter posts. Now we are going to add a Node.js microservice that will send an auto DM to those who follow you on Twitter. This adds a personal touch when you gain new followers and makes people more apt to pay attention to your tweets. If you don’t have the app from the last tutorial, you can download it here. Otherwise open up your terminal to the project root and let’s get started.
 

Node Script

This node script will use the twit npm module to create a Twitter stream listening to our own account. When the follow event is fired we will grab the source id of the user that sent us a follow request, after which we will send a DM to that user id with a welcome message. Let’s start by adding the twit dependency and the dotenv dependency.

npm install twit dotenv --save

Now create a new file called twitter.js and fill with the following:

require('dotenv').config()
var Twit = require('twit')
var T = new Twit({
 consumer_key: process.env.TWITTER_CONSUMER_KEY,
 consumer_secret: process.env.TWITTER_CONSUMER_SECRET,
 access_token: process.env.TWITTER_ACCESS_TOKEN,
 access_token_secret: process.env.TWITTER_ACCESS_TOKEN_SECRET,
 timeout_ms: 60*1000, // optional HTTP request timeout to apply to all requests.
})var stream = T.stream('user');
stream.on('connected', function(response){
 console.log('Connected!')
});
stream.on('follow',function(data){
 console.log(data.source.id);
 T.post('direct_messages/events/new',{
 "event": {
 "type": "message_create",
 "message_create": {
 "target": {
 "recipient_id": data.source.id
 },
 "message_data": {
 "text": "Thanks for the follow! Be sure to check out my blog https://jyroneparker.com",
 }
 }
 }
})});

The dotenv dependency allows us to use the same .env file to grab our Twitter app credentials that we used in our Laravel app. As you can see the stream fires on different events we just choose the follow and the connected events. Lastly we need to run the script make sure you have supervisor or some other program running it as a daemon.

node twitter.js

If you want to extend the functionality read up on the Twitter stream documentation here. Otherwise add some auto like functionality to your bot.

Posted on 7 Comments

How To Automate Your Twitter Posts With Laravel and Vue

Twitter Marketing Is Huge

Well for my platform it is anyway, whenever I create a new app or website Twitter is the first social network that I turn to. It’s fast, the analytics are on point, and it’s easy to use, my only issue is that I am busy coding and whatnot to Tweet as much as I would like or need to in order to optimize my reach. This leaves me with two options:

  1. Pay someone to manage my account for me
  2. Learn the Twitter API and write my own automation program to manage it myself

The idea of paying another person to manage my social media just made my stomach and my wallet hurt so the OBVIOUS choice is to use the API. Now let me tell you thisn  API is DENSE there is a lot you can do with it (click here for the docs) so I will only focus on one aspect in this tutorial, sending posts. The first basic application that I wrote was a simple post scheduler, it allows me to create as many posts as I want, set a date-time to post at, then a Laravel job executes at the desired time, then deletes the entry from the database. This basic application has saved me tremendous time because now I can just schedule all my important tweets weeks or months early!
 

Registering Your Twitter App

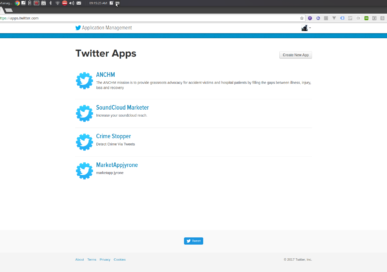
Before you can do any actual coding you need to register your app on Twitter, head over to the developer portal and create your app. The home page will show a list of your Twitter apps, if this is your first time then you won’t have any apps, click on create new app.
Fill out all the mandatory fields then proceed you should see a screen that shows you your Consume Key and Consumer Secret. Copy those down and also create some access tokens. These access tokens are for writing Twitter apps that only interact with your OWN account. Copy down the access token and the access token secret and that’s all you have to do. Now let’s code!
 

App Components


The main page will be a Vue.js app that allows you to add new tweets, and an area below to edit and delete them. In a traditional SPA manner the app will interact with an API for all it’s calls. The backend will consist of one model (Tweet), one controller (TweetController), and one Job ProcessTweet, pretty simple stuff let’s begin.  Start by creating your Laravel application.

laravel new tweeter && cd tweeter && php artisan make:auth

This app only has one composer dependency add it

composer require thujohn/twitter

In the config/app.php make sure to add the following provider and alias

'providers' => [
    Thujohn\Twitter\TwitterServiceProvider::class,
]
'aliases' => [
    'Twitter' => Thujohn\Twitter\Facades\Twitter::class,
]

Lastly run the following command to import the twitter config/ttwitter.php file and modify inserting your Twitter app credentials

php artisan vendor:publish --provider="Thujohn\Twitter\TwitterServiceProvider"

Tweet Model

Now create the Tweet model along with it’s migration

php artisan make:model -m Tweet

The Tweet model only has two attributes a string that holds the content that is limited to 140 characters and a timestamp for when you want the tweet to be published.

<?php
use Illuminate\Support\Facades\Schema;
use Illuminate\Database\Schema\Blueprint;
use Illuminate\Database\Migrations\Migration;
class CreateTweetsTable extends Migration
{
 /**
 * Run the migrations.
 *
 * @return void
 */
 public function up()
 {
 Schema::create('tweets', function (Blueprint $table) {
 $table->increments('id');
 $table->string('content',140);
 $table->timestamp('publish_timestamp');
 $table->timestamps();
 });
 }/**
 * Reverse the migrations.
 *
 * @return void
 */
 public function down()
 {
 Schema::dropIfExists('tweets');
 }
}

The Tweet model is pretty bare bones

<?php
namespace App;
use Illuminate\Database\Eloquent\Model;
class Tweet extends Model
{
 //
 public $fillable = [
 'content',
 'publish_timestamp'
 ];
}

Go ahead and run your migrations we are done with models, now to make our RESTful controller.

RESTful Controller and Routes

Create a resource controller for our Tweet model

php artisan make:controller --resource TweetController

The controller is basic I purposely left out validation and such as a homework exercise for you, but the gist is basic CRUD operations that return JSON

<?php
namespace App\Http\Controllers;
use Illuminate\Http\Request;
use App\Tweet;
use App\Jobs\ProcessTweet;
class TweetController extends Controller
{
 /**
 * Display a listing of the resource.
 *
 * @return \Illuminate\Http\Response
 */
 public function index()
 {
 //
 return response()->json(Tweet::all());
 }
/**
 * Show the form for creating a new resource.
 *
 * @return \Illuminate\Http\Response
 */
 public function create()
 {
 //
 }
/**
 * Store a newly created resource in storage.
 *
 * @param \Illuminate\Http\Request $request
 * @return \Illuminate\Http\Response
 */
 public function store(Request $request)
 {
 //create the tweet
 $tweet = Tweet::Create([
 'content' => $request->content,
 'publish_timestamp' => \Carbon\Carbon::parse($request->publish_timestamp)
 ]);
 //Add tweet to the queue
 ProcessTweet::dispatch($tweet)->delay(\Carbon\Carbon::parse($request->publish_timestamp,'America/New_York')->diffInSeconds(\Carbon\Carbon::now('America/New_York')));
//return json
 return response()->json($tweet);
 }/**
 * Display the specified resource.
 *
 * @param int $id
 * @return \Illuminate\Http\Response
 */
 public function show($id)
 {
 //
 return response()->json(Tweet::findOrFail($id));
 }/**
 * Show the form for editing the specified resource.
 *
 * @param int $id
 * @return \Illuminate\Http\Response
 */
 public function edit($id)
 {
 //
 }/**
 * Update the specified resource in storage.
 *
 * @param \Illuminate\Http\Request $request
 * @param int $id
 * @return \Illuminate\Http\Response
 */
 public function update(Request $request, $id)
 {
 //
 $tweet = Tweet::findOrFail($id);
 $tweet->fill([
 'content' => $request->content,
 'publish_timestamp' => \Carbon\Carbon::parse($request->publish_timestamp)
 ]);
 //return json
 return response()->json($tweet);
 }
/**
 * Remove the specified resource from storage.
 *
 * @param int $id
 * @return \Illuminate\Http\Response
 */
 public function destroy($id)
 {
 //
 Tweet::destroy($id);
 }
}

Notice the ProcessTweet job? We will implement that next but for now open up the routes/api.php file and add the following resource route

<?php
use Illuminate\Http\Request;
/*
|--------------------------------------------------------------------------
| API Routes
|--------------------------------------------------------------------------
|
| Here is where you can register API routes for your application. These
| routes are loaded by the RouteServiceProvider within a group which
| is assigned the "api" middleware group. Enjoy building your API!
|
*/
Route::middleware('auth:api')->get('/user', function (Request $request) {
 return $request->user();
});
Route::resource('/tweet','TweetController');

Now our Vue application (patience it’s coming) can interact with our backend. Now let’s add our ProcessTweet job and we will be finished on the backend.

ProcessTweet Job

In order to schedule the tweets to post at any given time you must utilize Laravel Jobs this will allow you to schedule your events to fire at a certain point in time. If you aren’t familiar with jobs and queues please look at my previous post because I will not be covering setting up queues in this tutorial, otherwise create a new job

php artisan make:job ProcessTweet

In the handle method we simply call the Twitter API and send the tweet then delete it from the database

<?php
namespace App\Jobs;
use Illuminate\Bus\Queueable;
use Illuminate\Queue\SerializesModels;
use Illuminate\Queue\InteractsWithQueue;
use Illuminate\Contracts\Queue\ShouldQueue;
use Illuminate\Foundation\Bus\Dispatchable;
use Twitter;
class ProcessTweet implements ShouldQueue
{
 use Dispatchable, InteractsWithQueue, Queueable, SerializesModels;
 public $tweet;
 /** * Create a new job instance.
 *
 * @return void
 */
 public function __construct(\App\Tweet $tweet)
 {
 //
 $this->tweet = $tweet;
 }
/**
 * Execute the job.
 *
 * @return void
 */
 public function handle()
 {
 //post the tweet
 Twitter::postTweet(['status' => $this->tweet->content, 'format' => 'json']);
 //delete the tweet from database
 \App\Tweet::destroy($this->tweet->id);
 }
}

Your backend is now functioning run your queue worker and test around with it or continue to creating the Vue application.

Getting The Front End Together

We need to add vue-resource to call our api so let’s add that first

npm install --save vue-resource

Also update the resources/js/app.js file

/**
 * First we will load all of this project's JavaScript dependencies which
 * includes Vue and other libraries. It is a great starting point when
 * building robust, powerful web applications using Vue and Laravel.
 */
require('./bootstrap');
window.Vue = require('vue');
const resource = require('vue-resource');
Vue.use(resource);
/**
 * Next, we will create a fresh Vue application instance and attach it to
 * the page. Then, you may begin adding components to this application
 * or customize the JavaScript scaffolding to fit your unique needs.
 */
Vue.component('tweet-component', require('./components/TweetComponent.vue'));
const app = new Vue({
 el: '#app'
});

As you can see the example-component has been replaced with the tweet-component rename your ExampleComponent.vue to TweetComponent.vue and update it with the following contents

<template>
 <div class="container">
 <div class="row">
 <div class="col-md-8 col-md-offset-2">
 <div class="panel panel-default">
 <div class="panel-heading">Tweet Scheduler</div>
<div class="panel-body">
 <div class="form-group">
 <input class="form-control" placeholder="Content" v-model="newTweet.content">
 </div>
 <div class="form-group">
 <input class="form-control" type="datetime-local" placeholder="Description" v-model="newTweet.publish_timestamp">
 </div>
<div class="form-group">
 <button class="btn btn-success" v-on:click="addTweet(newTweet)">Add Tweet</button>
 </div>
 <ul v-if="ready" class="list-group">
 <li v-for="post in tweets" class="list-group-item clearfix">
 {{post.content}}
 <span class="pull-right button-group">
 <button class=" btn btn-default" v-on:click="openEditTweet(post)">Edit</button>
 <button class=" btn btn-danger" v-on:click="deleteTweet(post)">Delete</button>
 </span>
 </li>
 </ul>
</div>
 </div>
 </div>
 </div>
 <!-- Modal -->
<div id="editModal" class="modal fade" role="dialog">
 <div class="modal-dialog">
<!-- Modal content-->
 <div class="modal-content">
 <div class="modal-header">
 <button type="button" class="close" data-dismiss="modal">&times;</button>
 <h4 class="modal-title">{{selectedTweet.content}}</h4>
 </div>
 <div class="modal-body">
 <div class="form-group">
 <input class="form-control" placeholder="Content" v-model="selectedTweet.content">
 </div>
 <div class="form-group">
 <input class="form-control" type="datetime-local" placeholder="Publish At" v-model="selectedTweet.publish_timestamp">
 </div>
 <div class="form-group">
 <button class="btn btn-info" v-on:click="editTweet(selectedTweet)">Edit Tweet</button>
 </div>
 </div>
 <div class="modal-footer">
 <button type="button" class="btn btn-default" data-dismiss="modal">Close</button>
 </div>
 </div>
</div>
 </div>
 </div>
</template>
<script>
export default {
 mounted() {
 console.log('Component mounted.')
 },
 data(){
 return {
 tweets: {},
 newTweet:{
 'content': '',
 'publish_timestamp': ''
 },
 selectedTweet:{
 'content': '',
 'publish_timestamp': ''
 },
 ready: false
 }
 },
 created(){
 this.$http.get('/api/tweet').then(function(data){
 this.tweets = data.data;
 this.ready = true;
 });
 },
 methods: {
 addTweet: function(tweet){
 this.$http.post('/api/tweet',tweet).then(function(data){
 this.tweets.unshift({content:tweet.content,publish_timestamp:tweet.publish_timestamp});
 });
 },
 editTweet: function(tweet){
 this.$http.put('/api/tweet/'+tweet.id,this.selectedTweet).then(function(data){
 let index = this.tweets.indexOf(tweet);
 this.tweets[index] = tweet;
 alert('Updated!');
 $("#editModal").modal('hide');
 });
 },
 openEditTweet: function(tweet){
 console.log(tweet);
 this.selectedTweet = tweet;
 $("#editModal").modal({show: true});
},
 deleteTweet: function(tweet){
 this.$http.delete('/api/tweet/'+tweet.id).then(function(data){
 let index = this.tweets.indexOf(tweet)
 this.tweets.splice(index, 1);
 });
}
}
}
</script>

Open up your resources/assets/sass/app.scss file and add the following fade transition

.fade-enter-active, .fade-leave-active {
 transition: opacity .5s
}
.fade-enter, .fade-leave-to /* .fade-leave-active below version 2.1.8 */ {
 opacity: 0
}

Run your npm build script as well as your queue worker and start tweeting! You can get the full source code here, and as always please subscribe to my blog via email or push notifications, share, and leave your comment below! If you would like to add a real-time nodejs microservice to your app then read here!

Posted on 1 Comment

Why The US Economy Is In Trouble If We Don’t Start Teaching More Computer Science

While Most Americans Are Worried About North Korea

I am worrying about the future prospects of the American economy. It’s no secret that today we are more interconnected than ever, and while it has brought about wonderful leaps and bounds in terms of convenience and ease of life there is one thing we overlooked……we are not teaching the skills needed in our school system. Computer science is not just the way of America’s economy it is the way of the GLOBAL economy, and looking at projections we are in a very very bad place.
 

We Are Failing Our Children


Only 10% of American high schools teach computer science, even though the tech sector is projected to grow faster than every other sector but five by the year 2020. The US is in such a desperate SHORTAGE of tech workers that they are planning on building an 1,800 person floating city out in international waters of the coast of San Francisco to bring in more H1-B foreign visa holders. Now I want you guys to think about this for a moment. The average tech worker makes $78,730, according to the Bureau of Labor Statistics (last year as a senior software engineer I made more than double that at the age of 24). Now let’s say these guys are making $78,730 (trust me those 1,800 engineers will be mostly if not all senior level so they will be making much more but for sake of simplicity we use this figure). That is $141,714,000/year that could have gone to home grown American workers.

There Is A Specialty Shortage In America Not A Job Shortage

I taught myself programming at the age of 8, it’s not because I’m a genius that I picked it up so early, it was because programming makes sense in a kid’s mind. It’s basically playing with theoretical Legos(programming language) and building Lego castles(programs). Furthermore I taught myself for free, and that is the key part I want to address. It is obvious our education system does not care to increase the amount of computer science education in public schools. IN FACT it has declined in the last 20 years from 25% student participation to 19% participation. Listen, MIT has it’s whole CS course online for free on Youtube for God’s sake sit your child down, sit next to them and both of you learn how to code, it only requires your time. I don’t have a degree and I was the youngest senior engineer on Apple’s mobile apps team at the age of 21. Don’t believe the hype that you need a 4 year degree. The economy needs you now! Don’t wait for the school system to teach you, knowledge is power, empower yourself!

What Is Going To Happen If We Don’t Change?

If we don’t start teaching computer science on a mass scale we simply will not be able to compete in the global economy in the long run. Automation is already replacing more jobs than anyone can count, the majority of the populace cannot make an immediate transition into another sector don’t believe me? Go ask a coal miner from Eastern Kentucky how their job transition has been. We need to teach not only technology skills but encourage entrepreneurship so that we can continue to have economic growth. If we don’t our economy is in trouble. Subscribe to my blog for free coding tutorials and if you haven’t already start your web development journey here.

Posted on Leave a comment

Black Business Pal Has Yelp In Their Sites

Black Business Directory’s Launch Primed To Rival Yelp.com

Black Owned Businesses Will Now Get Needed Exposure With The Help Of An Online Business Directory

Logo for BBP

Louisville, KY, September 20, 2017, Black Business Pal announced their plans to launch an online business directory that will help give major exposure to an exhaustive list of minority owned businesses across the country.
In a time when black owned businesses are thriving most don’t have a big marketing budget to reach their audiences. This website will create easier access for those businesses and their potential customers. The directory will offer a plethora of businesses that reach across various industries.
Black Business Pal’s purpose is to set the standard and raise the bar for online directories, which will ultimately drive the black economy forward. Black Business Pal wants to rival the major international directories like Yelp and Angie’s List, because they are targeting a niche market often overlooked by both sites. Black Business Pal’s goal is to highlight everything from mom and pop shops to corporations, though there are hundreds of other online directories geared to black owned businesses, Black Business Pal will focus on the aesthetics and functionality of their site in hopes of setting them apart.
The website which was in the testing phase for several months can be found at www.blackbusinesspal.com. The official launch of the site will be held during the All Black National Conference on October 1st, 2017 on the historic campus of Simmons College.
With the initial launch, Founder and CEO Richard Rowland, Jr. said, “We have to get it out of our heads that being successful is rocket science. We all have dreams. In order to make those dreams come to reality, it takes an awful lot of determination, dedication, self-discipline and effort.”
To learn more about Black Business Pal or have your business listed contact Richard Rowland at info@blackbusinesspal.com
###
About Black Business Pal, LLC.
Black Business Pal, LLC exists to transform black empowerment from an awesome idea to goals that are achievable one business at a time.
Our motto is: Bringing black empowerment to life.

Posted on 1 Comment

Check Out My New Web Application Anon Video Chat

Anon Video Chat

Anon Video Chat is my latest web application, the premise is simple, anonymous video chat using webRTC for secure low latency browser to browser connections. This app assigns you a random channel ID everytime you load the page (you have the option on saving the current ID to your device to use permanently) you can call other channel IDs and if they answer a webRTC connection is set up between your two browsers and the live feeds start. In the future I plan on adding features like file and location sharing and possibly Bitcoin sending/receiving. No data is ever stored on my server making all actions anonymous. I decided to write this for a few reasons

  • I wanted to sharpen my Vue.js skills
  • I wanted to better understand webRTC
  • I need to implement P2P chat in other applications
  • I didn’t want to pay Twilio to do something I could do myself

Why Did I Choose To Release It?

The reason I chose to release Anon Video Chat to the public is because I believe in the philosophy of an open and free internet. Other video applications like Skype collect tons of metadata on you and in turn sell that data on you for a profit. In cases like these you are not the consumer but the product. Not only is this creepy but it affects the performance of the application by providing overhead with no benefit to the end user resulting in laggy performance.

anon video chat screenshot
Screenshot of me and my friend in France using Anon Video Chat

Current Limitations Of Anon Video Chat

Until iOS11 is released later in the fall, Anon Video Chat will not work on iOS devices (blame them not me they decided not to implement webRTC until now!). Other than that it should work on Chrome, Firefox and Opera. If you notice that it doesn’t please email me and let me know jyrone.parker@gmail.com.
Needless to say I wrote this app in a few hours, you can tell by it’s current lack of features but as I stated above I will update it periodically. If the demand calls for it I will add whatever features you guys leave below in the comments. Also if you are interested in contributing to the project, drop your GitHub username in the comment section below and I will add you to the private repo!

Posted on Leave a comment

Why Is The Black Community Afraid Of Technology?

Blacks In IT

It’s no secret that blacks lack a strong presence in the information technology space, in today’s video I discuss why that is, and how the IT field can revolutionize the black economic landscape.  In this live stream I discuss with the audience the stigma in the black community that we don’t belong in the STEM field in general, and debunking that myth. Some of the pioneers in the IT/CS field have been black, for example the man who wrote the mathematics to make internet communication was black. One of the lead engineers who created the first gigahertz processor was black, and of course we have all seen Hidden Figures. The Computing Research Association did an excellent article on the state of blacks in tech . I explain how President Trump’s executive order calling for the modernization of the federal IT infrastructure and how that is a long handing opportunity for black people to get into the field and more.  Join me every Tuesday and Thursday for my #TechTallk live and participate in the discussions!
[youtube width=”100%” height=”100%” autoplay=”false”]https://www.youtube.com/watch?v=-Ic9A66DsmI[/youtube]

Posted on Leave a comment

Tech Talk #1 – Welcome To Tech Talk

[youtube width=”100%” height=”100%” autoplay=”false”]https://www.youtube.com/watch?v=6cVkXCEyAoI[/youtube]

Welcome To My First Tech Talk

Every Tuesday and Thursday I do #TechTalk a live stream show where I speak generally about technology. In the first episode I give a brief introduction into Tech Talk, my trip to Amsterdam, Euro tech scene vs. USA tech scene and more! Please like and subscribe to my channel to get real time notifications when I go live. If you have any questions that you would like to ask me, but you missed the live stream, follow me on Twitter @mastashake08 and tweet to me using the hashtag #TechTalkTuesday or #TechTalkThursday. I will get to them on the next show! Lastly subscribe to this blog to get updates whenever I post!

Posted on 51 Comments

Web Push Using Laravel 8 Notifications *Updated*

Web Push Is Awesome

No seriously! It’s a pivotal moment in web development. You see web push is a W3C protocol that allows websites to communicate with a user’s browser in the background, using this web developers can now do things such as: background push notifications, offline sync, and background analytics just to name few. The web push api follows the protocol and consist of 4 main stages:

  1. User Agent installs service worker
  2. App asks permission to show notifications
  3. Once permission is granted, subscribe to push
  4. Save subscription details on backend
  5. Send notification via Laravel notification

All the code can be seen on my Github and the live demo can be seen here!

Components Of Web Push

Implementing web push requires a true full-stack approach, on the back-end we have to:

  • Implement the WebPush notification channel
  • Set up VAPID keys (more details later)
  • Configure the user model to manage subscriptions
  • Fire the notifications

On the front end we must:

  • Create and install a service worker, the majority of our logic will be contained here and is responsible to handling push notifications
  • Give user prompt to accept permissions
  • Give user ability to send notification to self

I will break it down into back-end and front-end implementations as to not confuse you; let’s start with the back-end.
 

Creating The Backend

Create a blank Laravel application and run the following composer command to download the web push notification channel.

composer require laravel-notification-channels/webpush

The User Model

Next open up your user model and add the following.

<?php

namespace App\Models;

use Illuminate\Contracts\Auth\MustVerifyEmail;
use Illuminate\Database\Eloquent\Factories\HasFactory;
use Illuminate\Foundation\Auth\User as Authenticatable;
use Illuminate\Notifications\Notifiable;
use NotificationChannels\WebPush\HasPushSubscriptions;
use Laravel\Sanctum\HasApiTokens;

class User extends Authenticatable
{
use HasApiTokens, HasFactory, Notifiable, HasPushSubscriptions;

/**
* The attributes that are mass assignable.
*
* @var string[]
*/
protected $fillable = [
'name',
'email',
'password',
];

/**
* The attributes that should be hidden for serialization.
*
* @var array
*/
protected $hidden = [
'password',
'remember_token',
];

/**
* The attributes that should be cast.
*
* @var array
*/
protected $casts = [
'email_verified_at' => 'datetime',
];
}

This added HasPushSubscriptions trait allows the user model to receive push notifications. Without this trait the application won’t know what model to store the tokens on.


Next publish the migration with:

php artisan vendor:publish --provider="NotificationChannels\WebPush\WebPushServiceProvider" --tag="migrations"

Run the migrate command to create the necessary tables:

php artisan migrate

You can also publish the config file with the following command. We won’t be doing any customizations in part 1 but maybe down the line:

php artisan vendor:publish --provider="NotificationChannels\WebPush\WebPushServiceProvider" --tag="config"

Generate the VAPID keys with (required for browser authentication) with the following artisan command. This command will set VAPID_PUBLIC_KEY and VAPID_PRIVATE_KEYin your .env file. VAPID is a web push protocol that is needed if we want to send push notifications. Basically it voluntarily identifies itself to a push notification server. If you want to read the specification you can here:

php artisan webpush:vapid

The Notification Class

Next let’s create the notification being used. For now we will make a generic catch all notification. In later tutorials we may add some more custom notifications:

php artisan make:notification GenericNotification

Open up the file and replace with the following contents

<?php
namespace App\Notifications;
use Illuminate\Bus\Queueable;
use Illuminate\Notifications\Notification;
use Illuminate\Contracts\Queue\ShouldQueue;
use Illuminate\Notifications\Messages\MailMessage;
use NotificationChannels\WebPush\WebPushMessage;
use NotificationChannels\WebPush\WebPushChannel;
class GenericNotification extends Notification
{
    use Queueable;
    public $title, $body;
    /**
     * Create a new notification instance.
     *
     * @return void
     */
    public function __construct($title, $body)
    {
        //
        $this->title = $title;
        $this->body = $body;
    }
    /**
     * Get the notification's delivery channels.
     *
     * @param  mixed  $notifiable
     * @return array
     */
    public function via($notifiable)
    {
        return [WebPushChannel::class];
    }
    public function toWebPush($notifiable, $notification)
    {
      $time = \Carbon\Carbon::now();
        return WebPushMessage::create()
            // ->id($notification->id)
            ->title($this->title)
            ->icon(url('/push.png'))
            ->body($this->body);
            //->action('View account', 'view_account');
    }
}

Let’s break down this class. First off in the constructor() method we set the title and the body of the notification. This will be used to show the title and body of the push notification on the browser. The via() method we want to set the channel to the WebPushChannel. This should be self explanatory as we want to deliver via push notifications.

The API Routes

Next open up routes/api.php and fill out the API routes

<?php
use Illuminate\Http\Request;
use App\Models\User; /* |-------------------------------------------------------------------------- | API Routes |-------------------------------------------------------------------------- | | Here is where you can register API routes for your application. These | routes are loaded by the RouteServiceProvider within a group which | is assigned the "api" middleware group. Enjoy building your API! | */ Route::middleware('auth:api')->get('/user', function (Request $request) { return $request->user(); }); Route::post('/save-subscription/{id}',function($id, Request $request){ $user = \App\Model\User::findOrFail($id); $user->updatePushSubscription($request->input('endpoint'), $request->input('keys.p256dh'), $request->input('keys.auth')); $user->notify(new \App\Notifications\GenericNotification("Welcome To WebPush", "You will now get all of our push notifications")); return response()->json([ 'success' => true ]); }); Route::post('/send-notification/{id}', function($id, Request $request){ $user = \App\Model\User::findOrFail($id); $user->notify(new \App\Notifications\GenericNotification($request->title, $request->body)); return response()->json([ 'success' => true ]); });

As you can see, we only added two additional routes to the application, both of which are POST. The first route

/save-subscription/{id}

Is responsible for saving the web push subscription from the client. Once the client requests web push access a set of keys are generated, which must be sent to our server. Using the updatePushSubscription() method that comes with the trait added to the user model, we can set the webpush subscription for whatever url the user is requesting from. The updatePushSubscription method takes 3 parameters:

  • endpoint (required): This is the created on the front end when registering for push notifications
  • key (optional) : Needed to encrypt data, only encrypted messages can have a payload
  • token (optional): Needed to encrypt data, only encrypted messages can have a payload

That’s it for the back end! In the next tutorial we will make a Vue.js application and register for push notifications and test it out! If you enjoyed my content please like/subscribe/share! If you want another cool project learn how to stream your desktop to a recording or to YouTube!